I am still moving into my new home and for my first act, I broke a plate. . . Mind you, this previously rental home was completely furnished right down to silverware, dinnerware, towels, etc. I have moved into a '55 years old or older community.' It is common for them to come furnished. In fact, I know one person who rents these homes over the winter and gets $6,000 per month. Therefore, it needs to be nicely furnished for a person with that type of funds to rent.
Well, on the very next day, I saw this article in
Phoenix Home and Garden, May 2018. I know that you no doubt have a local magazine or the like that is full of wonderful - well, homes and gardens. Here is the vase that caught my attention:
By Carly Scholl | Photography by Rick Gayle
At first I thought that the photo was a white vase decorated with gold. After reading Carly Scholl's article, I realized that it was a broken vase that had a BEAUTIFUL repair that actually made the vase more terrific and especially interesting. You can read the instructions at the link above.
This project is called -
Kintsugi
or Kintsukuroi is the Japanese art of repairing broken pottery with
lacquer dusted or mixed with powdered gold, silver, or platinum, a
method similar to the maki-e technique. As a philosophy it treats
breakage and repair as part of the history of an object, rather than
something to disguise.
Kintsugi is also applied to your life. No matter that your life is not perfect, it is just part of your personal history. Check it out on any Search Engine. (BTW, to find SE's that DON"T TRACK YOU,
check here.)
So, what did that have to do with embroidery?? I have created the Freebie for this time to give you a method to decorate or repair something that you enjoy and/or want to embellish.
Before you download the file (4x4 in 3mm) I highly recommend
Badgemaster for your stabilizer. You already know I am a big fan of Badgemaster where using a single sheet to fit your hoop is the most sturdy, dependable stabilizer for this project. If you are going to use some other water-soluble stabilizer, please plan to use at least two sheets and possibly three sheets to have a successful outcome. See my blog on
Badgemaster use and the
Badgemaster blog by SewBlessed.
This photo shows that a lot of stitches have been set into a very small area.
You can see that Badgemaster has no holes, no failures despite the number of stitches.
Here are tips to keep in mind -
- Badgemaster will be your best bet for these delicate 'strings.'
- There are approximately 1,900 stitches per string for the 3/8" (3mm) by 4" (100mm) size.
- I have digitized this so you can use one thread for the 'underlay' and another for the top, such as when you are working with the metallic. It has two color stops.
- If your metallic is a little low, you can use a similar color for the underlay. Metallic tends to show its underwear - oops, make that underlay.
- Start with a sharp/new needle. There is no time like the present to change it.
- I have used metallic for the bobbin with perfect results. I did slow down the machine (advised when using metallic) and did not have any breaks. That metallic was terrific on both sides.
- These can be bent and likely can have somewhat sharp angles. I did not have the time to work with the strings. I do have one curved.
- Practice, different threads, machines and other issues can and do arise. However, I did 6 sets of the items before I was satisfied with the quality of the outcome.
- I will be using lighter colors in the future. They show so much more detail.
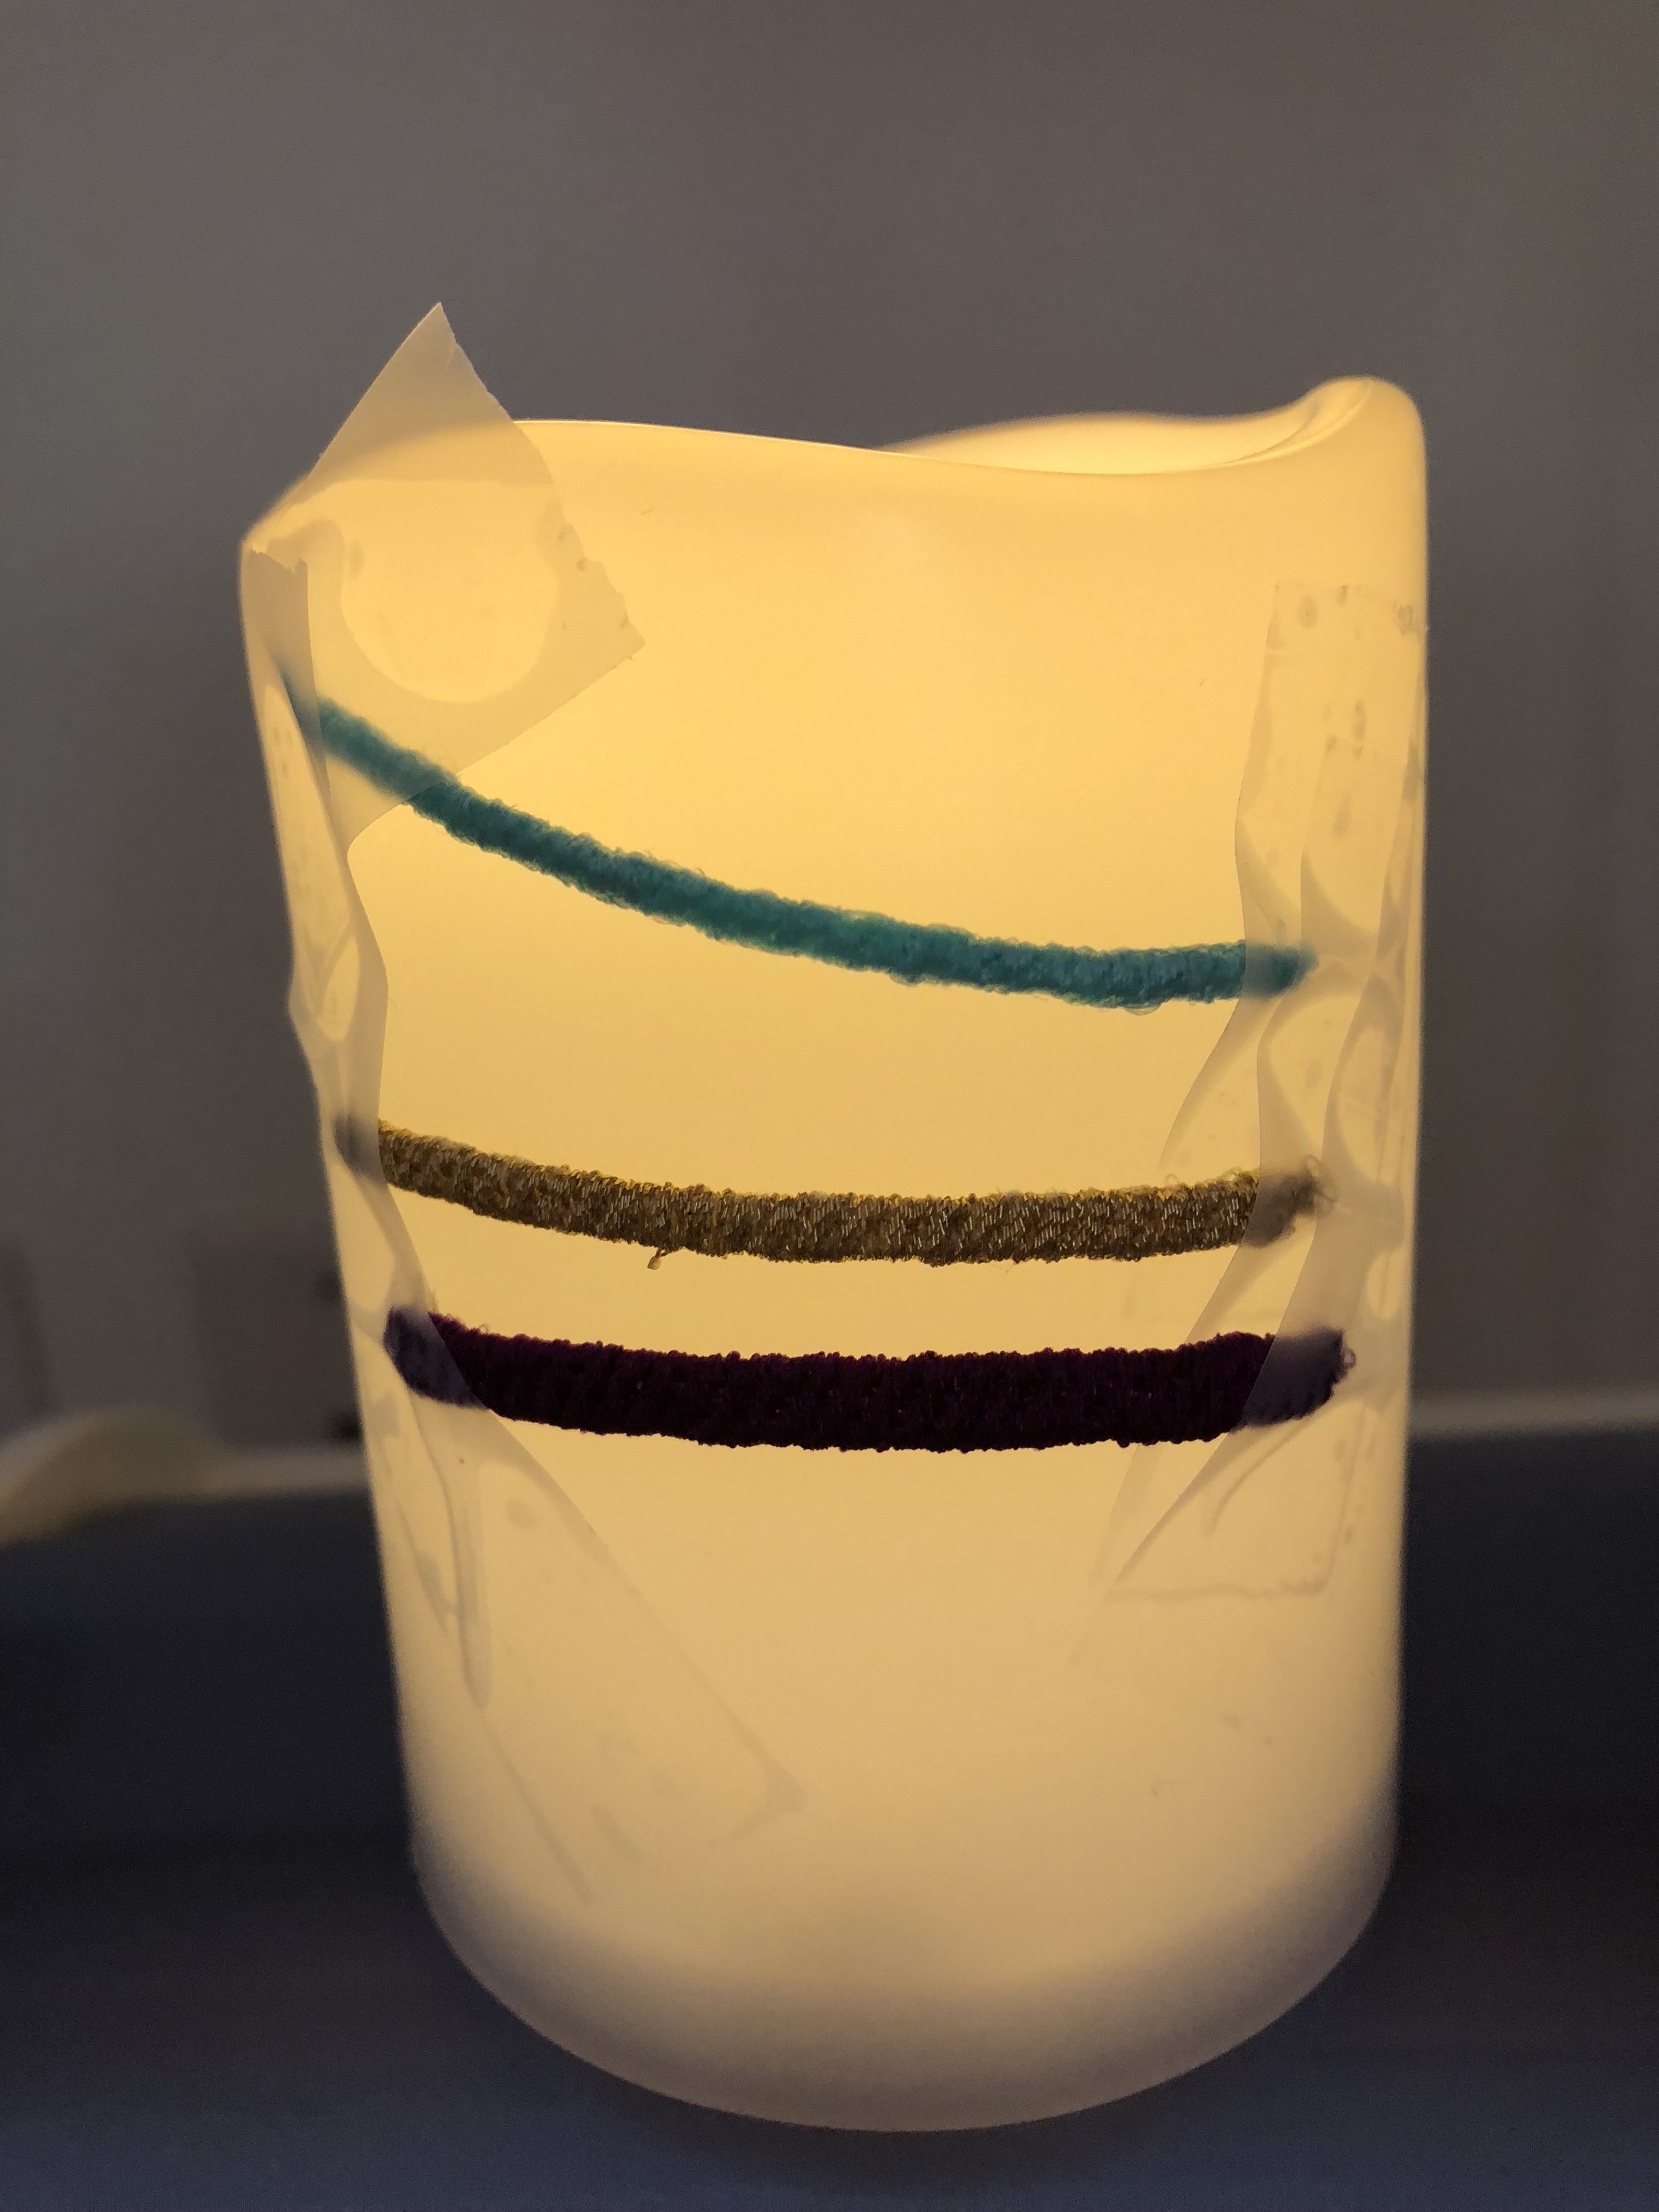
Did I mention that I was a little short of time?? The result is that you are seeing tape on this flame-less candle.
Here is the file for the 3mm size:
I did not have time to finish the 4mm and 6mm. Keep an eye on this site and I will have them for you 9/8/2018.
Thanks for your time, I know how busy we all are!!
Pat, The Avid Embroiderer