I love browsing garage sales to see what bargains I can
find. Recently, with my granddaughters’
bedroom makeovers in mind, I perused some local sales and came home with a few
things I knew I could transform into some adorable, and useful, accent pieces
for them.
First, I decided to alter an old (and very ugly) framed
corkboard into a darling embroidered board for pictures and notecards. In my excitement I forgot to take a before
picture, but imagine an old, green, peeling frame that held corkboard
pieces that were covered in stickers and tape. It
was in desperate need of a little TLC and creativity. It cost me 50 cents. And as a bonus the girls got to make some glittery clothespins one hot afternoon.
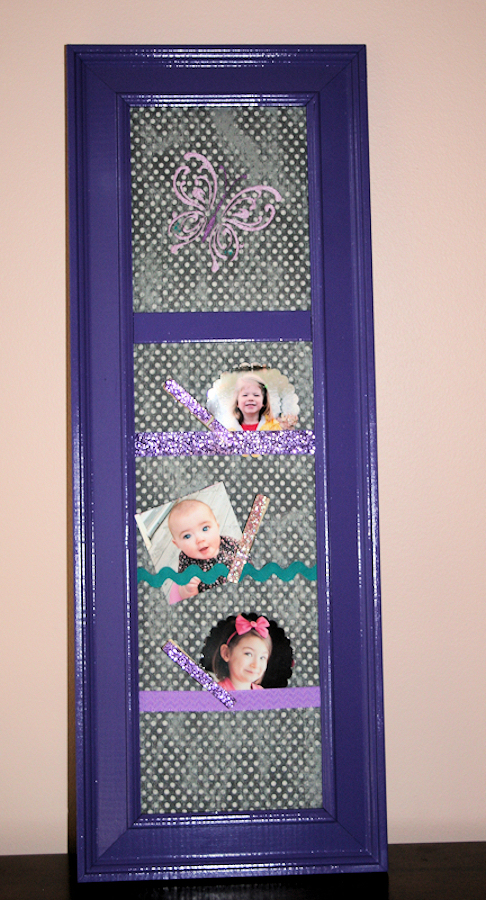
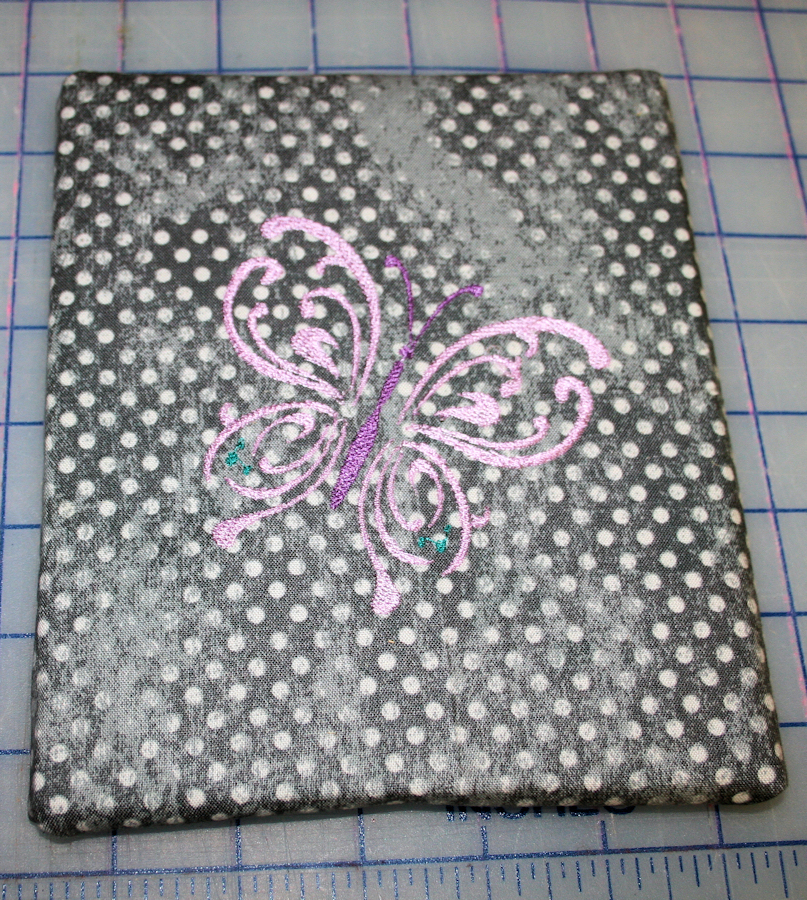
Here is the final décor piece:
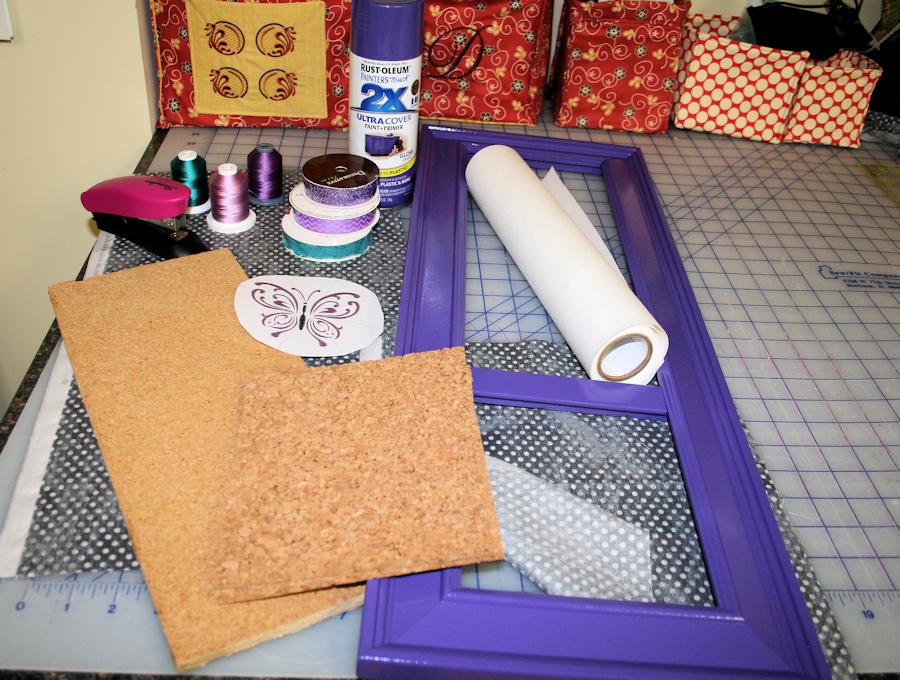
What you’ll need:
-an old frame
-corkboard cut to fit frame
-spray paint
-fabric cut to fit corkboard (I cut mine 5” longer and wider
than the corkboard)
-40 wt. embroidery thread
-embroidery design of choice (you can download the butterfly below.)
-tear away or cut away stabilizer
-stapler
-various ribbons cut to fit across corkboard plus at least two inches
-pins, paperclips, or clothespins (We painted ours with glue and added glitter)
Here is what you do:
1.
Spray paint the frame in your desired colors (I
did 3 coats).
2.
Find the center of your fabric using your
preferred method. I simply folded the
fabric in half lengthwise and pressed a small crease in the center. I then unfolded the fabric and folded in half
again, this time widthwise, and pressed another crease in the center. When the fabric is unfolded you will see that
your two creases intersect providing you with a visual of the center point of
your fabric.
3.
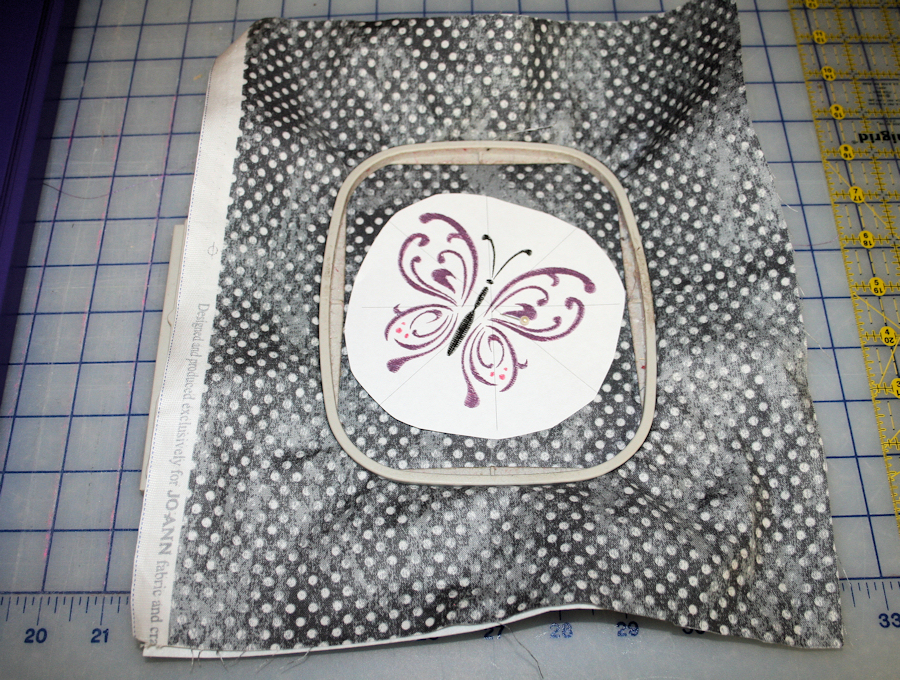
Choose your embroidery design, print a template
and pin this to the center of your fabric.
4.
Hoop the stabilizer and fabric making sure to
roll and pin the extra fabric as needed so that it stays out of the way while
embroidering.
5.
Load your chosen design into your machine. (you can download the butterfly below.)
6.
Slide the hoop into your machine, center the
needle and remove the embroidery design template. If using a lightweight design it is a good
idea to match your bobbin thread to your chosen embroidery thread colors rather
than using plain bobbin thread. Embroider
the design.
7.
Remove the hoop and cut away any excess
stabilizer.
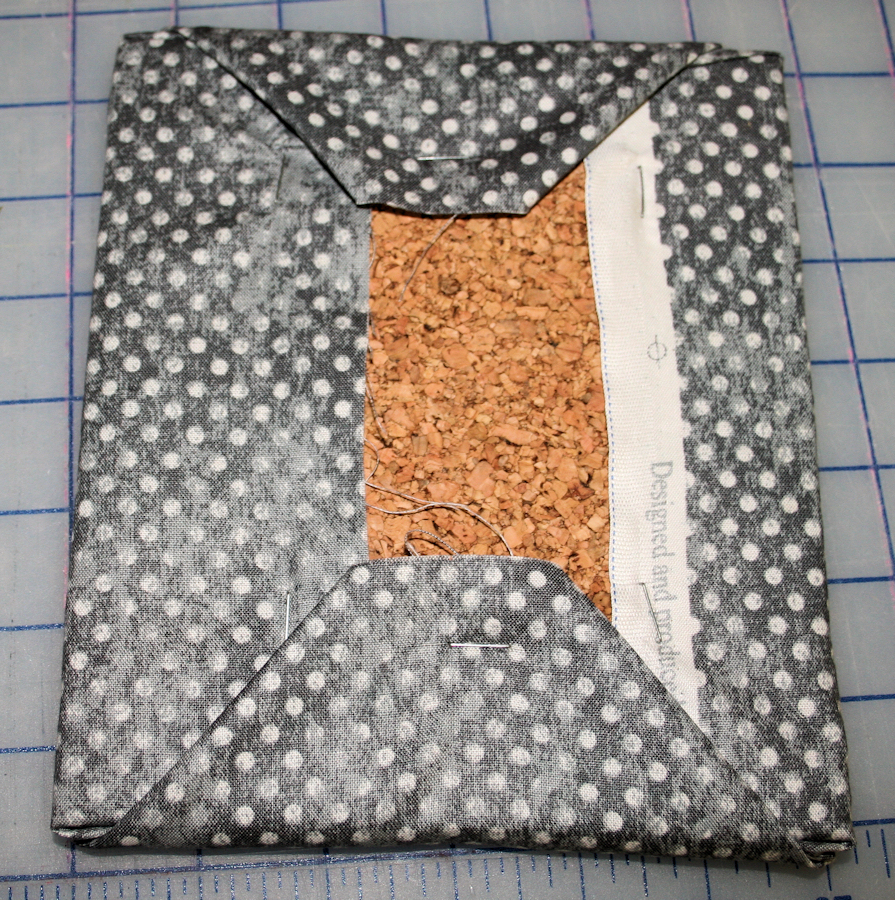
8.
Fit the embroidered fabric around the corkboard
and staple to the back.
9.If using a frame with two openings, as I did,
cover the second corkboard with fabric and staple as well.
10.
Lay your ribbon as desired (I put mine
horizontally) and staple to the back.
11.
Add pins or clips as desired to hold your photos
or cards.
A great accent piece for their new bedroom. We should be done painting today or tomorrow. Next time we hope to begin to show off a few Pottery Barn knock-offs that will be completed using the embroidery machine. In the meantime enjoy the butterfly design.
Take care,
DB
Butterfly Design.zip (138.2KB)