October 22, 2010
carol
Not rated yet
Individual characters (letters, numbers and punctuation marks) from my alphabets and
individual designs can be found on my Stock Design Page. My designs are also available in
packs, as described in this blog. Those can be found here. For designs and packs available
in multiple sizes, choose the size you want in the drop down menu box.
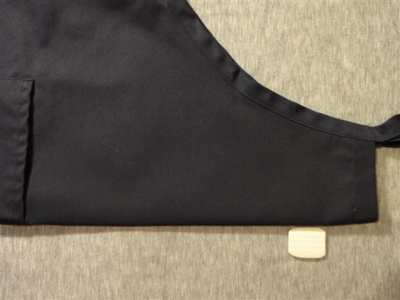
I was recently given some beautiful apron blanks to embroider for my family.
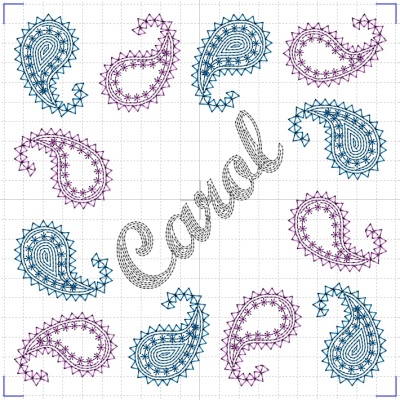
I chose my paisley designs for my apron, and decided to arrange my smaller size of
paisleys in my new 200 x 200 millimeter hoop. It looked very nice, but there
wasn't enough room for my name in the middle.
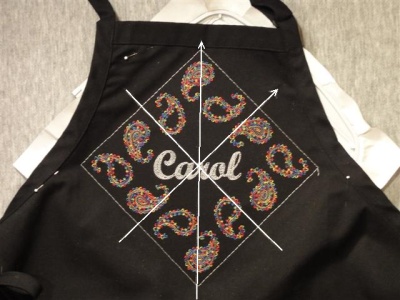
There was more room on the diagonal, so I rotated my name to fit the space.
I then positioned the design on the fabric so the name would be straight across.
(I didn't want to cause a crick in anyone's neck from viewing the design at an angle.)
In my software I can only rotate clockwise, so I set the rotation to 315 degrees for
45 degrees counter-clockwise.
I next drew a mock-up of a template on a piece of graph paper. A template for
this size of design would have required two pieces of paper for printing, so drawing
my own was actually quicker and less expensive. I marked the diagonals and also the
side of the design that faces up in the hoop.

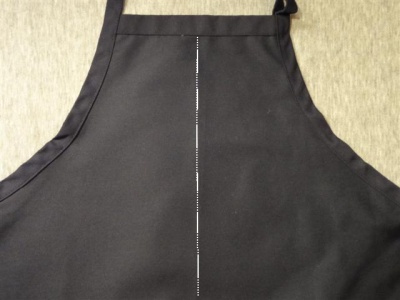
The next step was to prepare the apron. I washed and dried it, then folded it in
half, right sides out, to mark the vertical center of the apron. I marked on the fold
with a piece of chalk whose marks I knew I could steam out.
After unfolding the apron, I used a ruler to connect the small lines into a
continuous line.
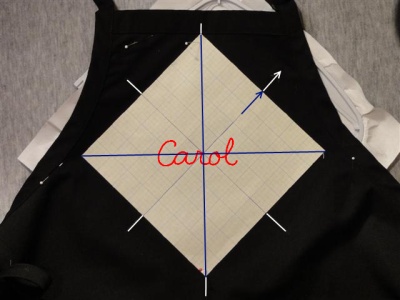
I placed the template on the fabric. I positioned the template's diagonal line
on the apron's vertical line, then slid the template up and down until I was satisfied
with the location. I marked the vertical and horizontal lines from the template. Note
that they are diagonal on the apron. I also marked an arrow showing the top of the
actual design. The arrow on the template is my guide.
The next picture shows the fabric positioned on hooped stabilizer. You can see
that the hoop is diagonal to the apron and that the design will be stitched with the name
positioned correctly. The arrow that points northeast ensures that I stitch the name right
side up. I connected the marks so I would have complete centering lines. (I did this
before pinning the fabric to the stabilizer but don't have a separate picture to show.)
I centered the design on the new (diagonal) centering lines and then used fix-baste
to hold the fabric in place. Finally, I embroidered the design.
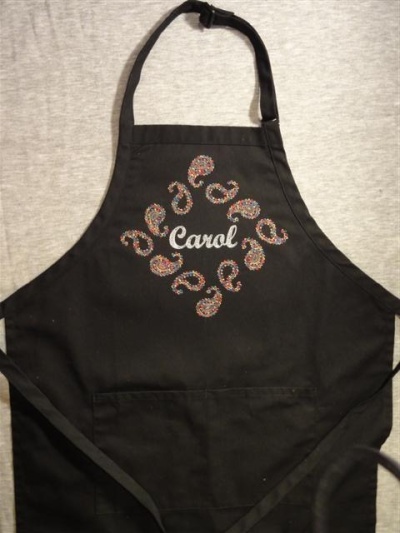
Here is the completed embroidery. I removed the fix basting and the excess stabilizer
from the wrong side, and then washed the apron again. It is all ready to get dirty now, if
I can bear to take that risk.
Contour Script for lettering
Paisley Square design
In another blog I will show you the aprons I embroidered for my sons. They are a little
bit punny, but my sons were very happy to receive them.