The kaleidocycle designs are available now. They are available in the design packs mentioned, and also individually.
A while ago, a friend sent me a link to a website that discussed an unusual geometric form.
Created by a math student, the form is called a Kaleidocycle. You may recognize the "kaleido"
prefix from "kaleidoscope"; it means "beautiful image." The suffix "cycle," of course, refers
to "ring" or "wheel." A kaleidocycle, also called a flexahedron, is made of 6 or more
tetrahedrons linked together in a ring. You can rotate the ring forever, alternating which
surface is visible on top. In case you'd like to read more about the shape and see a
kaleidocyle in action, here is the website my friend shared.
https://sci-toys.com/scitoys/scitoys/mathematics/paper_ring.html
I downloaded and printed the kaleidocycle panels so I could make my own kaleidocycle. Very
soon afterward, I decided to digitize the panel so that I could make them from longer lasting
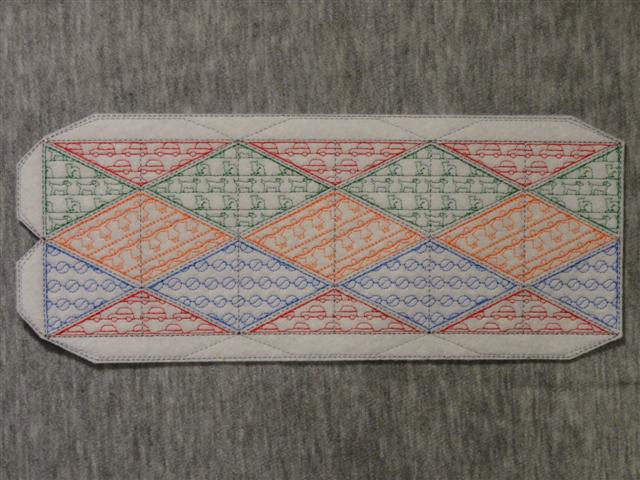
felt. I tried a variety of decorative stitch motifs available in my software. The panel shown
here has stitches from the Children's stitch menus. I call this arrangement a Kiddie Kaleidocycle.
A few months ago I started experimenting with my digitizing software's ability to turn
drawings into motis for fill areas and lines of stitching. I wanted to create an effect that
would look like wood grain. In experimenting with this idea, I thought of creating motifs that
would fit together like tiles. The spiral hexagon you see here...
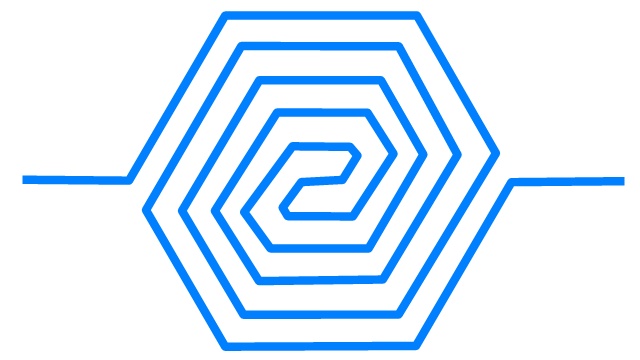
...turns into the pattern you see in the green diamonds of this kaleidocycle. Since the patterns
remind me of a parquet floor, I call the arrangement a Parquet kaleidocycle. (Look for more parquet
tile embroidery designs in an upcoming blog.)
If you saw the panels at the website above you will notice that mine are a little different.
The half diamonds at the top and bottom make it possible to sew a straight seam by machine
rather than have to sew a long zigzag seam by hand. This change makes the kaleidocycles much
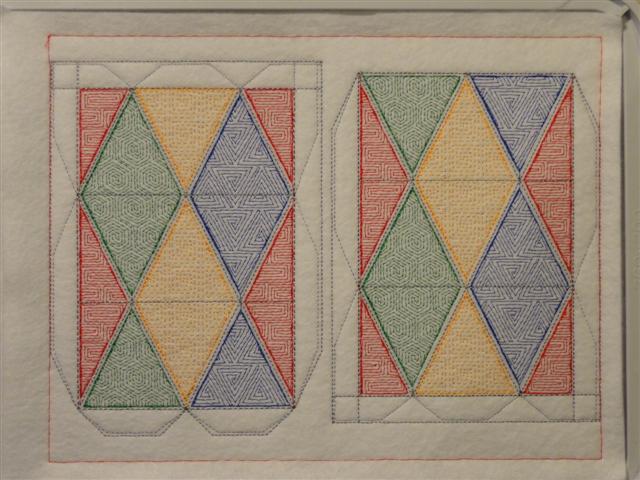
easier to finish. I also created some kaleidocycle panels that can be stitched in two sections.
Embroiderers with smaller hoops can use these designs to make kaleidocyles. I stitched both of
the halves in my 200 x 260 mm hoop, but each half will fit in the 130 x 180 mm hoop by itself.
Once you have embroidered your panel, you will need to cut it out and sew it together. The
short cross seam comes first, if you are making a 2-panel kaleidocycle. Next, follow the
instructions for pressing folds in the panel, and then stitch the long seam. You will then turn
the kaleidocycle right side out, tuck the tab end into the open end and stitch the opening by hand.
(Yes, I know that "hand" is a four-letter word, but it really is quicker to sew each layer separately
than to try to keep everything aligned to stitch by machine. It is also difficult to get the lumpy
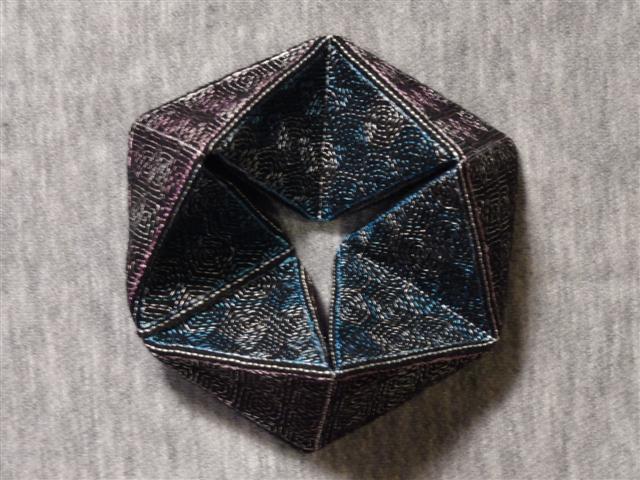
shape under the needle.) Here are pictures of the finished kaleidocycles.
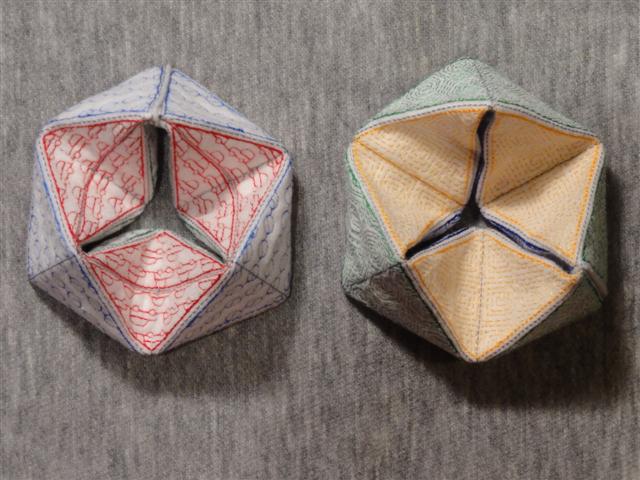
I recommend using felt. It can be cut very close to the stitching since it does not ravel.
It is also easy to sew by hand. I have tried many colors but keep coming back to black and white.
The black absorbs some of the thread's color, creating a more subtle look. The kaleidocycle
shown here has pink, teal, lavender and blue Sulky variegated thread. My husband pronounced this
one "classy." The colors almost look metallic.
I have had good luck with very pale colors of felt, but the medium shades don't show color very
well. Even though I love embroidering on black, I think the kaleidocycles on white seem to look the best.
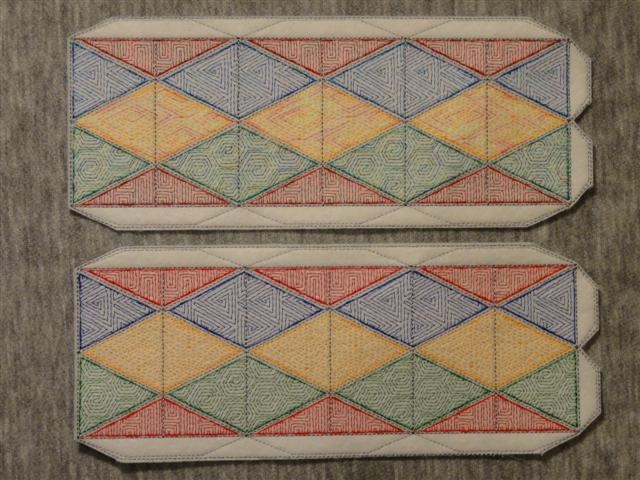
The following picture shows two Parquet kaleidocycle panels with similar colors. I used my Superior
Rainbows variegated thread for the top one and Robison-Anton solid threads for the bottom.
I gave a kaleidocycle to one of my uncles. He has some arthritis in his fingers and thought the
toy was perfect for keeping his fingers nimble. The fabric is soft and comfortable to hold and the
exercise easy to do. He asked me to make one for his physical therapist and she thought it a good
therapy tool, too. Someone else who received one of my kaleidocycles decided it would be perfect
for a napkin ring. You could make a set of kaleidocycles for a dinner and then give them as favors
to your guests. Another friend told me she turned her kaleidocycle under the table all through
a long meeting. And wouldn't these be perfect toys to keep in the car for road trips? No beeps and
boops and dings and dongs, just peace and quiet.
The designs are available individually, by fill pattern (Kiddie or Parquet), or as a
complete set. The fill sets each include 12 files: three single panel designs, the six left
and right halves of the two-panel designs, two arrangements of left and right halves in the same
hoop, and a design with two single panels arranged to fit in one hoop. The complete set includes
both fill sets plus an arrangement with one of each kaleidocycle style. The designs with 2
panels fit in a hoop at least 200 x 260 mm in size. Instructions for embroidery and assembly are
included with the designs. The design sets can be found here. Click here to download a list
of all the designs with their sizes, stitch counts, and finished dimensions. You will also see
the formats available for the designs. PES version 6 designs include 20 of the 25 designs and
version 9 includes 23. If you buy a single kaleidocycle that requires two panels, both panels
will be included in your download. The price will be the same as ordering a single-panel design.
The arrangement with one of each style costs the same as buying one of each design.