December 7, 2012
carol
Not rated yet
Do you remember the Parquet Tile motif fills I used in my kaleidocycles?
You can see them here. I had a lot of fun creating a variety of fills in my
embroidery software. After a while I decided to cover a piece of fabric with one
of the fills and make it into a Zip-Around pouch. I had just one problem: I couldn't
decide which fill to use.
I decided not to decide. A crazy patch arrangement gave me a reason to use
many patterns. It also gave me a way to arrange the different fill patterns in a
pleasing way. I used a different parquet tile fill to mimic each "fabric" section of
the crazy patch design and then used decorative stitch motifs for the crazy patch
embellishment.
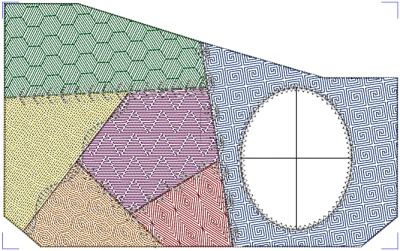
An oval window on the front of the pouch makes a pretty frame for an added name,
initial, or other design. I also arranged the designs without the oval. This version
is especially suitable for larger names or designs. You don't have to worry about
leaving open space between the design and the outline around the oval.
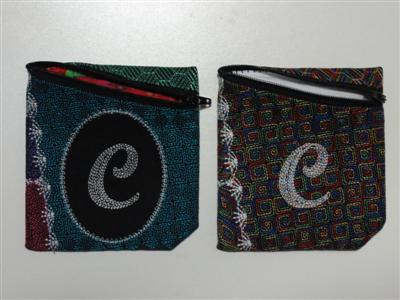
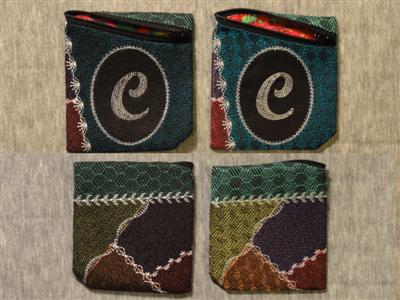
Here is a picture of two Crazy Patch Pouch embroidered panels, one with the oval
window and one without. I added a "C" in Contour Script 75 to both designs. I
embroidered the first one with six colors for the "fabric" and one more for the
embellishment and "C." For the panel without the oval, I used a single variegated
thread for all the fabrics (my favorite Superior Rainbows thread, #813) and white
thread for the embellishment and "C." The fabric "prints" coordinate perfectly because
they are made of the same thread.
After I made these pouches, I played some more with the motif fill functions in my
embroidery software. I created a motif that is very similar to the cathedral windows
quilt pattern. I used my Superior Rainbows #813 for this pouch that fits in the 200 x 260
mm hoop. It is not a crazy patch design, but my friends who have seen it asked me to
include it in my collection.
There are centering lines to make it easy to center a name or other added design on
the pouch front. Open the pouch design first, then add your name, initial, or other design.
Position your design, using the centering lines as a guide, and then combine embroideries.
See the instructions for more information.
I digitized pouch designs for 8 hoop sizes, ranging from 150 x 240 mm to 200 x 360 mm.
For each size there are five designs:
* without oval, 6 colors + embellishment
* without oval, one color + embellishment (file name includes "m" for monochromatic)
* with oval, 6 colors + embellishment (file name includes "o" for oval)
* with oval, one color + embellishment (file name includes "om" for oval monochromatic)
* cathedral windows fill pattern, 1 color
The chart available here lists all the designs and the sizes of the completed pouches
(if cut and sewn according to directions). Designs are available individually, according
to hoop size, and as a complete set. For the individual designs and hoop size packs,
choose the size from the drop down menu on the right side of the screen.
Designs for the Bernina and Viking Mega hoops are arranged to minimize hoop position
changes. The 150 x 300 designs will fit in the Bernina 150 x 400 oval hoop. Save with the
Auto Split option. (See your software instructions for help.) For the Viking hoop, save as
a Mega Single design.
Here is a picture of all the sizes.
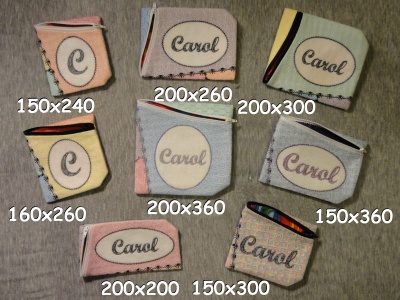
You can see that I varied the order of the colors for the crazy patch sections. It
doesn't really matter what order you use, but I recommend using a favorite color in place
of the blue in the color list. That last section (on the right side of the pouch) is
largest, so there will be more of that favorite color to enjoy.
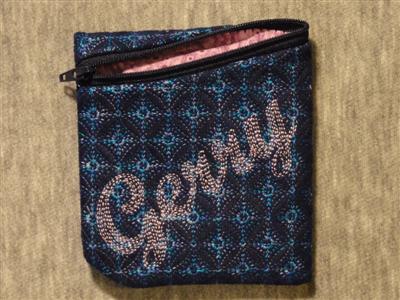
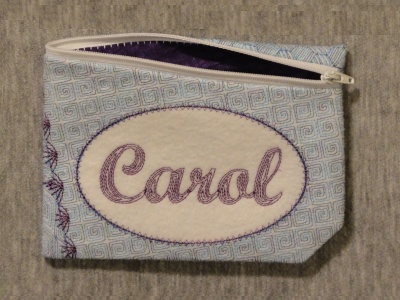
I like to use white or silver for embellishment when I embroider on black. When
I embroider on white, I use gray or black or a color that is included in a variegated
thread. On the following pouch I used purple thread to complement a blue-green-purple
variegation. I haven't yet tried a solid color on the monochromatic version with a
variegated thread for the embellishment but may do that one day.
When I first started playing with these designs, I stitched my pouches on felt.
That fabric stitches really well and gives the pouch enough body that no fleece is needed.
In fact, fleece on felt would be very stiff and bulky. I like the way the pouches handle,
but noticed that the thread sinks into the felt a bit. The colors aren't as bright as I
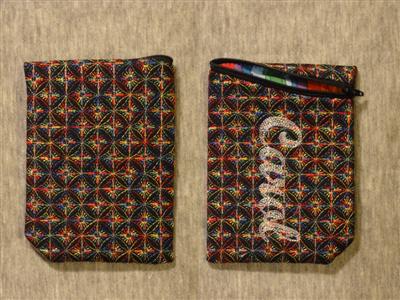
would like. I then tried a design on poplin. I fused interfacing to the back of the poplin
to give it a little body. That plus the cutaway stabilizer was enough, but you could use a
very light batting if you wanted. The next two pouches have the same "fabric" colors. Can
you see how much brighter the stitching looks on poplin?
For this collection of pouches, I have rewritten my Zip-Around instructions. The new
instructions include photos (instead of drawings) of all the steps. They also include a
section on making the pouches with the opening reversed. There are a few steps that are
different, so please do read that section before arranging and constructing your mirrored
pouch. The instructions are included with purchase of any pouch designs. Here is a
picture of one of my mirrored pouches. I rotated my mother's name to better fit the space
on the front of the pouch.