In high school Latin class, I learned a game that scholars believe was played by Roman soldiers. It is similar to tic-tac-toe, but uses a circle as a game board rather than a 3 x 3 grid. Signs of the game were found in ancient Rome but we don't know what the Romans called the game. Modern scholars call it Rota, the Latin word for "wheel." You can read more about the game and its rules at
this website.
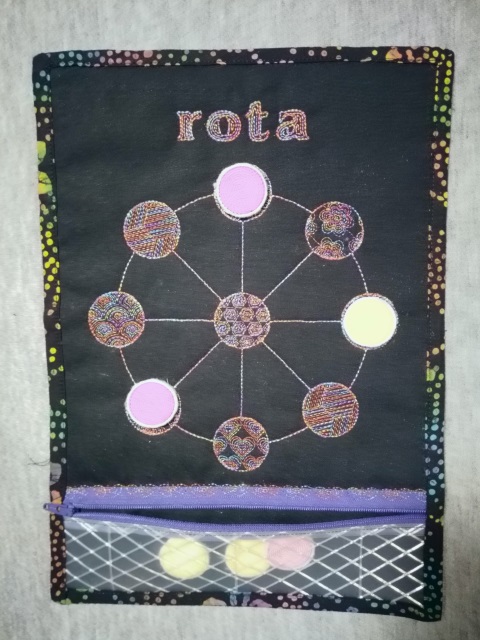
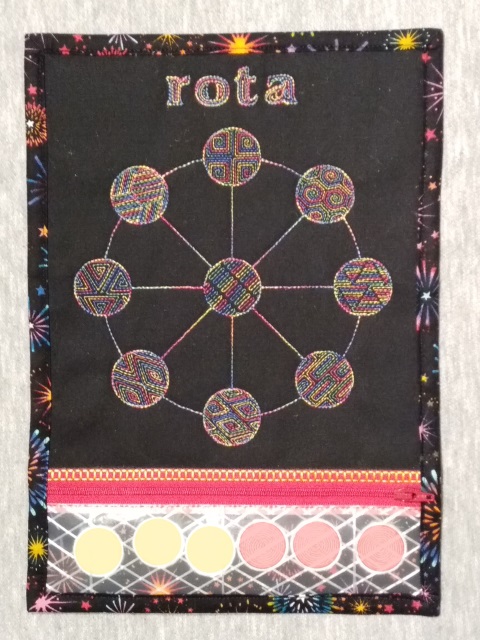
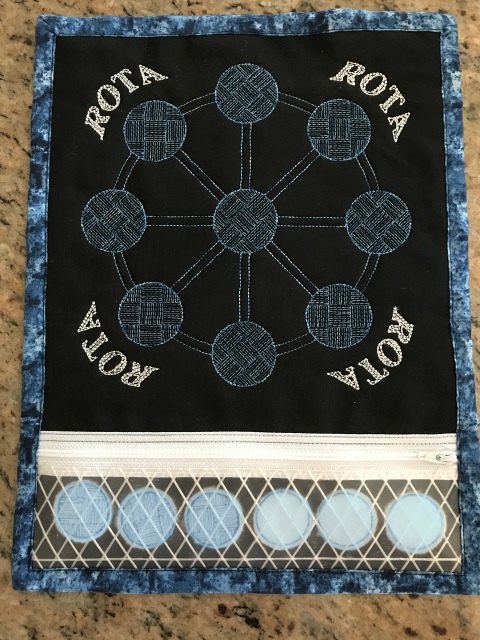
On a recent visit, I taught my 7-year-old grandson how to play Rota. I drew the game on paper and we used some checkers for markers. He LOVED the game! He caught onto the strategies immediately. I told him that when I went home I would embroider a game for him. He picked the fill patterns he wanted for the circles, and also the colors for the design, the markers, and the fabrics. When my other grandchildren arrived, my grandson taught his 7-year-old cousin to play; she loved the game, too. She picked the fills and colors for her game as well. I embroidered her game while she was visiting at our house and then made the game for my grandson (he lives in a different city). I used my 200 x 260 mm hoop for both games.
As I did for my
chess and checkers games, I made markers from felt and added lines for cutting the markers out with special cutwork needles. I also added pockets to the bottom of the game boards for storing the markers. A mitered fabric frame completes the project. We'll talk some more about the Rota games in just a bit, but take a look at the pictures for now.
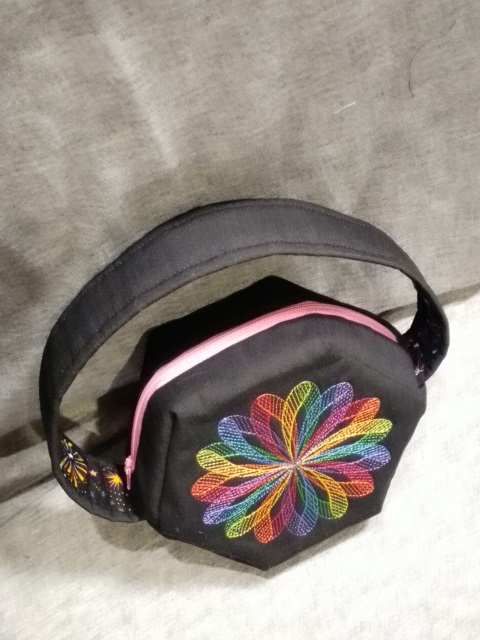
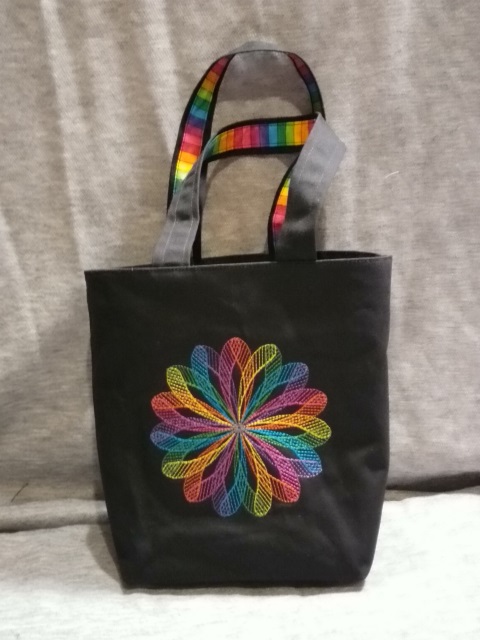
I didn't leave the other grandchildren out of the fun. I made a
little purse for the 5-year-old girl and a tote bag for the 3-year-old
girl. I used the same
swirl design f
or both, but with slightly
different colors. The tote swirl has magenta and turquoise instead of
red and blue, giving a jewel look to the swirl. (My daughter-in-law
suggested that change after she saw one of my other swirl projects.)
When I gave the little one her tote, she climbed on my lap, patted my
face, and said, "You're a good person." What a compliment! Here are
pictures of the two gifts.
For
the 1-year-old boy, I made a mat with some animal designs. You may
recognize the turtle, bunny, and teddy bear; I "borrowed" them from my
jigsaw puzzle collection and sized them to fit together in a hoop.
The fish are the creation of my daughter-in-law. I stitched them on
fabric and added a 260 x 360 mm version of my
mug rug outline. The
loops on the side will allow the parents to fasten the mat to a high
chair or stroller.

Now, back to the Rota
game. When I posted pictures of my gifts to my Yahoo embroidery groups,
some members mentioned that they would like to make the game for
grandkids, too. I was happy to arrange the designs.
By
moving the game's name to the corners, I was able to fit the embroidery
into my 200 x 200 mm hoop. (I like saving stabilizer, don't you?) I
also made the circles bigger so that the markers could be bigger, too,
and widened the connecting lines between circles. I sized the game for
150 x 150 mm hoops and then enlarged the circles to be about the same
size as on the larger games. Now all the game board designs can share
the same marker designs. Finally, I gave the same fill pattern to all
the circles in a game, and then made different versions of the game with
different fill patterns.
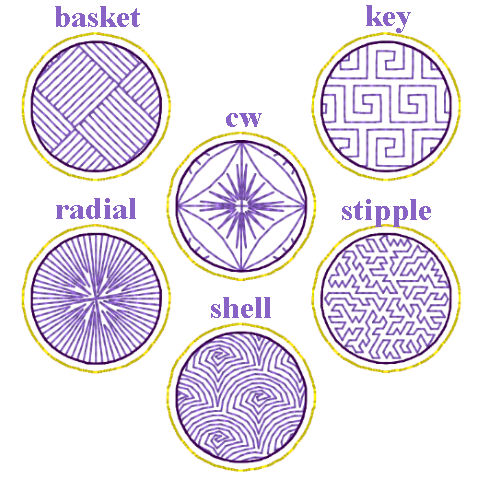
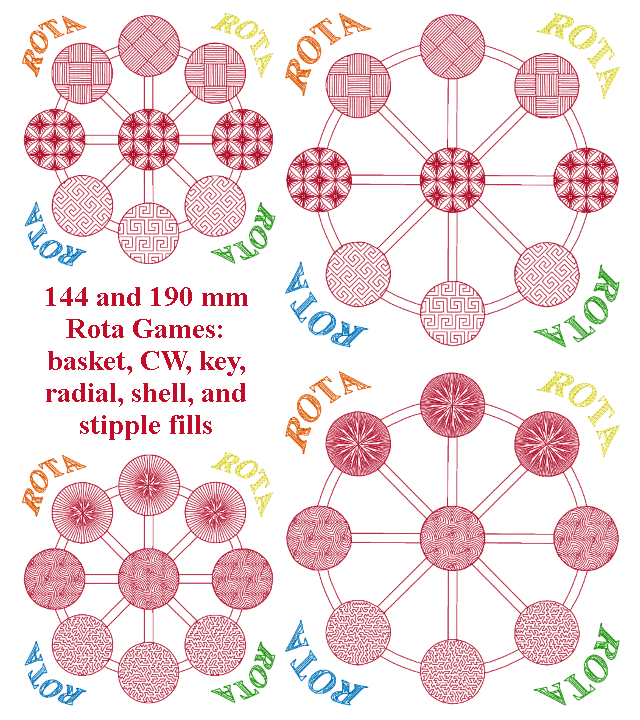
The game boards and markers are
available in 6 fill patterns: basket weave (basket), cathedral windows
(CW), key, radial, shell, and stipple. You can use the same fill for
game and markers or you can mix and match. (You can also cut 1 1/4"
circles from plain felt in two colors, or use coins or buttons in two
colors.) Here are a few pictures to show all the fills available. The
first picture shows one of each marker variety. The second shows two
144 mm games and two 190 mm games; each game shows three of the fill
patterns.
As you can see from the game design picture, there are 5 colors in each
game. The instructions included with your purchase suggest some
arrangements. In the Large game below, I used Superior Rainbows #817
thread for the game and white for the ROTA labels in the corners. The
markers are stitched with the same Rainbows thread. I omitted the fill
pattern for three of the markers so that they are the same color as the
felt. For the Small game, I used Rainbows #813 for the game and
alternated red and blue for the labels. The markers use the same red
and blue colors to coordinate with the labels.
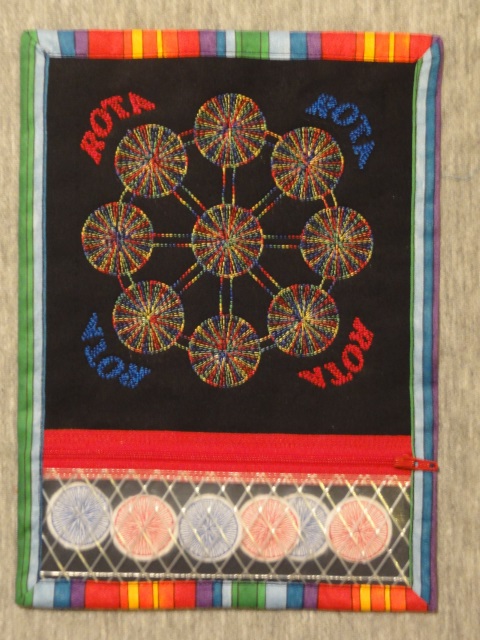
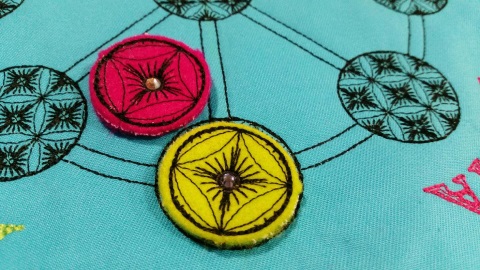
My friend Pauline tested my design and instructions for me. She added
her own creative touch by setting crystals into the centers of her
cathedral windows markers. Don't they look great?
The
complete set includes all 12 game boards and 6 marker sets. The
designs are also available in -design packs- and as individual designs.
To purchase a
Rota board design pack, choose Small for the 144 mm
game boards, or Large for the 190 mm game boards from the drop down
menu. The Rota marker set is available
here. To purchase an
individual Rota game board design, choose the fill pattern you want and
then choose the Small or Large size from the drop down menu. Individual Rota game boards and marker designs can be found
here.
Each purchase includes
instructions for embroidering and constructing the Rota game board and
for making the markers. If you have a computer or internet tablet in
your sewing area, I recommend viewing the instructions on screen rather
than printing them. You will save paper and ink and also be able to
zoom in to see the photos more clearly.
Speaking of
instructions, I tend to write mine so that they are beginner-friendly. I
add a lot of photographs so that the instructions are as clear as
possible. You may feel the instructions are more detailed than you
need. Nevertheless, I suggest you read through them at least once, even
if you are an experienced sewer. You may prefer to construct your game
a different way in the end, but you will have less risk of missing
something important if you see what I had in mind first.
Click the link below to download a guide to all the designs, with stitch counts and dimensions.
Guide_to_Rota.pdf (306.6KB)