In-the-hoop projects are very popular. There is something satisfying about letting our expensive
machines do all the work. I have done some projects like this, myself: I made some
luggage tags and
labels (which I shared with you through my blogs), and I have also made some freestanding lace.
The drawback for me, however, is that I don't always want a satin stitch border; sometimes I prefer the
neatness of a finished seam. For my
baby bib design, for example, I thought a satin border would be very
scratchy. To avoid that, I stitch whatever design I want on the bib, place the lining fabric face down on top,
and stitch the outline of a bib. The outline includes an opening for turning right side out.
I lately used this same approach to make some mug rugs. (In case you haven't heard that term before,
a mug rug is a coaster.) The mug rug doesn't have to be for a coffee or tea mug, but can be. I think the fun
of the name is in the rhyme, don't you?
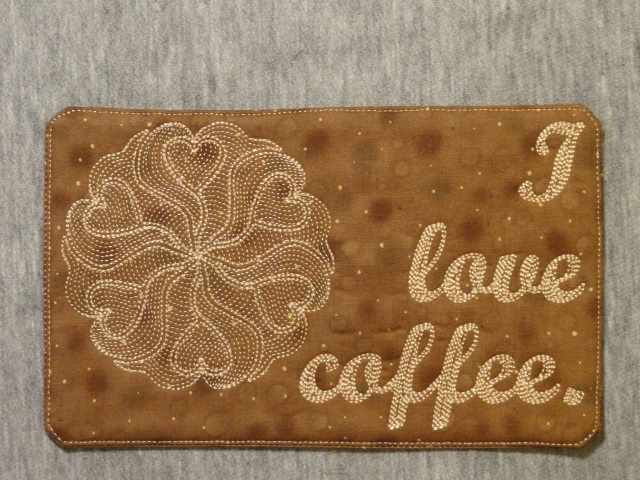
For this mug rug, I combined Medallion Swirl
6_rep_mw_heart_115 with "I love coffee." arranged in my
Contour Script 60 alphabet. I then added
mug_rug_150x240 to the design. I stitched the swirl and the text
before adding the lining fabric to the hoop and stitching the outline. The only additional work I had to do
was trimming the seam allowances, pressing seams open, turning right side out, pressing flat, and top stitching.
It sounds like a lot, but I bet I finished it all in the time my machine would have been still stitching a
satin border. Even if it did take longer, I like the look better. Perhaps you will, too, once you try it.
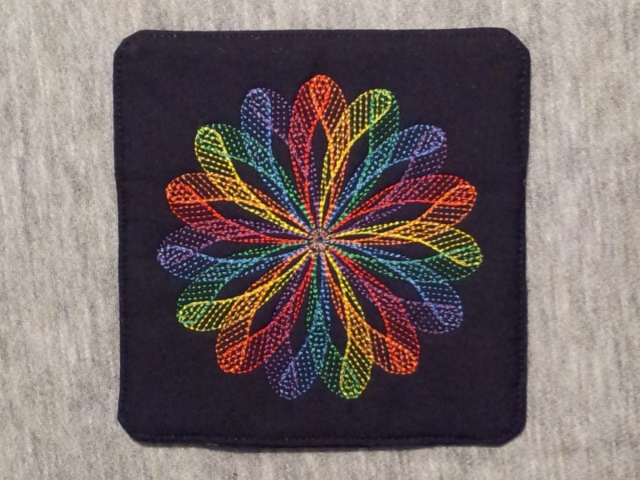
Here is a square mug rug, using Fancy Swirl
v_split_15_6-color_115 and
mug_rug_150x150.
I have digitized 4 square mug rug outlines and 5 rectangle mug rug outlines. Click the link below to
download a list of all the hoops, along with their stitch counts and dimensions in inches and metric. The
designs are available
singly
and in a
complete set. Each purchase comes with instructions about
combining embroidery designs, and embroidering and constructing the mug
rugs.
Each rectangle design includes a red star that marks the location of the opening for turning the mug rug
inside out. It is often easier to arrange a design in the horizontal orientation, especially if text is
included, and then rotate for embroidering. Because some embroidery software rotates clockwise and other
rotates counter clockwise, I wanted the opening in the outline to be noticeable. I find it easier to embroider
the
outline when the opening is toward me rather than at the top of the
hoop. The star is meant to be deleted from the design once its purpose
has been served.
Mug_Rug_Outlines_Stitch_Counts.pdf (22.4KB)