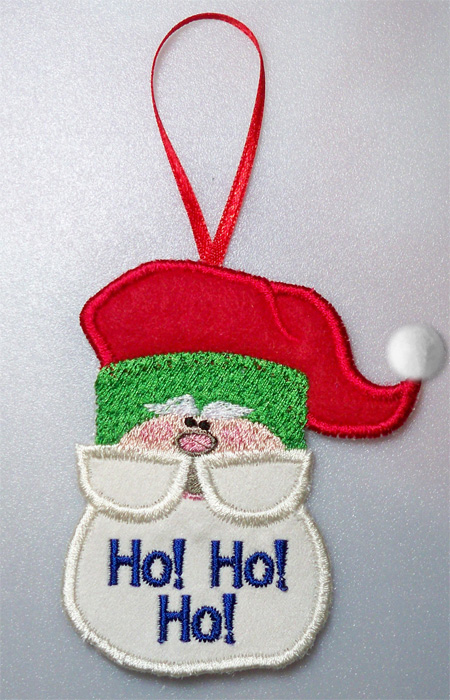
It's easy to create unique freestanding ornaments using applique designs. Much like freestanding lace is constructed on water-soluble stabilizer, freestanding applique is made stable from the applique base. With satin stitching all around, they can stand alone.
This applique design is by Adorable Ideas. I removed the ball on the end of his hat because I wanted to add a white pom pom.
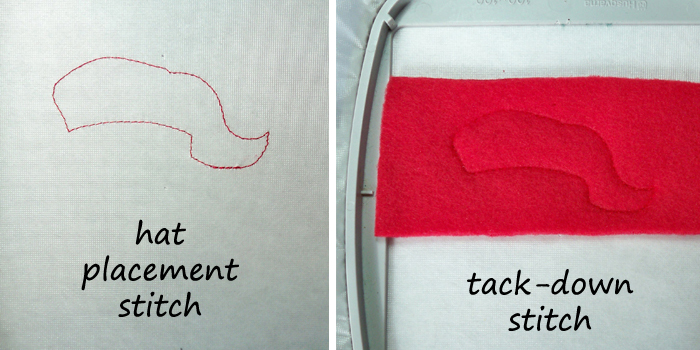
I hooped a heavy-weight water-soluble stabilizer (WSS), like Badgemaster, and sprayed a hoop-sized piece of medium-weight cut-away stabilizer on one side and finger-pressed it to the under side of the hooped WSS. Placement stitches show where the hat applique will go. I used a piece of red fleece for dimension. The second stitch tacks down the fleece.
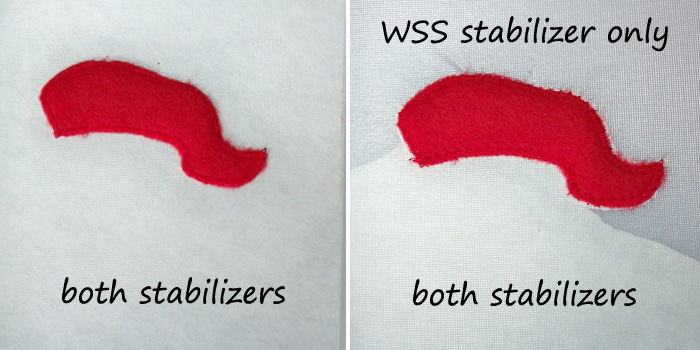
Clip outside of the lines close to the stitches. Take the hoop off of the machine and turn it over on a flat surface. Clip the cut-away stabilizer from around the top and point of the hat close to the tack-down stitches.
The idea is to trim the cut-away stabilizer as each piece of the applique design is stitched so it doesn't show. The cut-away will serve as a base, much like a typical applique fabric base. Leave the WSS intact until the very end.
After the hat band outline stitches, but before the underlay stitches, I stop the machine and remove the hoop again, clipping cut-away stabilizer at points 1 and 2. Clip to the side band at point 3 and into the side under the hat tip at point 4.
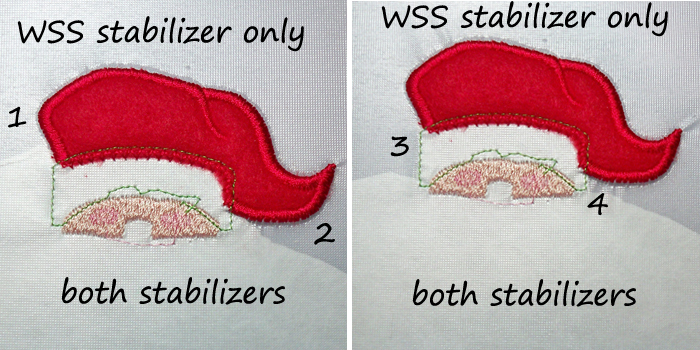
Finish stitching the hat band and eyebrows. When it comes to the beard placement stitch, remove the hoop from the machine.
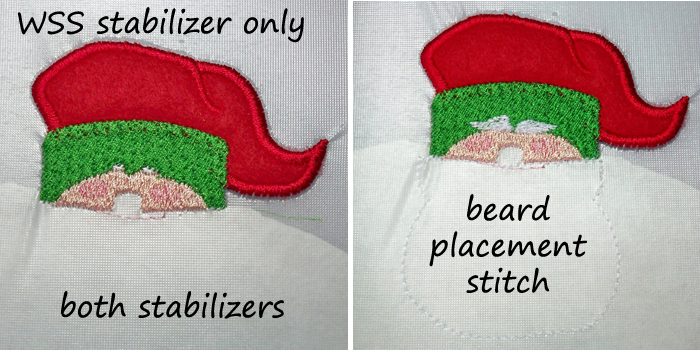
Clip the rest of the cut-away stabilizer up to the beard placement stitches. Now, the only stabilizer in the hoop is water-soluble.
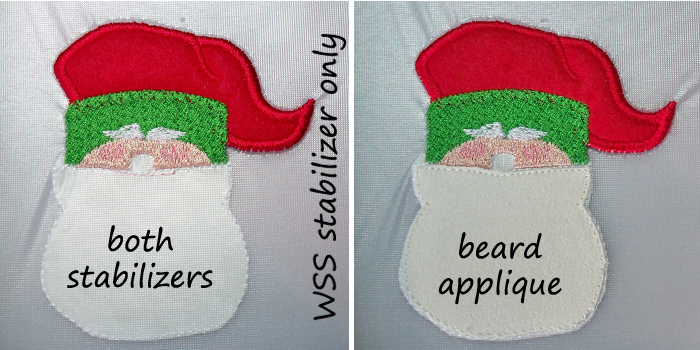
I used faux suede for the beard to add texture. After tack-down stitches, trim the excess suede and finish stitching the eyes, nose, mouth, and mustache/beard satin stiches.
I added the Ho! Ho! Ho! text to the center of the beard. When all stitching is complete, remove the design and clip the WSS close to the satin stitches. If stray bits of WSS remain, use a wet cotton swab and run it along the edge of the satin stitches. Attach a hanger, glue on a two-inch pom pom, and it's an ornament or gift tag!

Here are Ho! Ho! Ho! files for you to use. Get a jump on Christmas, I'll bet you have several people who would enjoy one of these!
Debbie SewBlest