June 14, 2013
carol
Not rated yet
My brother rides a trike. (No, it is not a tricycle like we had when
we were young. He rides one of these, an elliptical exercise machine. He
says that it's a lot more fun for him than a stationery machine in his basement
would be.) I bet you are wondering why I am mentioning this activity in a blog
about machine embroidery. The connection is that he asked me to make something
to hold his smart phone: he likes to listen to music while he rides, and he
doesn't want the cords from his earphones to get in his way. Further, he wanted
his phone front and center, not on an armband.
My solution was to make him a Pocket Pinny. (Pinny is the name for the
things that we wore in PE class, to distinguish one team from the other for field
sports and basketball. In volleyball the net keeps the teams apart.) I used an
athletic mesh fabric so the pinny would be light and not hold in heat. I bound
the outer edges with fold-over elastic, and added reflective tape for safety. The
casing at bottom holds an adjustable belt.
Finally, there is the pocket. It is just big enough to hold the phone. An opening
at the top or in one of the side seams allows access to the headphone jack and
the Velcro closure on the tab keeps the phone secure. Here is a picture of my
brother's Pocket Pinny.
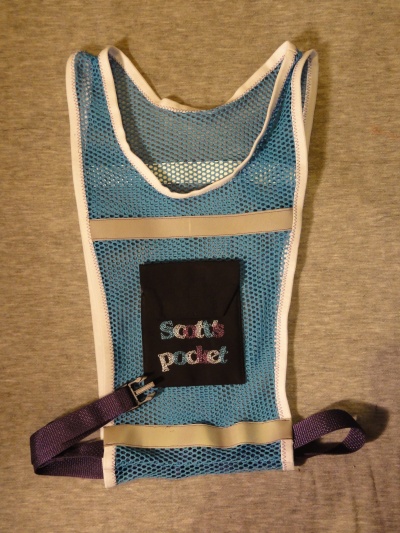
For the lettering I jumbled letters from the -Contour Print 40- alphabet. The
alphabet can be found here. (The 40 mm size is listed as Large in the dropdown
menu.) Click here to see the Contour Print Complete Set.- "Scott" by itself
looked too small so I added another word.
The boxes that surround the letters are meant to aid in aligning text on a line;
you will not need them for making a jumble. To remove the boxes, open each
letter in a design editing program. Hide the letter and then delete the box. See
How to Jumble for help in overlapping and tilting your letters.
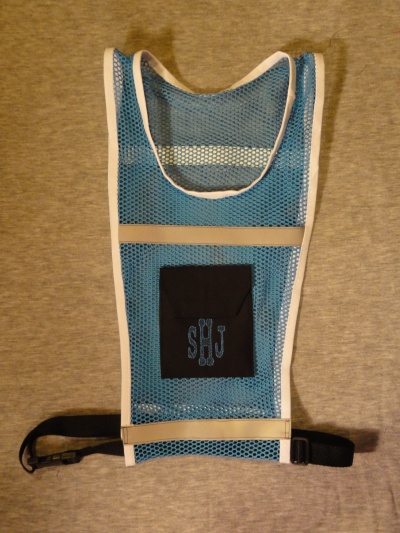
I made this pinny for a cousin. The lettering is from a font I am still working
on. I hope to make it available soon, so watch this blog for more information.
I also made a pinny for myself, but wanted something a little different. A
friend had sent me a roll of satin bias binding in a gorgeous rainbow print.
I have been saving the binding for something special and decided the pinny
would be the perfect use. Here is my pinny.

I have looked for the binding online but have only found it from vendors
in the UK. It is available by the yard and by the roll. Look for 20 mm rainbow
satin bias binding, manufactured by Prym. One half inch wide
double fold bias tape would work well, too. I do not recommend 1/4" wide
bias binding because the open nature of the mesh causes gaps along the cut edge
that would not be caught in such a narrow seam.
The instructions for making this pocket pinny are available here. I created
three separate documents rather than one very large one that might be difficult
to download. Click on each link below to download the instructions.
* Prepare Patterns for Pocket Pinny
* Sewing Instructions for Pinny Pocket
* Sewing Instructions for Pocket Pinny
The first document includes pattern sections that can be traced onto pattern
tracing material. The instructions will help you size the pocket to your phone
and the pinny to your torso. Make your patterns first so that you know how
much athletic mesh and binding you will need.