
These casserole carriers are simple to make and are
perfect for upcoming pot luck gatherings.
You can make them different by using an assortment of fabrics (maybe
from your “stash”) and embroidery designs.
Materials:
2 pieces of fabric cut into a 22 inch square*
2 pieces of fabric cut into 4 inches by 22 inches
*(For red and white carrier, cut 4 squares 11-1/2 inches
square instead of one of the 22 inch squares.
Sew them together with a ½ inch seam and continue as directed below)
Small pieces of fabric of your choice for cupcake
appliques
1 piece of low loft batting or washable felt cut in a 22
inch square and 1 piece cut into 4 inches by 22 inches
Medium weight tear away embroidery stabilizer
Embroidery designs - Dakota Collectible Collections #970426
Redwork Memories and # 970443 - Crafty Cupcakes.
2 – 3 inch metal or heavy plastic rings (Can be found in
the purse section of Hobby Lobby or check the $1 jewelry store for bracelets)
4 buttons of your choice
Instructions:
1. Place
the right sides together of the 22 inch square fabric with the square of
batting on the outside. Place pins
around the outside edges to keep them even while stitching.
2. Stitch
around the outside edge, leaving about 5 inches unstitched.
3. Turn
the fabric to the right side through the hole you left unstitched.
4. That
will leave the batting sandwiched on the inside. Slip stitch the opening together.
5. Press
the square. Top stitch around the outside of the square. I stitched the width of the side of the
pressure foot.
6. Mark
a horizontal and vertical line through the center of the square so that you can
follow them and straight stitch through all layers to hold the batting in
place.
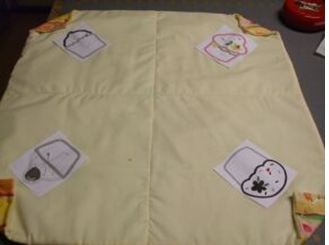
7. Using
a printed template of your design, mark the position of the design in the
corners of the square, leaving enough space for the corner to be folded
down. I put a cupcake in each
corner. When using the redwork design,
I only embroidered two corners because of the larger sizes of the designs.
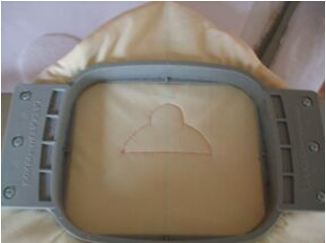
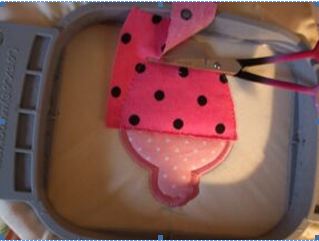
8. Hoop
the stabilizer and the corner of the square with the markings lined up in the
center of your hoop. Stitch the first
color of the cupcake design for a placement line.
9. Place
a piece of fabric over the stitching and stitch the next color.
Trim around the stitching as close to
the stitching as possible.
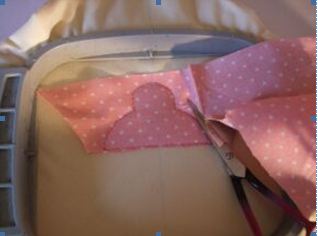
Stitch the next color.
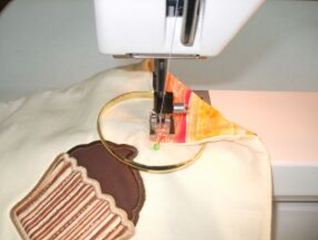
10.
Continue stitching an outline, placing the
appliqué fabric on top, stitching, trimming and finishing the embroidery
design. Remove the stabilizer.

11.
Embroider the other designs in the
corners.
Handle
1. Place
the fabrics for the handle together as you did on the square fabric and stitch
the two long sides and one short side.
Turn the handle right side out.
Fold the raw edges left on the short side to the inside and top stitch
to close the opening.
2. Stitch
a line down the center of the length of the handle or top stitch along each
edge as done below.
Finishing
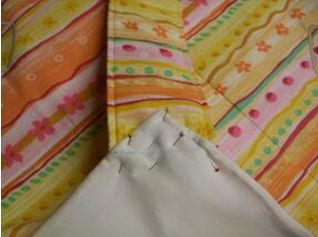
1. Place
the end of the handle under opposite corners of the square. Mark a line 2 inches from the tip of the
corner and line that up a line marked 2 inches from the end of the handle. Stitch along the line. Fold the triangle shaped corner down and
stitch the decorative button in the center.
2. For
the corners of the square that do not have the handle stitched to them, fold
the corner down the same measurement as the corners to which the handle was
sewn.
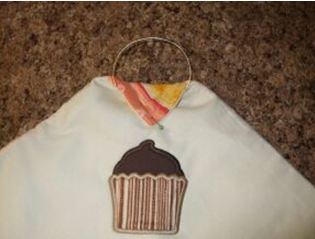
3. Place
a ring inside this fold and machine stitch the corner down. (If your ring is too thick for the 2 inch
measurement, you may fold it down a little more to be able to stitch.)
4. Sew
your button on the triangle the same as the other corners.
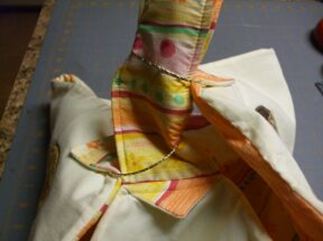
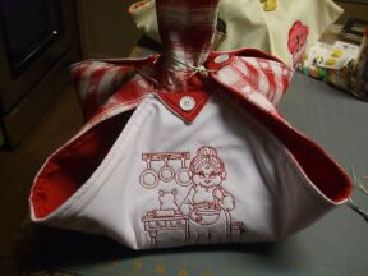
Thread the handle through both
rings and your carrier is finished! (The buttons do not show on this picture
because I photographed it before sewing on the buttons.)
By Virginia
Please let me know any comments you may have below. Thanks!