Make this 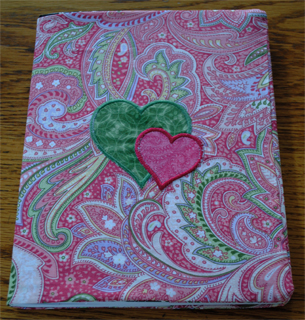
from this 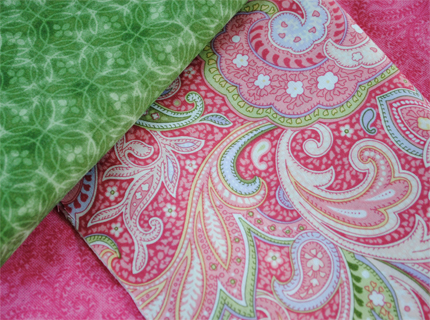
and this!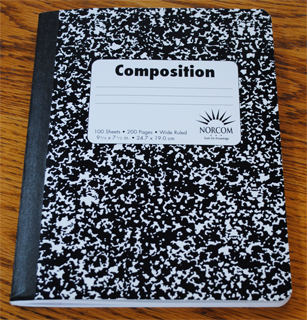
It is almost back-to-school time and this embroidered notebook cover is a quick and easy project using a standard 50-cent composition book. It takes about a half-yard of fabric, or two fat quarters, and a few scraps for the applique. Best of all, you can customize it with any embroidery. Your student will be the only one with a notebook like this one!
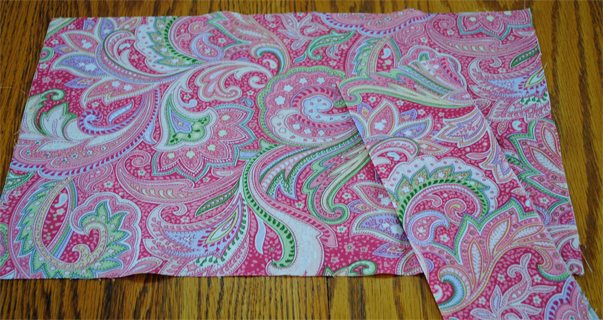
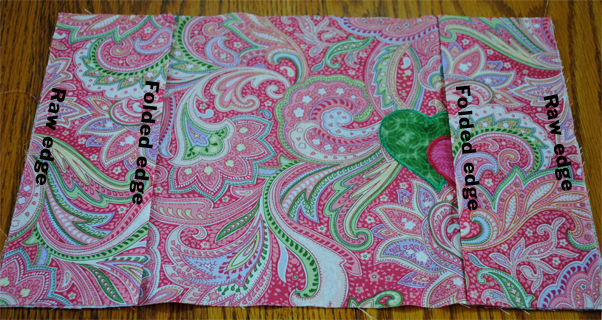
I like to press all fabrics before cutting, especially with a project such as this whose measurements depend upon a good fit. The notebook measured 9.75" tall and 15.25" wide when fully open. I added a half-inch seam allowance and cut two pieces of fabric 10.25" tall by 15.75" wide for the front and back. For the side flaps, I cut two pieces of fabric 7.5" wide by 10.25" tall. Fold the flaps in half, lentghwise, and press.
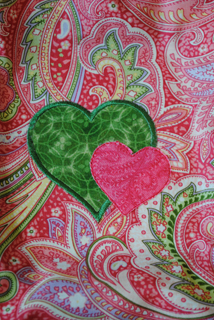
For the embroidery, I chose HQH 102-3 from the Amazing Designs Applique Quilting Hearts Collection. Choose from 46 designs for the 4x4-inch hoop and 30 designs for the 5x7-inch hoop. Hoop with a tear-away stabilizer and embroider the applique of choice, centering it on the front half of the cover.
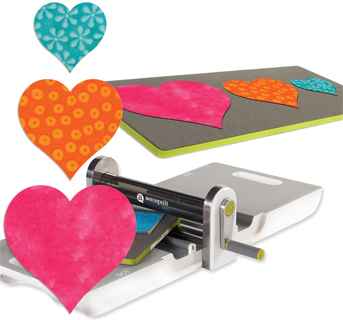
One of the wonderful things about this embroidery program is that the appliques work perfectly with the AccuQuilt Go! heart die 55029. The AccuQuilt GO! machine effortlessly die cuts several layers of 2", 3", and 4" hearts. All you have to do is run the fabric and die through the machine using the hand crank and lay your applique hearts in the first (placement) stitch out area where they will be tacked down and satin stitched. If you don't have an AccuQuilt GO!, you can still applique using traditional methods (placement stitch, tack down, cut outside fabric to the stitch line, and satin stitch).
Once the applique or front cover embroidery is finished, place the outside cover right side up. Line up each flap with the outside edges, matching raw edges and keeping the folds to the inside. Place the inside cover piece face down on the flaps and outside cover. Pin in place and stitch around the outside with a 1/4" seam, leaving a 1.5" opening for turning.
Turn the flaps out after stitching and hand-stitch the bottom opening left for turning.
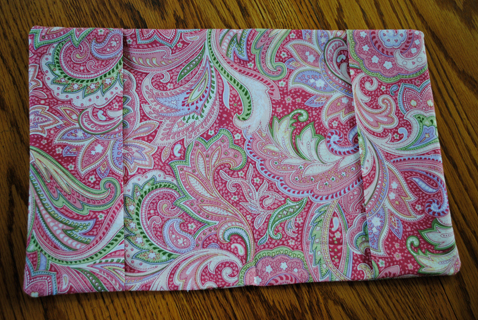
Slip the notebook cover pages in the flaps and you are done! The same concept can be used to make a cover for a journal, favorite book, or Bible.
Debbie SewBlest