In Part 1, Puckering, Crooked Placement and Bad design Selection
In Part 2, No Discovery Sew, No Organized with CatalogXpress or other organizational software/plan
I read a lot of newsletters on different things. One of them is blogging. The last one said, "Stop apologizing for your knowledge." I had to think about it a little bit, but it is true, while I am not an expert in many things, the issues I bring to you are from my personal experiences - both good and bad. Make no mistake, I learn from every project I do. Have I done every mistake that can be made? LOL, probably not. I am more a test participant and then I share that information with persons who love machine embroidery as much as I do.
Always feel free to put your 2 cents worth in - - make that $2 worth of your experiences. I want to know how others do tasks and better still WHAT NOT TO DO!
- HOOPING: Experienced embroiderers understand hooping because of their mistakes but a newbie does not have that luxury. If you were to search the Internet for hooping techniques, you would get about a dozen or more places on how to hoop. You will also get about 1.3 million sites to sell you hooping aids.
Let's talk about how to determine your hooping method!
- There is no one hooping method for every project. No surprise there but how do you determine the hoop technique if you are new or if the fabric is new to you? Most of the sites you may have found on Google will tell you one method. Wrong! There are multiple methods and some are downright bad for your project.
- All the hooping aids in the universe won't help if you don't have a good idea of what to do for the amount of tension for the fabric.
- There are some things you can do until you are more acquainted with the right hooping method for your project.
Here is what I recommend:
- Always do a discovery sew. Nothing can be substituted for that. Use the fabric, or as close as you can come to it, in your test. Use the stabilizer appropriate for the fabric. A general rule of thumb is - the heavier the fabric, the less stabilizer it will need. For instance - denim can sometimes be sewn without stabilizer but, batiste, a semi-sheet fabric will need a lot more stabilizer. I also have felt (this is my opinion - humble but loveable) that it is easy to under-stabilize your project, causing all sorts of problems. However, it is really difficult to over-stabilize a fabric because it can always be removed.
- Be sure you are using the smallest hoop for your project.
- Next, decide if you are going to hoop the stabilizer only or the fabric with the stabilizer. This is important because some fabrics will be damaged by the hoop. Some of those are: leather, velour, silk or any napped fabric. You must decide for yourself if your fabric should be stabilized. If in doubt - don't hoop.
My personal favorite hooping method - yours may be different - and again, please let me and others know. We may find one works better than another and we want to be able to do the best job possible with as little time and money as possible.
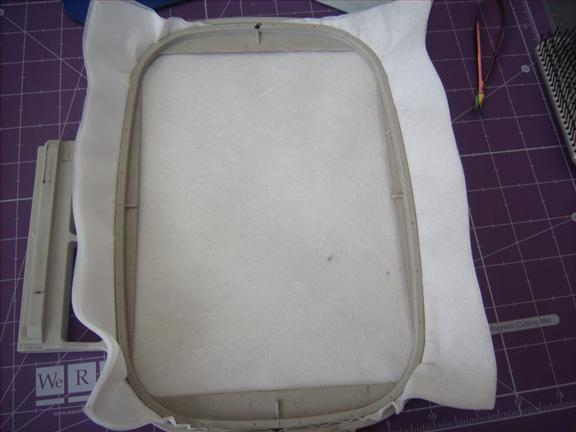
- If I am going to use a cut or tear away. I begin by cutting the stabilizer about 3 - 4 inches each way larger than the hoop I will be using. To be stabile, stabilizer needs to have the strength and size to do the job right. Skimping on stabilizer is short sighted and can possibly result in a failure of the stabilizer.
- The next thing I like to do is to place the stabilizer in the hoops appropriately and tighten the screw. This creates a cup like appearance in the stabilizer and when it is ready to be actually used, the folds are already present and it just slips into the hoop. Unhoop the stabilizer.
- If I am going to place my fabric on top of the stabilizer and hoop both I use a light coating of the Lapel Sticks on the stabilizer. It adheres the fabric beautifully and does not remain forever! I don't have to baste the fabric when I use it either.
- Next, I place the inner hoop over the fabric, stabilizer and outer hoop. I make sure that the outer hoop is very loose at this point. I don't want to have to press the inner hoop at all. I want to 'drop' it into the outer hoop.
- I am 'finger' pressing the fabric around the hoop but not really making it a finished, ready to embroider placement. Then I tighten the hoop to sewing firmness.
- I may have a fabric that has some pinches or tucks that I can see. I will loosen the screw enough to just allow reasonable movement of my fabric, usually about 1.5 turns. I gently massage the fabric where it belongs and then reinsert the top hoop for the final, approximately, 3/4 turn.
What I have done is created a fabric that is in its most natural state. It is secure to the stabilizer and ready to sew. Some will disagree with me and say that the fabric should be 'taut.' That is great, but I am more interested in the fabric being as the designer intended for it to drape or lay.
It works for me 99% of the time. It works for me with the fabric not being inside the hoop as well. Outside the hoop, the fabric already is in its position as the designer planned.
If you are embroidering a lot, I do highly recommend Snap-Hoop, in fact, it was Snap-Hoop that allowed me to realize that hooping fabric in its native state is best for most situations. Never forget that the best tools make the best projects. AND, Snap-Hoop has new sizes for different machines, Check It Out!! (Did I mention that they are on SALE? )
)
Please do give us your thoughts. My method may or may not work for you.