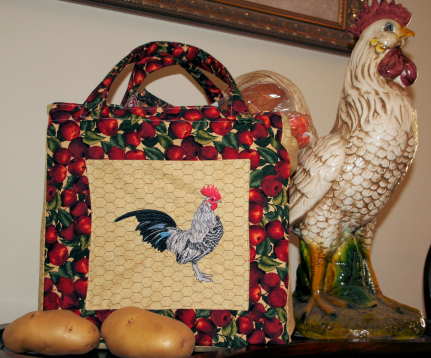
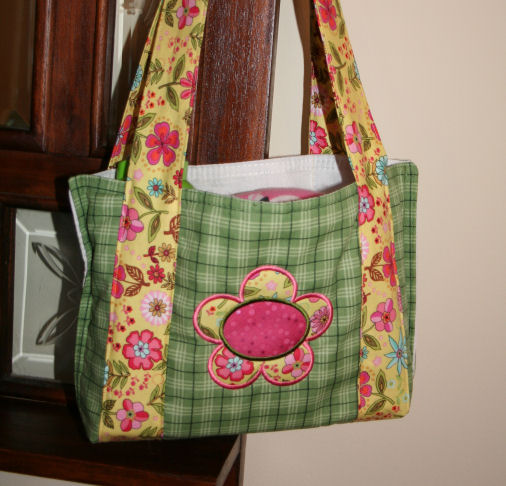
You can never have too many bags. We use bags for everything from storing tiny toys to carrying our groceries in "green" bags. But last week my daughter decided she needed a huge bag. She teaches science two days a week at a local Christian school. But since she shares the job (someone else teaches the other two days in the same classroom) she has to haul many of her supplies back and forth. She has 60 students in all so she needs 60 clear bottles, 60 apples, 60 whatever. She had a really big bag that worked pretty well. It was, however, made of the same stuff as those reusable $1 bags at the grocery stores. After only four weeks of school it ripped down one side. So, she came over to search through my fabric stash so we could make one. She chose some home décor fabric that someone had given to me a couple of years ago. Here is what we made:

The finished tote measures 8"deep. 17" tall and 18" wide. We made the handles go all the way around to give them more strength. Of course we had to put some embroidery on it.
What you need:
Fabric for outside: 2 rectangles 18" tall by 27" wide
Fabric for lining: 2 rectangles 18" tall by 27' wide
Handles: 2 strips 4" wide by 54" long
Sturdy bottom piece (measure your finished bottom for exact size)
Coordinating sewing thread
Embroidery design, stabilizer and embroidery thread (optional)
What you do:
Optional embroidery
1. Fold fabric in half widthwise and finger press to make a temporary crease. Measure down that crease from top about 7" and Mark this as the center for your embroidery.
2. Hoop stabilizer and fabric with mark (Or printed template pinned in place over mark*).
3. Embroider your design (Make sure it is in the hoop correctly for you design. Ours was rotated in the hoop.)
4. Remove the hoop. Tear or cut away stabilizer.
We used this design.
Make the Bag
1. With wrong sides together fold the long strip in half and press so it is 2"x54". Open and press the raw edges to the center then fold back in half and press again. It should be 1"X54"
2. Sew about down both long sides about 1/8" in from edge to make the handle.
3. Lay the outside front of you bag on a flat surface. Measure in 6" from top and bottom right edge and mark. Repeat for the left side. You can draw a line from the bottom to the top if you need to.
4. Begin by matching the bottom raw edge of the strip to the bottom of the fabric where marked. Pin all the way up. Repeat for the left side using the other end of the strip. Make sure your front handle is not twisted.
5. Sew from top to bottom on both the right and left sides of the pinned strip.
6. Repeat using the outside back and the other strip.
7. Place bag outside rectangles right sides together (make sure you embroidery and handle loops are at the top. Pin the sides and bottom. Using 1/2" seam sew around the sides and bottom.
8. Place bag lining rectangles right sides together. Pin sides and bottom. Using 1/2" seam sew around the sides and bottom but leave about a 6" opening at the bottom.
9. Clip the bottom corners of both outside and lining.
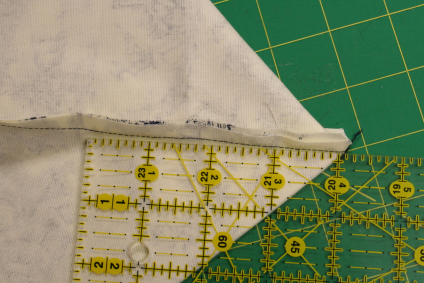
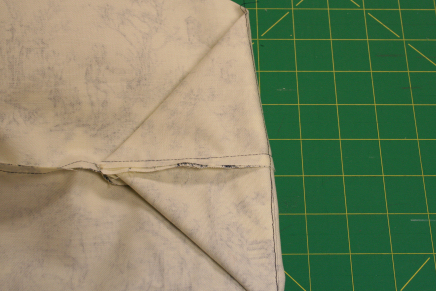
10. To make the flat bottom lay the bottom seam of the lining bag (still inside out)on table and pull the corner out aligning the side seam over top of the bottom one. Measure in 4" from the point and draw a line across. Sew along the line.
11. Fold the point onto the bottom seam line and tack down. (On smaller bags I would cut this off 1/2" from the seam I sewed but this bag needs to have a strong bottom.)
12. Repeat for the other side of the lining and for both sides of the outside bag.
13. Turn the outside bag right side out and insert into the inside bag. Tuck the handles between on each side. Using 1/2" seam sew all the way around the top of the bag being careful not to catch those handle loops in the seam.
14. Turn the bag right side out through the opening in the lining bag. Sew the opening closed and push the lining down inside the bag.
15. Press and top stitch around the top of the bag.
16. Measure the bottom of your bag. Make a sturdy bottom if desired. We used a strong, thin plastic from the hardware store. Many hardware stores will cut these to size for you and you can make several from one sheet of the plastic. Thin plywood or heavy Timtex will work as well. You can cover the bottom with a fabric sleeve too if you like. Our plastic was smooth and this was utilitarian so we did not.
*Catalog Xpress will print templates for placement of embroidery.
For more tote projects you can go to these Keeping It Simple projects:
Designer Grocery Bags (but we use these for just about everything.)
Quick Sunday Bag
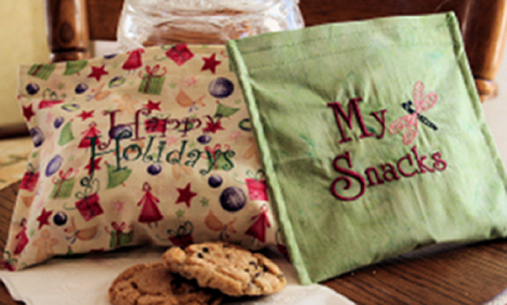
Little snack bags
Bags and totes make easy gifts and there is one that is just right for everyone.
Take care,
DB