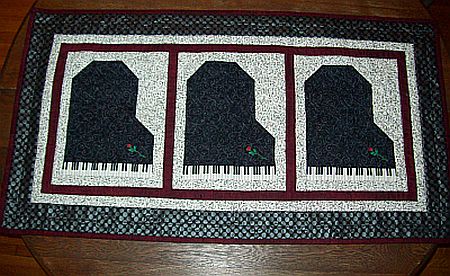
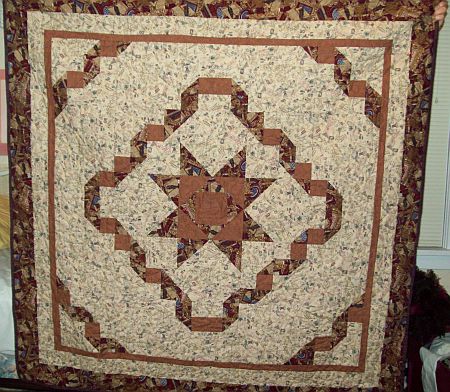
The subject matter this time is probably one of the “testiest” that I have approached. We are nearing the end of making a quilt from start to finish. Adding the bind is the best part, right up to stitching down the binding on the back. The photos I am using were made while I was finishing this quilt for my grand daughter. She plays the piano, and the wall hanging was a gift for her 8th grade graduation. That quilt is shown here.
First, decide the width of the binding you like. It is common to make a 1/4inch or ½ inch binding. Next, decide between a very durable, double layer of fabric on the edge, called French or double binding. Or choose to make a single binding which has only one layer of fabric on the edge of the binding. Since I have been making quilts regularly, I have used the double binding, simply because it will last a long time with much use and many washings. As a general rule, you can plan to cut your binding strips about six times the width of the finished binding, plus 1/8th in. That extra 1/8th inch is just a little extra assurance that the binding will cover the entire seam. I nearly always use a ½ inch binding. I just like the look of a generous binding on the edge of my quilts. Many people prefer a 1/4 inch binding. It is entirely personal preference. As an example of cutting strips for ½ inch binding, you would cut strips 3 1/8 inches wide. It is also personal preference whether you cut the binding strips on the straight grain or on the bias grain of the fabric. However, If you decide to cut strips on the straight grain, be sure to cut the strips crosswise of the fabric, or from selvage to selvage. The reason is that there is a very slight stretch in the crosswise grain and that leaves just a bit of ease when applying the binding. I wanted a ½ inch finished binding.
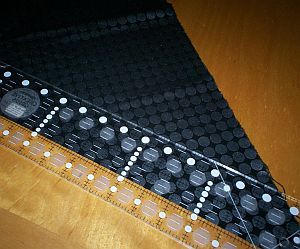
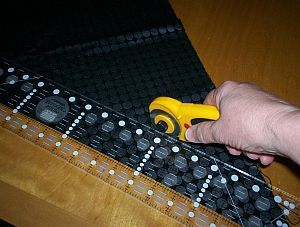
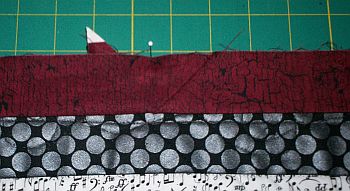
In the photos I am using for this blog, I have cut fabric on the bias of the fabric because I like the look of the diagonal printed dots of the fabric better than the straight-line dots. Borders are not normally cut on the bias because of the stretching that occurs with bias. In this case, the bias border is strictly a design choice. Thinking ahead in all aspects of quilting proves to turn out a better product. Visualizing the end product is very helpful. Cutting the border is shown in photo
Note: If you are interested in learning more about cutting borders on the bias, contact me by email and I will help you, or make a note in comments.
The book All In One Quilter’s Reference Tool* I recommended in an earlier blog is very clear about helping to determine the amount of fabric needed for the size of your quilt. After cutting the correct amount of strips, it is time to join all the strips into a long continuous strip of fabric. I recommend joining the strips on the bias to reduce bulk at the joining seamlines. Layer the strips perpendicular to each other, right sides together. Sew the seam across the diagonal. Trim the seam to 1/4 inch. Next, go to the iron, and press the strip in the lengthwise center. This bias strip is normally several yards long.
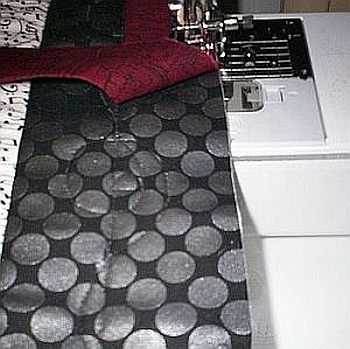
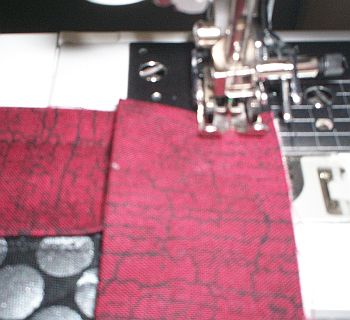
Square up the quilt, and trim edges. If you own a walking foot, it’s a great tool for sewing binding. Because of the kind of hopping motion of a walking foot, the top binding layers are not pushed forward against the quilt body as you sew. Sew the cut edge of the binding to the quilt edge, using ½ in. seam allowance. Sew the binding to the front of the quilt. It will be turned to the back for finishing. Lay the binding evenly along the cut edge of the quilt. Begin stitching in the center on one side of the quilt. Mark the center point of the side where you want to begin and end. I usually begin at the center of the bottom edge. Start sewing about 6 inches from the center and leaving a 12 to 18 inch “tail” of binding strip before you begin. Sew with ½ inch seam, evenly. To make miter corners, sew toward the corner, stopping at ½ inch before the end of the seam. Pivot the quilt one quarter turn to the left and backstitch off the edge of the quilt. Continue sewing all the way around the quilt, mitering corners and stopping about 12 inches from where you began. That will leave a space of about 12 inches between and beginning and ending of the strips.
At this point, I’m going to be brutally honest with you and tell you that making a mitered seam at the joining point of the binding is TRICKY. If you are not a mathematician or engineer, you may need a lot of practice. Hang in there . . . It is one of the most satisfying parts of making a quilt. The first time you make a really nice a mitered joining of a quilt binding is great. I checked some of my quilts, looking for a joining that would show up in a photo, but I couldn’t find one that isn’t invisible. (No brag, just fact). The older quilts were sewn in any way I could figure out at the time, with marginal success. BTW. *The book mentioned above has good instruction for joining the binding.
Note: I try to remember some of the things that I have heard that quilt judges look for when judging quilts in a show. One important one that they do check is that they look at the binding carefully to see if the seam allowance inside of the binding “fills” the binding. In other words, make sure that you have made the seam so that when the binding is turned to the back, there is no empty space in the edge of the binding. It’s not very visible until you look close or feel the edge with your fingers, but it is one of the signs of a quality quilt. The details make a difference.
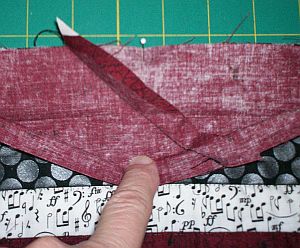
At the end fold each piece of binding strip toward the center of the side, meeting with folds at the center mark. Place a pin at each fold to mark the meeting point. Don’t cut the strip ends yet! Open out the folded strip ends and mark a 45 degree angle on the inside of the binding, centering the 45 degree angle at the pin-marked strip. Pin the seam lines together and check to make sure that your mitered ending fits together nicely. Marking in the right direction on poth ends can be confusing. Make any adjustment to the seamlines now, if needed. Sew the seamline together. When you are sure it’s all fitting well, now you can use the scissors and trim to 1/4 inch.
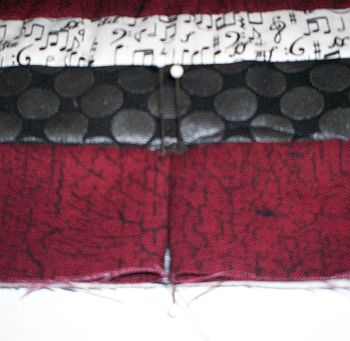
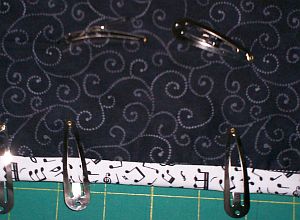
Now that you have sewn the binding to the quilt, check the seam all the way around to see if there any visible places that you need to change or adjust (what is mean here is mistakes) Giggles here are allowed. When you are satisfied with the results, it’s time to stitch down the binding on the back of the quilt. Turn the binding to the back of the quilt. In the past I have used pins to hold the binding down while I stitch. However, a really neat and easy tricks is to use spring hair clips to hold the binding in place while stitching.
This brings us to the end of the quilt we’ve worked on all these months. This is assuming that you HAVE been making a quilt. In the future, I have a few other things
to talk about, like a neat way to make half square triangles, some applique, and making a quilt label. Last time I asked for your input about topics for future LaRueSews subjects. I didn’t get any response. I would really like to continue writing, but without some feedback from you I will not know what interests you.
Last time I said I would include a photo of the quilt I gave to Kasey, my oldest granddaughter to take with her to college. It began as a retreat mystery quilt, last September and turned into her college quilt. It is proof that I can make a whole quilt from my stash. She liked it a lot.
I would also like to tell you some great places to get good quilt fabric. Check out this link one. IMHO it is the best fabric web site I know. eQuilter.com
Keep quilting and meet me here in two weeks.
Stitches to you,
LaRue