My daughter has a baby due in a few weeks and since it is
her fourth she needs to replace a few things.
She uses cloth diapers and needs new wet bags before this baby
comes. She seems to be getting a little
anxious about having everything done and ready even though the baby is not due
for a few weeks yet. So, I have put my
bedroom project on hold to get some of these things done and ease her
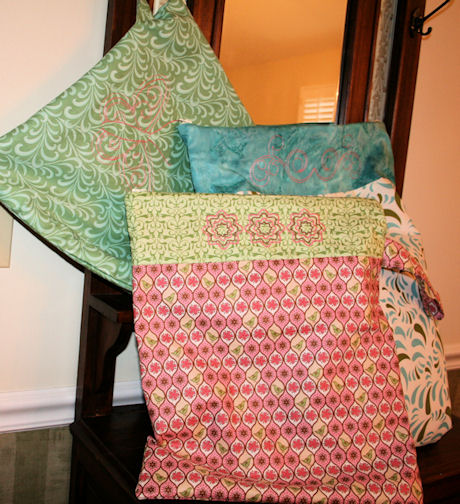
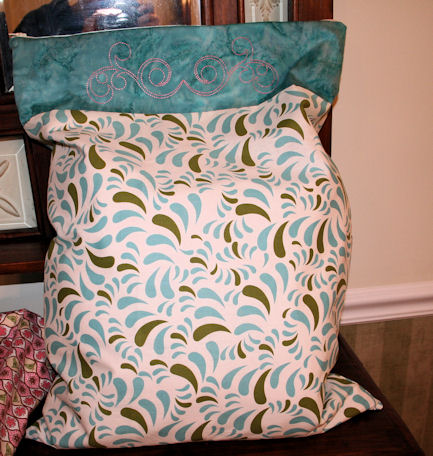
mind. I made two large wet bags to use
at home and a couple of smaller ones for when she is out and about. I had this big piece of fabric that a friend
gave me awhile back so the large ones are almost exactly the same. Here is what they look like:
Here is what you
need to make them:
For the large one
with the border top:
Two rectangles of cotton fabric 19 1/2" X 21 1/2"
for outside of the bag
Two rectangles of cotton fabric 19 1/2" X 6" for
outside border of the bag
Two rectangles of PUL fabric 19 1/2" X 27 1/2" for
lining
One 18" zipper
Embroidery design (you can download the ones I used below)
Embroidery thread
Cut away stabilizer
Lapel temporary adhesive
General sewing thread
Embroider the design
1. Fold the front border rectangle in half both
vertically and horizontally and finger press to find the center and make lines
for hooping.
2. Hoop the cutaway stabilizer and center the
rectangle in the hoop using the lapel temporary adhesive to secure the fabric.
3. Embroider the design of your choice. (The
double swirl is below but it does require a big hoop.)
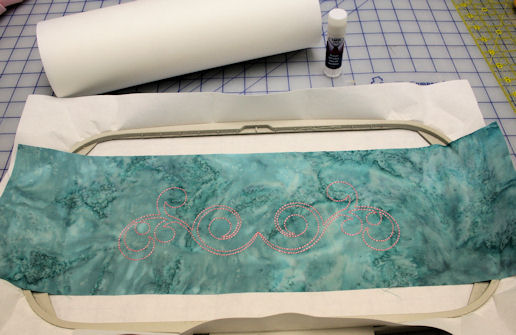
4. Remove from hoop and cut away excess
stabilizer.
Make the bag
Note: I used 1/2"
seams throughout
1. Place the front fabric face up on a flat
surface. Put the embroidered rectangle
face down and top facing downward on top.
Align the top raw edges. Pin and
sew. Press seams toward darker material.
Repeat for back outside fabrics.
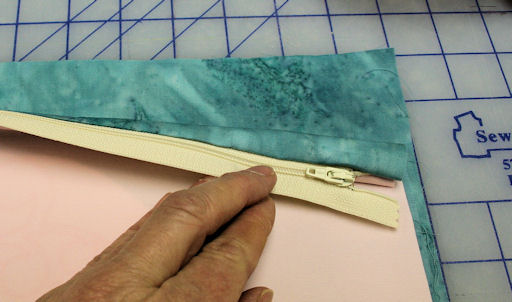
2. Again, place the front
outside rectangle face up on a flat surface.
Align the zipper face down along the top edge.
3. Place a PUL lining rectangle face down over
the zipper and align the edge. Pin in
place. Using a zipper foot sew along the
edge.
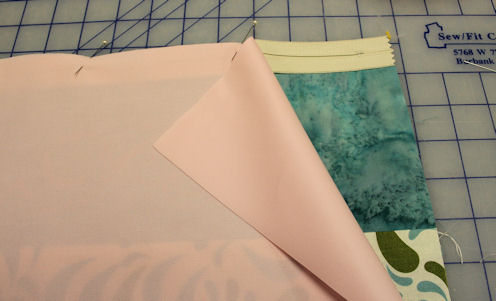
4. Flip the fabrics so the wrong sides are
together.
5. Place the back outside rectangle face
up. Align the second zipper edge face
down along the top edge. Place the
lining rectangle face down over the top of all and align the edge. Pin in place. Using a zipper foot sew along
the edge.
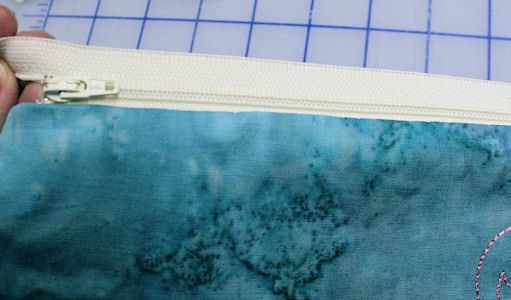
Note: Some of the pictures would not download from the camera. So the images for the next steps were taken from this blog. They are the same other than the project size is much smaller.
5. Open it up so zipper is in the center and
wrong sides are together. (You will not
leave it this way.)
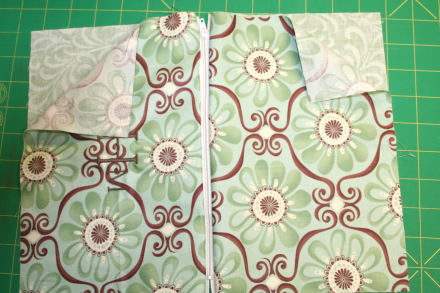
6. Unzip the zipper half way. DO NOT skip this step or you will not
be able to turn the finished wet bag right side out later.
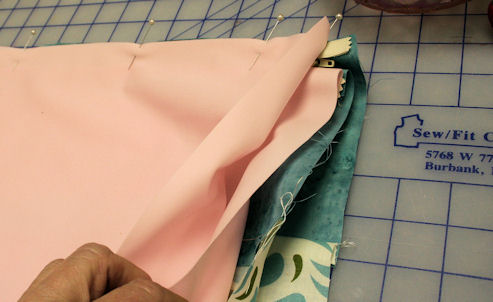
7. Reposition the fabric by placing the right
sides of the front together and the right sides of the lining together making a
really big rectangle. Pin. (For the medium
bags this is where you would align the handle raw edge on the side about a 1"
down from the zipper head between the outside rectangles and pin in place.)
8. Sew all the way around the large rectangle
leaving a 6" opening in the lining for turning.

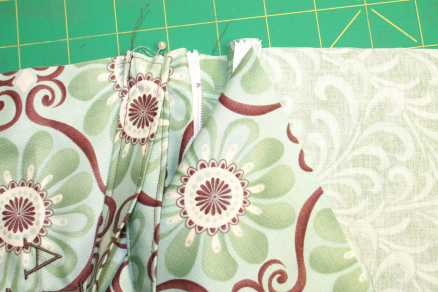
9. Trim the corners. Turn right side out, unzip the zipper. Then
push the corners out on both the outside and lining. Stitch
the opening closed.
10. Push the lining down into the bag. Zip it up Press edges if desired and it is
ready to fill up with wet stuff.
Optional handle
1. With right sides together fold the strip in
half longwise and press. Sew along long
raw edge leaving both ends open. Turn
right side out and press. Top stitch
along both long edges. Set aside until
you get to step 7 above.
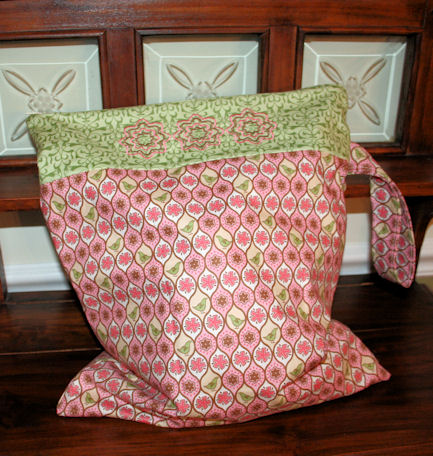
Here are the
measurements used for the medium size wet bags:
For the medium one with the border top:
Two rectangles of cotton fabric 15 1/2" X 15 1/2" for outside of the bag
Two rectangles of cotton fabric 15 1/2" X 15 1/2" for outside border of the bag
One rectangle of cotton fabric 16" X 3 1/2" for the handle if
desired
Two rectangles of PUL fabric 15 1/2" X 19 1/2' for lining
One 14" Zipper
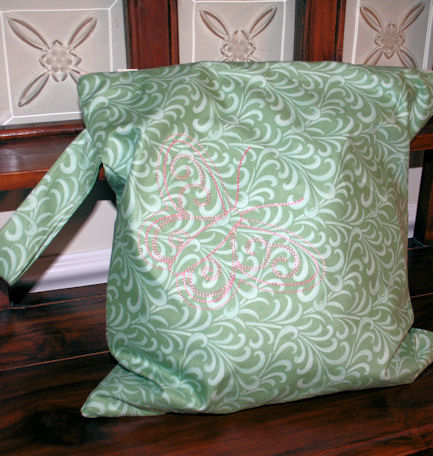
For the slightly smaller medium one without any border:
Two rectangles of cotton fabric 15 1/2" X 16 1/2"
Two rectangles of PUL fabric 15 1/2" X 16 1/2
One rectangle of cotton fabric 16" X 3 1/2" for the handle if
desired
One 14" Zipper
In addition to holding diapers and other baby dirties wet bags are also
great for wet swimsuits after a long day of lounging at the pool and sweaty
towels/clothes after a good workout or hot game of tennis. They are also great to keep under the sink
for those wet items that need to go down to the laundry. When the girls come to stay we will make a
couple more just the right size for their swimming attire. They can pick their own designs and the
oldest can even try doing the zipper I think.
You can download the simple designs that I used here. The double swirl and the huge
butterfly require a larger 6'X10" hoop. The
three scallops design will fit in the 5"X7" hoop.
If you want to create pool style wet bags there are loads of design options on Annthegran.
Lastly, here are a few other baby
blogs from the past. Many have free designs you can download along with the project instructions. There always seems
to be a baby to sew for somewhere close by.
Embroidered Baby Ts
Themed Baby Burpies
Baby Photo Blocks
Easter Goodies for Baby
Designer Burpies
Hope you enjoy your embroidery as much as I do.
Take care,
DB