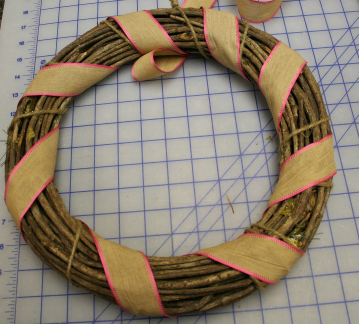
We had our first really nice day here today in what seems like forever. And tomorrow is supposed to be even better. Maybe those 8 foot piles of pushed snow will finally melt. So, with spring in the air the mood struck to create some new things for the front porch. Since I have no car right now I went into my sewing room in search of something that would provide the feeling of spring. There was a pile of burlap sitting on my cutting table that had been there since Christmas. It was originally going to be a tree skirt but we ended up using something else for that project. Burlap is "in" so I began with that and a couple of fat quarters of pink gingham. I had a couple of very old Christmas wreaths that we did not use any longer so I took those apart and used the grapevine portion for the wreath. I wanted it to be quick and easy so I could enjoy some time outdoors in the afternoon. Here is how the wreath turned out:

Here is what you need:
One twelve inch grapevine wreath.
2 1/2 yards of 1 inch ribbon
1/3 yard of burlap
1 fat quarter or various scraps of cotton
Coordinating embroidery thread (Use the same color in the bobbin as in the needle for this project.)
Light weight tear away stabilizer
Daisy and heart outline designs (Download them here)
Monogram Letter (I made mine in Designer's Gallery MasterWorks 3 using the Bean Stitch Appliqué Font but you could most likely use the outline portion of this font in Alphabet Xpress.)
lace scraps
Hot glue gun and glue
Lapel stick or temporary adhesive (optional)
Here is what you do:
1. Wrap ribbon as desired around your grapevine wreath and hot glue in place.
2. Embroider 3 of each of the large and medium size of the daisies. For each: hoop the lightweight, tear away stabilizer and burlap. (or hoop just the stabilizer and adhere squares of the burlap on top.) Embroidery the daisy outline.
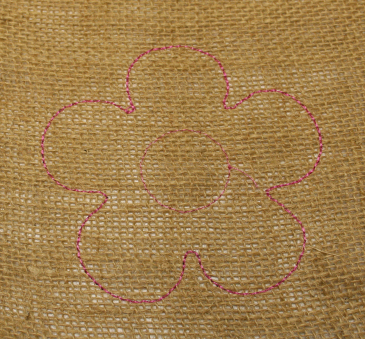
3. Remove from the hoop. Carefully remove the stabilizer. Cut roughly around each daisy outline creating raw edges.
4. Embroider 3 the small size of the daisies. For each: hoop the lightweight, tear away stabilizer and burlap. (or hoop just the stabilizer and adhere squares of the burlap on top.) Embroidery the small daisy outline.
5. Using the lapel stick adhere the corners of a small square of your fabric over the center of the daisy outline. Embroider the center.
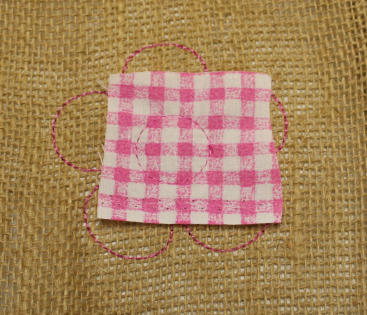
6. Remove from the hoop. Carefully remove the stabilizer. Cut roughly around the center and then around the daisy outline creating raw edges.
7. Glue the daisy centers together with the smallest on top and largest on bottom, making 3 daisies. Glue onto your wreath as desired.
8. Embroider the heart outlines. Hoop the lightweight, tear away stabilizer and burlap. (or hoop just the stabilizer and adhere squares of the burlap on top.) Embroidery the first heart outline.
9. Using the lapel stick adhere the corners of a square of your fabric over the heart outline. Embroider the center heart
10 Remove from the hoop. Carefully remove the stabilizer. Cut roughly around the center heart and then around the burlap heart outline creating raw edges.
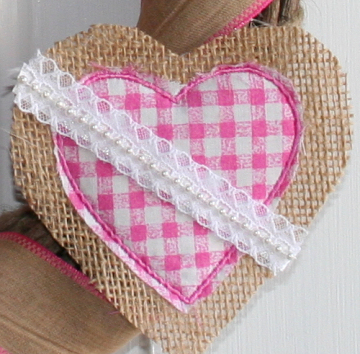
11. Cut a piece of ribbon or lace to fit your heart and glue in place. Glue the heart to the wreath as desired.
12. Embroidery a monogram letter that is almost 4" tall. I layered the stabilizer, pink gingham, and then burlap on top for the one I made. Cut out leaving raw edges. Glue ribbon to back and to the top of the wreath.
This could make a cute decoration for one of those burlap bridal showers that are so popular right now. Or even a baby shower decoration with the baby's name on the heart. If you create other uses for the outline daisies or heart please post them in Annthegran's gallery so we can all share your inspiration.
I hope to add a burlap welcome banner for my long planter and pot wrap to complete my spring porch. What do you have planned to celebrate the coming of spring? Whatever it is make it fun.
Take care,
DB