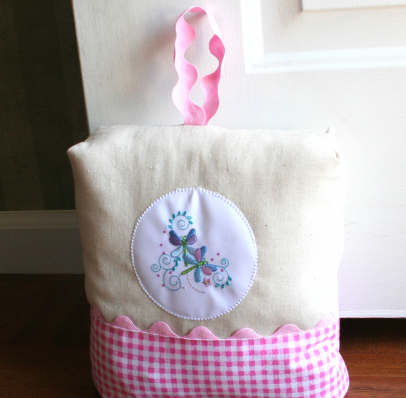
While out one day a few weeks ago my mother and I saw some really cute little door stop decorations done in an Easter theme. I love the fresh spring air flowing through the house but I always have to use a door stop to keep my front door from swinging shut. In the past I have used a fabric covered brick, a rubber stopper, and other items. This, I thought, is a great idea. Today I decided I should make a doorstop of my own. Although I loved the little bunnies on the ones we saw I decided to make mine with little dragonflies. It is quite a bit different in design but I think it turned out just fine for a fun, crafty door stop. Here is what mine looks like:
Here is what you need:
Two rectangles of utility cotton fabric 12" wide X 13" tall
Two accent rectangles of cotton print 12" wide X 6" tall
Two 12" lengths of 1" rick rack
One 10" length of 1" rick rack
One square white or solid color cotton for appliqué
Cut away stabilizer
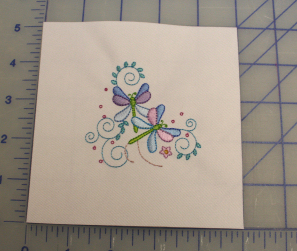
Embroidery design not more than 4" x 4" (Here's the one we used)
Embroidery appliqué shape (Click to download the narrow candlewick circle and the satin circle)
Lapel Stick or other temporary adhesive
Embroidery appliqué snips
Embroidery thread
Sewing thread
Craft stuffing.
Heavy 8" zip lock bag filled with 3 cups sand or cat litter and taped with packing tape
Here is what you do:
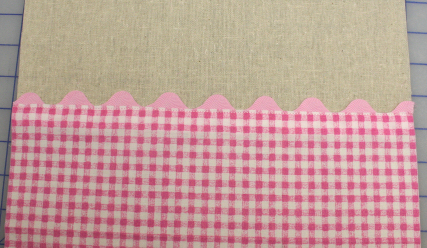
1. Lay one 12" x 6" accent rectangle face up on your work surface. Align the rick rack along the top edge as shown in image. Sew through the middle.
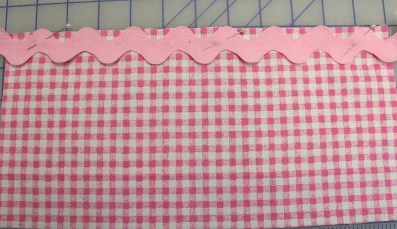
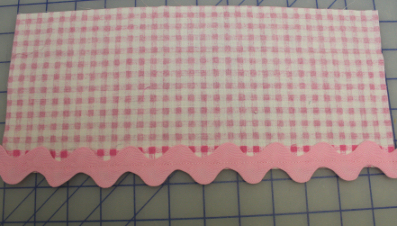
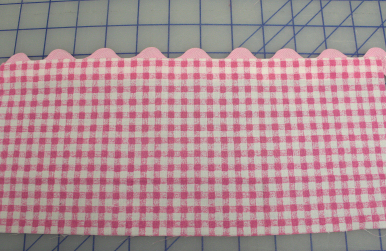
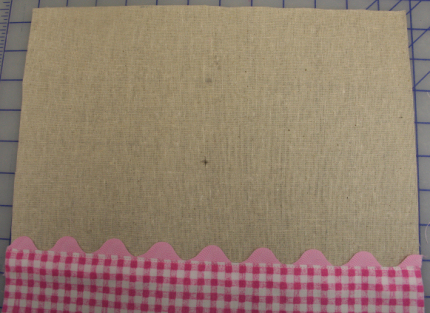
2. Fold to the back and press. Repeat step one and two for the other accent rectangle.
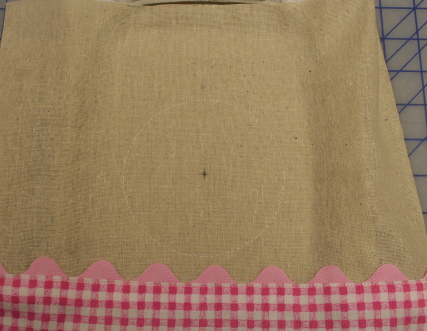
3. Lay one 12" X13" rectangle face up on the work surface. Lay one accent rectangle face up on top aligning the raw edges at the bottom. Pin and sew along the top edge of the fabric just below the rick rack. Repeat for other pieces.
4. Lay one completed rectangle face up on the work surface with the layers at the bottom. Find the center of the top edge, measure down 5" and mark. Set aside.
5. Hoop some soft cut away stabilizer. Using your lapel stick center and adhere the 5" square on top. (Alternatively you can hoop a larger piece of fabric along with your stabilizer and cut it to 5" after you do your embroidery.) Embroider the design of your choice. (The design I used can be found here.)
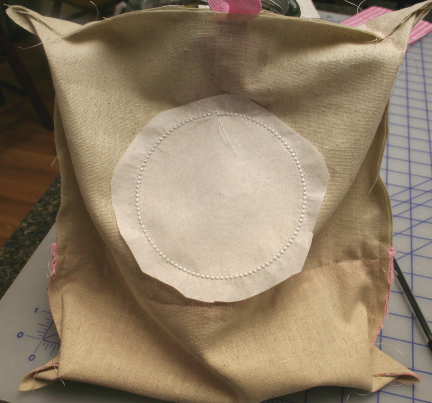
6. Remove from the hoop. Cut the stabilizer to the same 5" square as the fabric square.
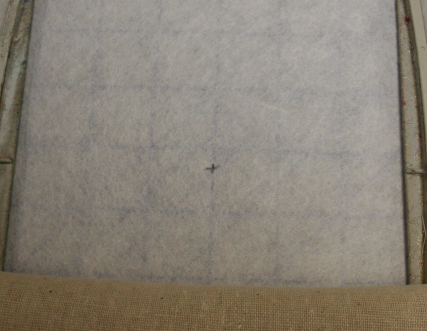
7. Hoop soft cut away stabilizer in a 5x7 hoop. Mark the center. Align the mark on your large rectangle with the one on your stabilizer. Use the label stick to adhere the fabric in the hoop around the edges away from the embroidery area.
8. Embroidery the first color of the candlewick circle appliqué or the satin circle appliqué . (The candlewick appliqué is very narrow so if you do not have the appliqué snips to trim really closely you might want to use the satin circle appliqué.) Remove the hoop from the machine and place on flat work surface. Use the Lapel Stick to put a little adhesive on the edges of backside of the 5" fabric square. Place on top of the circle run in your hoop making sure it is centered and fits inside the circle.
9. Embroider the second color of the appliqué ( I used white for all three thread colors so it would be sure to match my fabric.) Remove the hoop from the machine and place on flat work surface. Using appliqué snips trim closely around the outside of the circle.
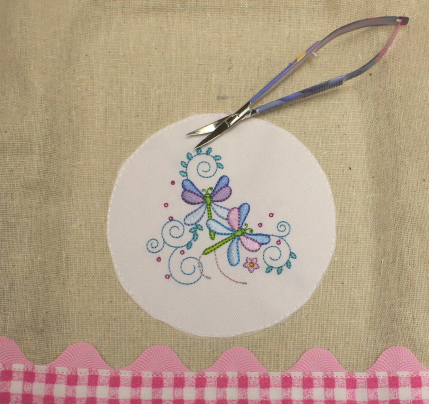
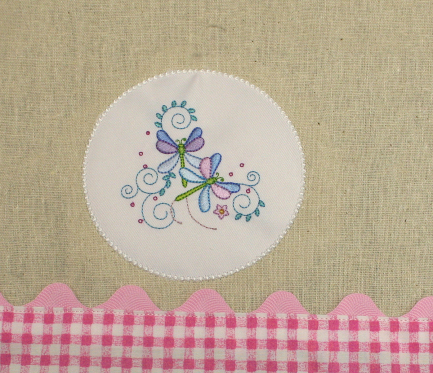
10. Embroider the last color of the appliqué. Remove the hoop from the machine. Cut away the excess stabilizer on the backside.
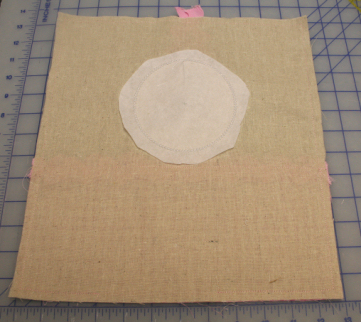
11. Place one fabric rectangle layer face up on the work surface. Place the other rectangle face down aligning all edges. Fold the 10" length of rick rack to make a loop. At the top center tuck the loop in between the layers and let the raw edges stick out about 1/4" at the top. Pin. Using a 1/2" seam sew around edge leaving a 5 inch opening at the bottom for turning.
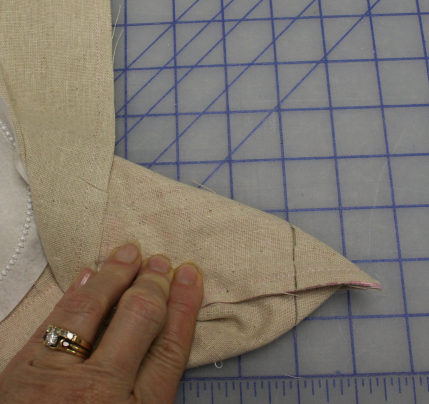
12. While still inside out pull out one bottom corner to a point aligning bottom and side seam. Measure in 1" and draw a line. Sew along the line. Repeat for the other three corners. Your project should look something like a gunny sack.
13. Turn right side out. Poke the corners out. Stuff pretty full with the craft stuffing. Slide the bag of sand inside and add additional stuffing if needed. Sew the opening closed.
When the door is closed it sits against the wall and protects it from the door knob that often hits the wall when the door is swung open. So, if you know someone who has a door that swings freely and won't stay open this little project may be just what you need. It is an easy project that could be made to match any décor.
Take care,
DB