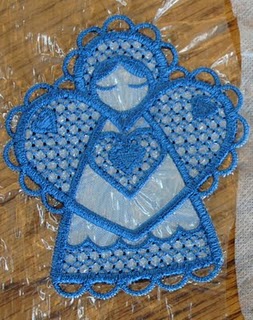
Handmade cards show extra appreciation. This one says, "Thanks for Being an Angel," and includes a lace angel. Other designs could be used to make teacher gifts, bookmarks, holiday ornaments, or gift tags.

Freestanding Lace (FSL) looks much more difficult to make than it is. The magic is in the water soluble stabilizer.
Water Soluble Stabilizer
Water-soluble stabilizer (WSS) is a must when creating freestanding lace. It supports the stitched design. Stabilizer is hooped, the design is stitched out, excess stabilizer is cut away, and the rest rinses away in warm water, leaving only the stitched design.
There are three basic types of water-soluble stabilizers commonly used for FSL. One is a clear or milky cellophane-type film like Badgemaster and the other is a sheer white mesh/cloth-type. The cloth/mesh type also comes as an adhesive WSS, eliminating the sticky hoop syndrome common with spraying hooped stabilizer. All are available on a roll although I have also seen them in sheets.
Ann carries each of these types of stabilizers and they are always half-price for Club members. Check out a blog by The Computerist to see how much she saved in just one year with the various club benefits.
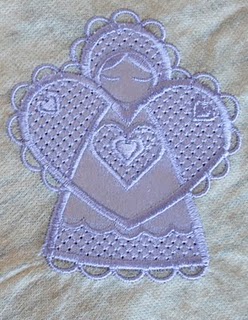
The angel design I used calls for two layers of clear WSS which works great, but I have also used just one layer of the mesh/cloth type and it embroiders just fine.
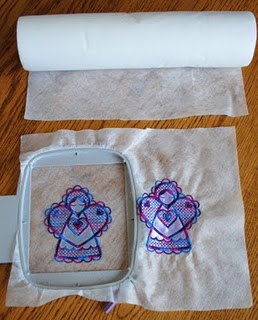
I do not cut separate pieces of stabilizer to fit the hoop. I keep the width of the roll intact and cut a piece of stabilizer that fits the height of the hoop and measures the entire width of the roll. Hooping close to the right or left edge of stabilizer allows more room laterally making it easier to hoop the second time. If I cut stabilizer off the roll and cut it in half to use on a 4x4 hoop, there isn't much excess stabilizer to work with around the edges and it's more difficult to get a tight hooping.
The Card
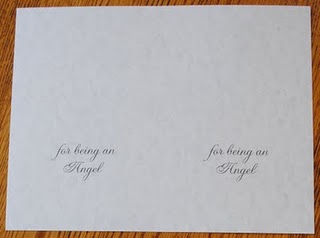
I have included PDF files of the card for you to use. If you have the free Adobe Acrobat Reader program on your computer, the files should print out easily. You could also import them as graphics into a word processing or graphic design program.
There is a file for the front of the card and another for the inside. It will print two cards on one sheet of letter-sized paper. Just be sure to orient the second printed side of the card so that the inside is where it should be on the bottom half of the page when the card is cut and folded.
Most office supply stores sell specialty papers and matching A-2 sized envelopes. Many have copy capabilities if you take the designs in on a jump drive or burn them to a CD. Pretty scrapbook stock will also work if cut down to 8.5" x 11."
Stitch out the FSL design according to the instructions. Unhoop. Clip excess stabilizer from the embroidered item, rinse it in warm water, and lay it flat to dry. It may require light pressing with an iron. When it's dry, insert it into the card and make someone's day!
Tips
- Keep WSS in plastic zip bags or air-tight containers to avoid dampness.
- When clipping excess WSS from a project, put the scraps in a plastic zip bag or container. They can be used when patching another piece of WSS that is accidently sliced or torn.
- The amount of rinsing determines the stiffness of the finished FSL project. The more you rinse, the softer it becomes. Less rinsing leaves some WSS intact in stitches giving a crisper look.
- AnntheGran's brayer is ideal for flattening FSL while drying and also for getting a secure, wrinkle-free bond with adhesive stabilizers. (Thanks Avid Embroiderer. Why didn't I think of that?)