May 13, 2011
carol
Not rated yet
Individual characters (letters, numbers and punctuation marks) from my alphabets and
individual designs can be found on my Stock Design Page. My designs are also available in
packs, as described in this blog. Those can be found here. For designs and packs available
in multiple sizes, choose the size you want in the drop down menu box.
A member of my American Sewing Guild Neighborhood Group brought an interesting pouch
for Show and Tell. (You know how much I like pouches!) This one had pieces of metal
measuring tape in the opening. The metal flexes and bends, allowing the pouch to open
and then snap shut. Hex frames will do the same thing, but cost a lot more than metal
measuring tapes, especially if you buy the tapes at a dollar store. I found a 16 foot
long tape at a dollar store near me. This is enough for quite a few pouches.
I made a pouch with the instructions provided, but didn't like the result: French
seams hid the raw edges, but added a lot of bulk. Also, the pouch would not close all
the way. Here are pictures of that first pouch.
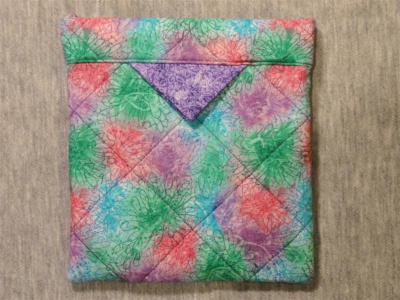

I went back to the drawing board, and my next effort worked much better. The pouch
snaps closed now. I used a double layer of metal tape in each casing to give the
opening a lot more strength. The pouch doesn't want to "park" in the open position, but
it is easy enough to pull open the pouch with the aid of the triangular tabs. (If your metal
tape is stronger than the dollar store kind, you may be able to get by with a single
layer.)
Now that I was satisfied with the construction of the pouch, I wanted to try a new
size. I made this snap portfolio to hold my notebook for sewing guild meetings.
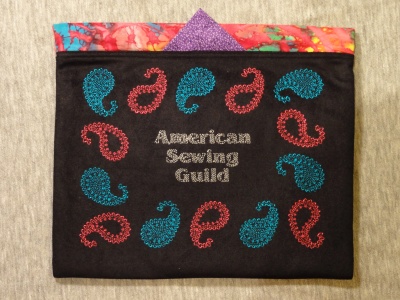
I arranged the lettering with Contour Print 20 and then framed it with
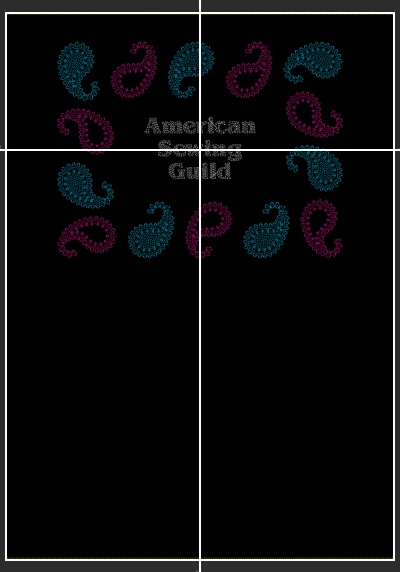
paisley_ABu_frame_200x260. I cut a piece of fabric slightly bigger in both
dimensions than the outer pouch needed to be. The outer pouch was 13 1/2" x 19", so
I cut my fabric 14" x 20". I marked a vertical centering line down the middle of the
fabric, 7" from one side edge. I marked my horizontal centering line 1/4 of the way
down that 20". That turned out to be 5" down. When I trimmed the fabric to size,
I allowed 1/4 of the 19" height (4 3/4") above the horizontal centering line. There
will be a seam allowance at the top, but I find that designs look more balanced when
slightly closer to the top than to the bottom. Here is a picture of how the
embroidery fits on the fabric. The inner outline shows where I trimmed the fabric.
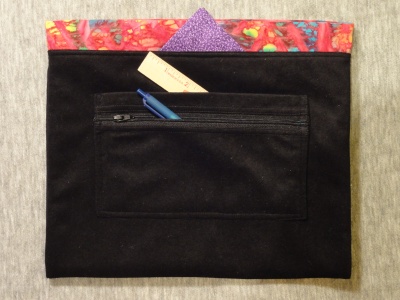
I added a double pocket to the back for pens and other small things I might want
to keep handy. I didn't embroider on the pocket this time, but the instructions to do
so can be found in my Embroidered Double Pocket blog. The pocket is double because
the space behind the zipper pocket is also a pocket. Nice?
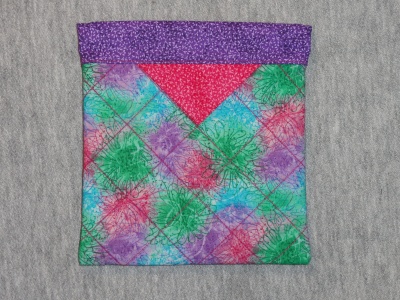
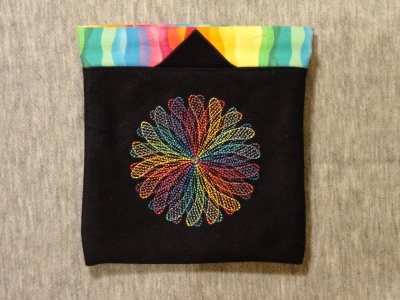
I made one more pouch so that I could try my construction method with a single
layer of metal measuring tape in each casing. It closes better than the first pouch
but is not quite as tight as with the double layer of tape. You can decide whether
to use a single or double layer for your own pouch, depending on the width and
weight of the tape and on the use for your pouch. I used V_18_6-color_96, available
in a set of designs for the 100 x 100 mm hoop and also in the complete set of swirls.
Click here to download the instructions for my version of a snap closure pouch.
The PDF includes fabric sizes for a 6 1/2" x 6 3/4" pouch. It also includes guidelines
for planning pouches in other sizes. The measurements for the portfolio can be
found in that section of the PDF.
Please do be careful, as the cut ends of the metal measuring tape are VERY sharp.
Be sure you follow the instructions for rounding the ends of the tape, covering them with
duct tape, and discarding the trimmed bits safely.
I also recommend that you cut the entire length of measuring tape free of the housing.
If you cut off only the pieces you need, there will be no metal lip on the end of the
tape to keep the tape from retracting into the housing. I cut the tape where it was
attached to the housing. I rolled it up and tied it with a metal twist tie. The metal
wants to spring free but the twist tie holds the tape together. I also keep my tape in
a plastic container. When I want to cut more tape off, I unroll as much as I need, cut
off the pieces, and retie the remaining tape immediately.