Yes, friends of Ann The Gran, Quilting and Machine Embroidery are great partners. They can be used in ways other than making a quilt with machine embroidered blocks. The two following photos are the first of a number of photos what will appear on LaRueSews-Quilts in the not too distant future. That sounds a little like a news lead on the 11:00 P.M. news. "Stay turned, more information in your local news at 11 o’clock." 
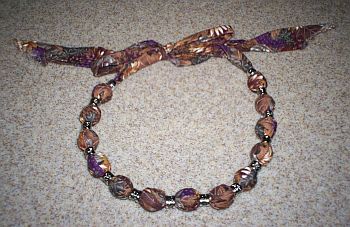
 Yup, that’s what it is . . . a lead-in to the blogs that will appear after my return from an absence from my next two blogs. I will be gone for a little while, but when I return, you get to see the finished product and other things happening in the life of LaRueSews and Company. The first photo is my stitch-out.
What comes next in making a quilt . . . That next step is getting ready to assemble all the pieces for your last step before actually layering the quilt to get it ready for quilting. I know that sounds like an extra step, but it’s an important one. That step is making sure that you have all the “ingredients for the recipe.” When you are cooking, many cookbooks, especially beginning cookbooks, tell you to assemble your ingredients before you begin. The same thing goes for getting ready to layer a quilt. A description of layering is probably a good place to start. When we “layer” a quilt, we are laying out all of the materials that we need to put the quilt together. (Also called a quilt sandwich) Have you ever been in the middle of making a cake and found that one or two of the basic ingredients are not on your pantry shelf? In that case, you have to stop, run to the store and buy those eggs, or baking powder, etc. If we don’t have some masking tape or a measuring tape, the same thing happens. For me, that means a two or three hour round-trip to a sewing store to buy that thing I need to get the job done. I’m really glad that is not the way it is for everyone. Even Walmart has stopped selling the basic tool for sewing. I noticed recently, that they do carry some of the basic quilting tools, but one of the things that quilters and other who sew often use is blue water soluble markers. Can you believe that the last two Wal Marts I have been in no longer carry those pens?!
I will list the things you will need to have to layer your quilt:
- Fabric for backing, pressed.
- Backing and batting should be two or three inches bigger in length and width than the quilt top.
- Batting of your choice.
- Quilt top, also well pressed.
- Masking tape or large clips.
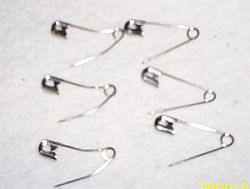
- Non rusting-quilting safety pins.
- Optional, basting thread.
- Large table or use the floor.
- Measuring tape.
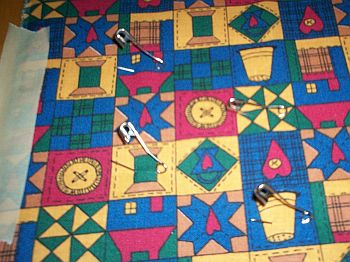
It’s a good idea to unfold the batting a day ahead of layering, to let the batting relax and breath for a few hours. Since I don’t have a project in process to show a full size quilt for layering, I will show you my mini version. Just put your imagining hat on your head, and think along with me and my mini version. The first photo shows the backing that is taped to a flat surface. The second photo is the layered backing, batting, and quilt top, in order.
Layering and basting a quilt is a whole lot easier and more fun if you have a buddy who is willing to lend a hand. (Goes faster too, and easier on the back) Be sure that you have a space large enough to layer the entire quilt on a flat area. I have a large cutting table that works great for most quilt tops. If you don’t have that option, you can baste on the floor if your knees can handle it. First, lay your pressed quilt backing. If you are using a table, you may use large clips to secure the backing to the edge of the table. Smooth out the backing, centering it on the table or floor. It needs to be fairly taut so that it is somewhat tighter than the quilt top when finished. Tape or clip the backing to the table or floor. Now lay out the batting, center the batting on top of the backing. Smooth it out over the backing, making sure all bumps and creases are gone. Next comes the top. Center the top on the backing and batting. There’s no need to clip or tape the top and batting. By now, you have decided whether to thread baste or pin-baste. Thread basting is pretty straightforward. Using long pieces of thread and long needles or curved needles, use long running stitches to hold the layers together for quilting. Basting parallel to the edges in both directions is better than basting on the diagonal. If you are pin basting, use quilting safety pins. Quilting pins have a curve in the middle, making it easier to push the pins through the layers of the quilt. Shop for quilting pins that are the non-rusting variety.
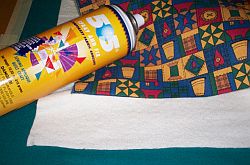
Temporary adhesive can also be used, layering in the same sequence. I haven't used it on small projects, but it works great for wallhangings.
When you are finished basting, remove the tape or clips. You can turn the edges of the backing over the edge of the top and batting to avoid tearing the backing and batting while you quilt. When I finished basting my Indigo Sunset quilt, I basted packaged wide bias tape to the edge of the quilt to protect it while I quilted it. With this quilt, I knew that quilting would be a long process and I wanted a protected edge during the quilting process. It was a great idea, and worked very well.
I have included this link that shows the layering process. Thanks to debbiemumm.com.
Ok, Friends, that wraps it up for this time. I’ll see you back here at Ann The Gran-LaRueSews-Quilts after a short break.
Stitches to you, and see you later,
LaRue