(Me singing) "Rain drops on roses and whiskers on kittens; the smell of leather and warm woolen mittens . . . . " Oops, you caught me, I love the smell of leather, it seems earthy, rich and makes a wonderful handbag. This time, I am doing a luggage tag for a client who is giving it as a gift. I don't even get to keep it.
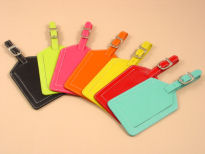
This tag is one of the ‘blanks' from Susan Mars, Allaboutblanks, which is available here at ATG. The colors are luscious, black, lemon, pink, orange, yellow, red and turquoise. What a nice gift and a great way to say - "Here are your keys, isn't it time for your relatives to go home?" (Grinning out loud.)
First a few rules for our project. Designs planned for leather or suede should be fairly open. Dense stitching can cause holes in the soft leather making it weak and possibly creating an opening. I would use an outline style, monograms or a simple abstract design. Please understand that these are a medium weight leather and not the sort that would be on a saddle or other heavy leather.
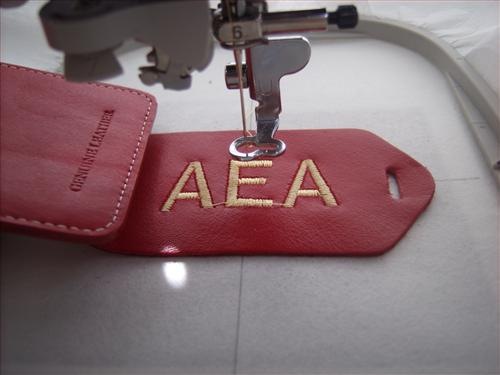
Test sew out the designs on scraps of similar leather if you are able. I had a heavy towel to work with, but a second hand store may have had something more suitable. I used an AnnTheGran heavy cut-away stabilizer with temporary spray adhesive. I avoided hooping the leather and slowed the machine speed from 800 to 350. Susan said she used a regular needle, so I decided to give it a try so I did not have to buy a needle that I won't use a lot. I did use a #70/10 which is a very small needle. Avoid using a large needle because the leather is not forgiving at all.
Speaking of stabilizers, I previously had used rubber bands to hold my rolls and here are the results:

With this stabilizer, I would have to iron it before I was able to use it, wrinkled stabilizer is an oxymoron!
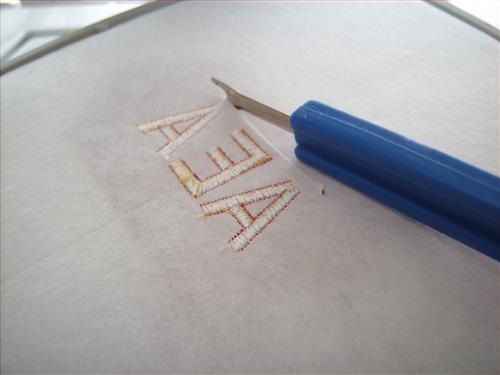
Back to the luggage tags. My client wanted three initials and she chose a font that was preloaded on my BabyLock. The monogram area is barely 2" by 4", and I made some adjustments to the lettering to suit the tag's area.
Following the rule to use the smallest hoop available, I hooped my 4" by 4" and using the "In the Hoop" folding and flexible ruler to mark the center of the hoop. I made a small mark on the leather which was just visible.
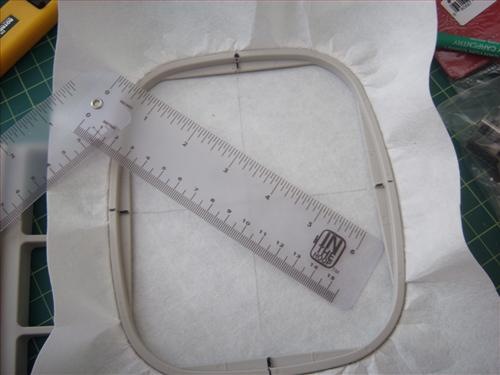
The flexible ruler has a ‘zero' axis, so I centered my tag to my hoop frame. The gold colored grommet in the center of the ruler is the ‘zero.'

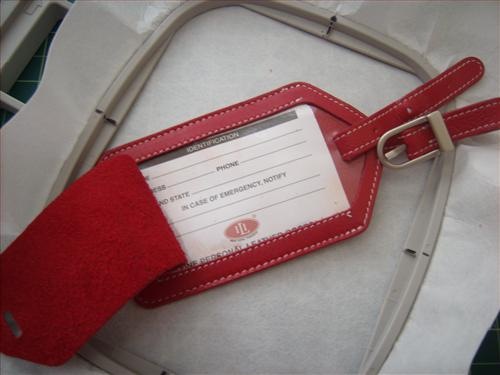
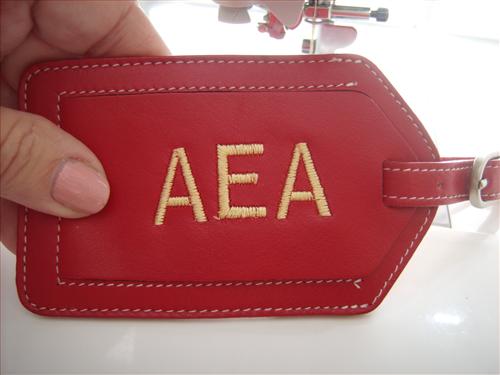
I used a gold-beige color because it offset the red so nicely. I am pleased with the results and trust the client will be as well.
I did a rough cut of the stabilizer with my seam ripper. Incidentally, if you are still using the one that came with your machine - retire it to the kitchen where it will cut open a lot of things. Get a new seam ripper and be careful of its sharpness! Then I finished the cutaway with scissors. Be sure not to take too much away. It won't show except when you fill out the identification. Otherwise, the closed and monogrammed flap will cover the name, address and other information for some measure of safety against identity theft.
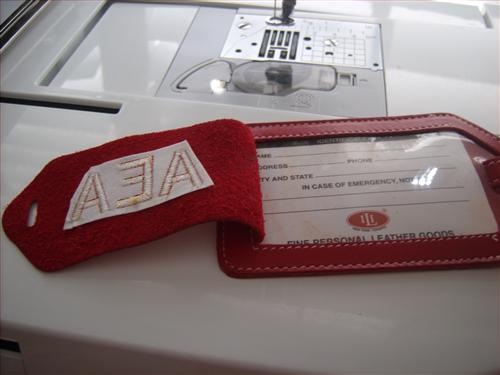
Final and lovely project -
Thank you for joining me again. If you enjoy my writing, tell a friend. If you have a comment, please do that right now, I love hearing from you all.
Enjoy the rest of the Holidays and may health and joy find you and yours always smiling.
Pat