It has finally cooled down here in Arizona, it is 94 degrees today. . . (humidity around 40% - it is a dry heat.)
I found some information on keeping your pumpkin fresher longer. It was the Better Homes and Garden (BHG) Newsletter.
Although there's no way to make your carved
pumpkins last FOREVER, you can still take a few steps to extend their
life. Use these ingenious tips (plus 5 must-have products!) to love your
carved pumpkins for longer.
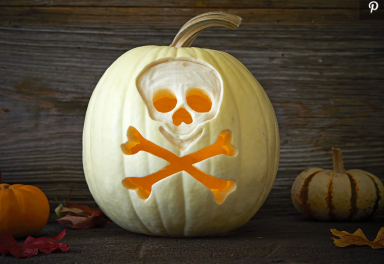
Photo courtesy of BHG
You've scored the perfect pumpkin at the patch and carved the coolest design onto it (like a stencil of your dog), only for it to be rotted before Halloween week even starts. Now what? Don't let your precious pumpkin carving time and effort go to waste: Learn how to make your carved pumpkins last longer.
There are some precautions you can take to preserve your pumpkin
before you even start carving, as well as care techniques to follow
when you're finished to ensure that your pumpkin will be looking fresh
until October 31.
Before You Start…
Let It Dry
When cleaning out your pumpkin,
make sure that the inside is completely free of guts. Before taking
carving tools to your pumpkin, let the cavity dry out; moisture inside
the pumpkin, paired with more air exposure from cuts, will lead to
faster rot.
Leave the Stem Alone
Cutting a hole in
the top of your pumpkin (where the stem is) to empty its cavity may seem
like the natural way to do it. However, cutting the stem off is
actually unhealthy for the pumpkin—the stem serves as the pumpkin's
lifeline, still delivering nutrients to the rest of the pumpkin (even
off the vine!). Instead of cutting an opening around the top, cut one on
the side or back of the pumpkin. That way, the stem stays attached.
Once It’s Carved…
Make a Pumpkin Spray
DIY a pumpkin spray
to keep your jack-o'-lantern looking its best all season. Fill up an
empty spray bottle with water and add one tablespoon of peppermint
castile soap. Shake the bottle to mix contents and spray your carved
pumpkin daily. Peppermint acts as a natural fungicide, which will slow
down the decay process.
Avoid Candles
While a flickering
candle inside your carved pumpkin is festive at night, it’s best to
avoid fire in or near your pumpkin. The flame inside a pumpkin will
cause the interior to dry out, causing it to rot faster. Instead, use a
flickering battery-operated light.
Moisturize It
You may notice that
when carved pumpkins begin to rot, the edges where they're cut are the
first places to deteriorate. Rub petroleum jelly around the carved parts
of the pumpkin to lock in moisture. If you don’t have petroleum jelly
on hand, use olive oil or coconut oil.
Give It a Bath
Pumpkins resist
heat, so shriveling is a good indication that your pumpkin needs a cold
shock. Try giving it an ice bath for about an hour or leave it in
the refrigerator overnight. This tip is especially important if you live
in a region where Halloweens are warm and humid.
Keep Bugs Away
Keep fruit flies
from eating away at your pumpkin. To do this, you need to first make
sure that all pumpkin guts are removed, which is what the fruit flies
desire. If you notice that these pesky insects are hanging around your
pumpkin, place a fruit fly trap nearby.
I
am personally not a fan of a (live) vegetable sitting around on
anything. We don't do it for other holidays, why not setting a new
tradition. I am thinking about all the fake pumpkins available today.
Skip Amazon and head for the Dollar Store. It is loaded with fun items
and, naturally, pumpkins. (Although, years ago, I did grow a yam near my
carport window. It actually grew out the window and flowed down the
carport wall. . . )
Using
the largest pumpkin available (each store has a different selection!),
create my Frankenbird (it was time for a makeover. . .) with a few
tricks, you will have a decoration that will last for years to come.
First, some tips -
- Select
a piece of fabric to match the pumpkin. My plan (yours may vary) is to
create my embroidery and look like it is embroidered on the actual
pumpkin. You can also use a transparent fabric wherein I would trim the
design and glue it to framework. Another possibility would be to use a
fabric that glows in the dark. With all these options, you could make a
dozen and each would be different!
- Choose
your thread colors for their sparkle and/or florescent qualities. There
are glow-in-the-dark threads and using eight colors would make it
really interesting. Since you will likely have faux candle lights on in
the candy distribution center, place your project in a dimly lit area.
Make sure your colors pop, this is no place for pastels.
- I
actually did the outline with two threads, both in the needle at the
same time. I was not going for a significant difference in colors, I
chose a beige and a sparkling gold metallic to blend together. You may
remember my blog on using two threads in a single needle sew.
Your automatic threader may do the threading just fine, or dunk the two
tails in water and finger press them together.
- The
outline for Frank is done in the 'Bean Stitch' aka the triple stitch.
It should do a good job of making itself seen. However, if you like, you
can rerun that color two times, consecutively, for a little more
impact.
I hope
you enjoy my take on this character. His hair is uneven, shoe laces
untied and he actually has a ring - probably a class ring from the class
of 1736. Let me know what you do with the design, use the Comment Area
below. I truly want to hear from YOU!