Project Details
Skill Level: Some Experience
Time Required: 3 Hour(s)
Materials
Embroidery Machine with minimum Hoop Requirement of 12.5cm x 11cm (5" x 4.25")
2 pieces 23cm x 23cm (9" x 9") Fabric (samples shown made with Pink Linen)
1 piece 23cm x 23cm (9" x 9") Iron-on Fusible Stabilizer
1 piece 9cm x 9cm (3.5" x 3.5") Applique Fabric (samples shown use White Felted Wool for Applique). NOTE: Fabric choice for Applique - Non-Fray fabric for a clean edge, Fraying fabric for a ragged edge
13cm - 21cm (5" - 8") length of thin cording or ribbon (length depends on desired size of loop). NOTE: The loop can be omitted for a drawer sachet
Approx. 4 tablespoons of Scented Beads or "stemless" Potpourri for stuffing (stems will poke through the fabric). NOTE: A small amount of Batting or Fiberfill can be added for a puffier look
Rayon or Polyester embroidery threads in desired colors (samples shown use light pink, cream, medium green, and gold)
1" strip of masking tape
Point Turner/Presser
Sewing needle
Applique scissors (optional)
|
Designs used in this project
|
FINISHED PROJECT :

Preparation:
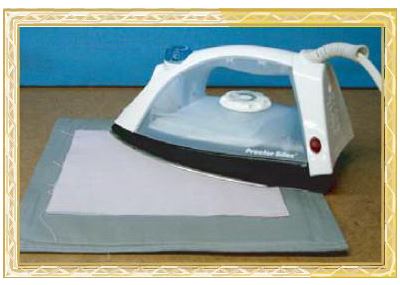
Follow manufacturer's suggested instructions to stabilize one piece of fabric with Iron-on Fusible stabilizer. |
|
|
Transfer each embroidery design to your embroidery machine using preferred method (direct transfer/ATA PC card, etc.) NOTE: There is one design in this collection that a monogram can be added to. If desired, the shield shape can be loaded into your editing software or to your machine for this addition prior to sewing.
Choose your embroidery thread colors. |
Embroidery Sewing Sequences
Please review the 3 sewing sequences that correspond to each sachet.
Heart
1. Applique Placement Guideline - Lt. Pink
Place Applique fabric
2. Tackdown and Cutline - Lt. Pink
Cut out exactly on outer cutline
3. Vines - Lt. Green
4. Flowers - Cream
5. Flower Centers - Gold
6. Loop Placement Guideline - matching thread color to fabric
Place and secure Loop
Place second piece of Fabric
7. Closing Seam and Cutline - matching thread color to fabric
Shield
1. Applique Placement Guideline - Lt. Pink
a) Place Applique fabric
2. Tackdown and Cutline - Lt. Pink
b) Cut out exactly on outer cutline
3. Monogram Background - Lt. Pink
**Monogram (if added) - Lt. Green
Most embroidery machines have editing ability that allows lettering to be added to a design, however, not all machines will let you control where in the sequence the additional color stop will be added. Wherever your machine adds the monogram letter, you will need to select that color stop NOW. Sew the letter and then select through the color stops to get back to color stop 4. (Loop placement guide line).
4. Loop Placement Guideline - matching thread color to fabric
a) Place and secure Loop, b) place second piece of Fabric
5. Closing Seam and Cutline - matching thread color to fabric
Fancy Emerald
1. Applique Placement Guideline - Lt. Pink
a) Place Applique fabric
2. Tackdown and Cutline - Lt. Pink
a) Cut out exactly on outer cutline
3. Floral Motif - Lt. Pink
4. Loop Placement Guideline- matching thread color to fabric
a) Place and secure Loop, b) place second piece of Fabric
5. Closing Seam and Cutline - matching thread color to fabric
| Step 1: |
Embroidery and Construction:
Hoop fused fabric piece and attach hoop to machine. No other stabilizer is necessary.
|
 |
| Step 2: |
Start machine to sew the first color stop in the embroidery design. A run-stitch line in the shape of the sachet will sew and stop. This is the Applique Placement Guideline. (Our sample shows black thread to highlight) |
 |
| Step 3: |
Place small square of applique fabric over the Applique Placement Guideline. Be sure to place evenly over the placement line. |
 |
| Step 4: |
Sew next color stop. This is the Applique Cutline and Tackdown. |
 |
| Step 5: |
Remove hoop from machine and carefully cut ONLY the applique fabric exactly on the outside (cutline) line. Applique scissors are best for this step, but small scissors can also be used. NOTE: Don't worry about any loose threads at this stage, we'll clean them up later! |
 |
| Step 6: |
| Re-attach hoop to machine and continue sewing at color stop 3 to complete the embroidery on the applique. |
| Step 7: |
When all stops in the applique embellishment are complete, start machine to sew the next color stop. This is the Loop Placement Guideline. Only 4-5 stitches will sew here. |
 |
| Step 8: |
Place loop ends approximately 1" to the left of the needle directly over the Loop Placement Guideline. Take the remaining length of loop to the right of the needle and curl it up over the applique area. Secure with masking tape. NOTE: It is important that no part of the loop exceeds the applique shape area. |
 |
| Step 9: |
Place second piece of fabric over the hoop with the right side facing down. To ensure that the loop ends (to the left) are not disturbed at this stage, start the fabric to the right of the needle and slide under the foot moving to the left until the fabric covers the hoop area. |
 |
| Step 10: |
| Sew last color stop in the design. This is the closing seam and cutline. For best results, match this thread color to the fabric. NOTE: A small gap will be noticeable on the inside (seam) run stitches. This is the gap to turn the sachet out to the right side. |
| Step 11: |
Finishing
Detach hoop from the machine and carefully remove the fabric from the hoop. |
| Step 12: |
Cut out exactly on the outer cutline. Turn over and trim any loose threads from the backside of the embroidery. |
 |
| Step 13: |
Square off sharp corners and cut notches on curves. |
 |
| Step 14: |
Carefully turn sachet to right side through the 1" gap. |
 |
| Step 15: |
Remove tape, trim any threads and remove any loose threads around the applique. |
 |
| Step 16: |
Use a Point Turner to get nice, sharp corners. Press seam. |

|
| Step 17: |
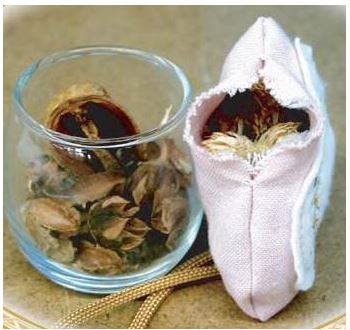
Fill with scented beads or "stemless" potpourri. NOTE: Sachets can be partially filled with Batting or Fiberfill for a puffier look. |
| Step 18: |
Fold in raw edge and close the gap with small hand stitches. |
 |
Designs used in this project
|