Summer is here to stay I think. The vegetable garden that I planted in April has started to produce... I have little green tomatoes on each and every plant. We will soon be able to pick the first zucchini and I think there will be lots more coming on! I have cucumbers that will be ready to pick in a couple of weeks and the peppers and tomatoes that will be ready in July. Dad, Mom, Jon and I are in a race to see who will get to pick the first tomato of the season. So far, I have been able to keep the weeds under control and if the squirrels, rabbits (which have eaten all but one eggplant already) and deer don't get the ripe veggies before we do there should be a bountiful supply this year.
What I do know about gardening I learned from my Dad. As a child we had a huge garden. Thinking back now, I really didn't pay much attention to what my Dad grew, but we always had fresh veggies all summer. We ate them, canned them and sold them all around the neighborhood. Now I grow a garden too, because that is what my Dad did and I really do find pleasure in watching things grow. My Dad can't plant anymore but my brother and I planted a small garden in his yard this year. He and Mom are having fun checking it each day to see how it is growing.
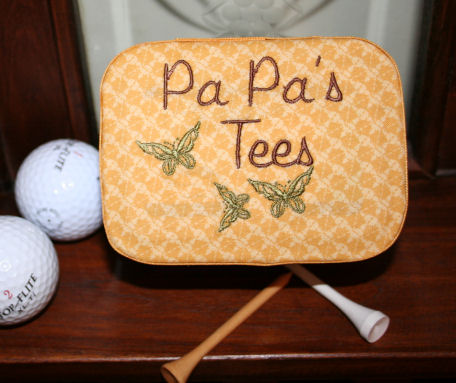
Father's Day is just a couple of weeks away. So for this week's Keeping It Simple project I made these little boxes. The first box we made was a gift card box but I forgot to take a picture and it is gone now.. My husband loves golf so the girls can give him this one.
Here is what you need:
A small box or tin
fabric
an embroidery design that fits (you can download the butterflies below and add your own text)
Trans-Web or Appliease or other two sided fusible for appliqué
tearaway stabilizer
Embroidery thread
temporay adhesive (optional)
What you do:
1. Cut your fabric slightly larger than the area that you want to cover (Or larger than your hoop if you like to hoop it)
2. Iron the transweb on the backside of the fabric.
3. Mark the center of your embroidery on the fabric or pin a printed template in place.
4. Hoop the stabilizer. spray a little temporary adhesive around the edges of the backside of the fabric area and place face up so the center is aligned in the hoop. (Or hoop the stabilizer and fabric.)
5. Embroider the design. Remove the stabilizer.
6. Cut the fabric to fit the area on the box or lid that you want to cover (I traced around it and then cut it out. The transweb will keep the fabric from fraying.
7. Glue (or iron on if the surface of your box allows). Embellish as desired with ribbon, crystals or whatever you like.
It's an easy idea to help you give something special to the Father in your life. If he likes the guitar do a pick box, for the computer lover a USB box, or just do Dad's Stuff.
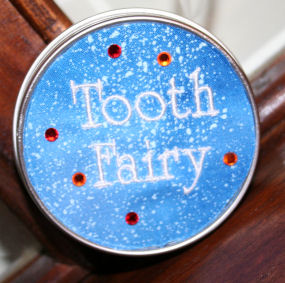
Here are a couple of other cute ideas for little boxes. They are great for gift cards, jewelry and other small gifts such as flavored tea, mints or whatever you can think of. Save any little box you get and recycle it like this. I hope you have fun creating unique boxes of your own.

Click here to dowload the little butterflies border.
In the meantime I had better start looking for some more ways to cook zucchini!
Take care,
DB