This summer we visited some very special friends. At lunch one day, I pulled all my pouches
from my purse to show them. I offered to make the wife a custom pouch of her choice. She chose
the 200x260 mm
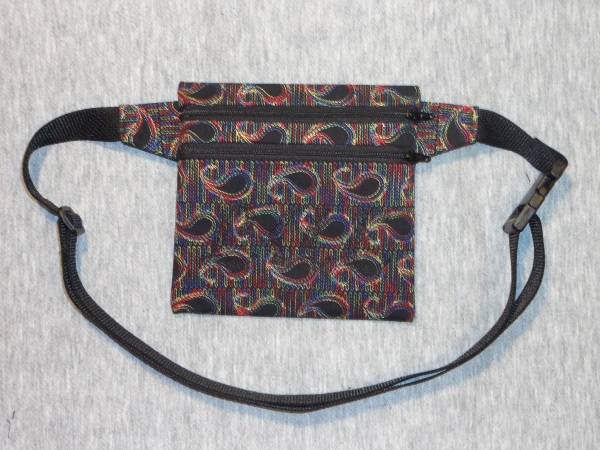
Dog Leash Pouch. She said she would like to wear the pouch as a belt pack.
I had already digitized a taller pouch, made in the 200x360 pouch. I had also already digitized side
pieces for attaching a belt. I hadn't gotten around to making a sample yet, but it was in the works.
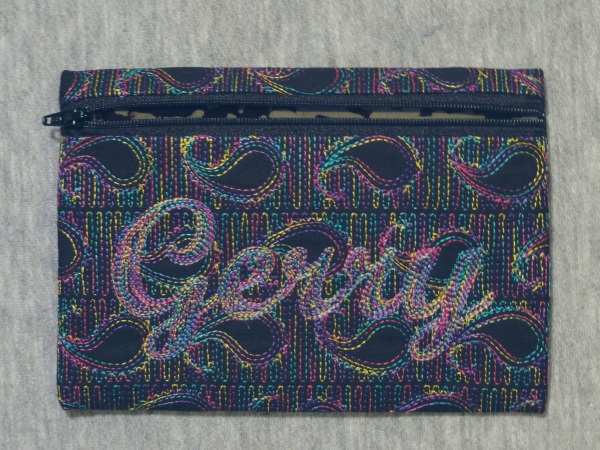
The other thing my friend asked for was a paisley fill pattern. That was not something I already had
but I was able to create the fill motif within a few days of being asked.
Here is a picture of the belt pack I made for my friend. As requested, I stitched her initials in
black rather than a contrasting color.
I made a smaller paisley pouch for my mother. She wanted only one zipper and she wanted her
name in the same thread as the paisley fill. I will talk more about these pouches in a later blog.
Mom and my friend were both very pleased with their pouches. I was pleased with my new fill
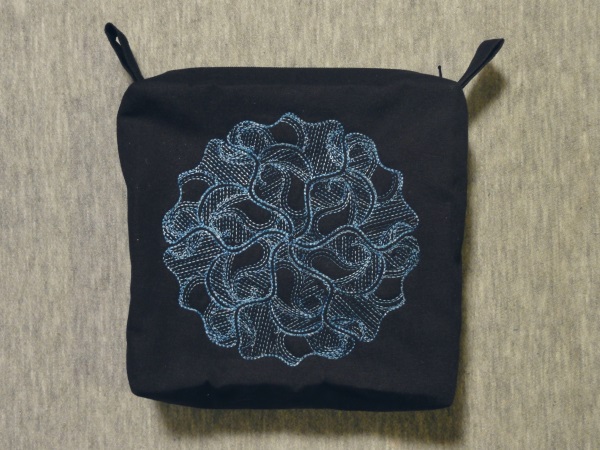
pattern and wanted to play with it some more. I decided to try using it in a medallion swirl design.
Here is the result, stitched on a
Fancy Shoulder Purse made with loops but no strap. This design
fits in the 150 x 150 mm hoop.
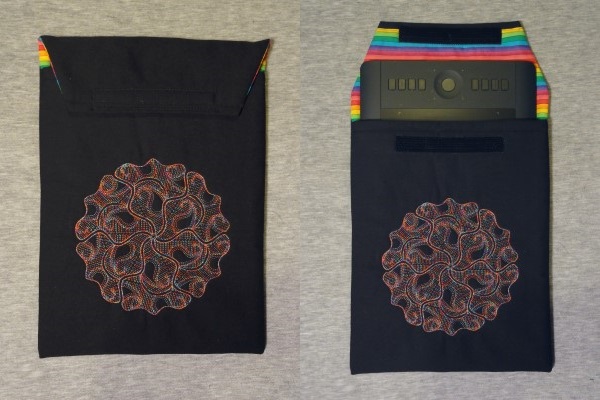
Next I wanted to stitch the paisley design in the 200 x 200 mm size. I dislike making "only"
samples so brainstormed about what I could make big enough for the design I wanted to stitch.
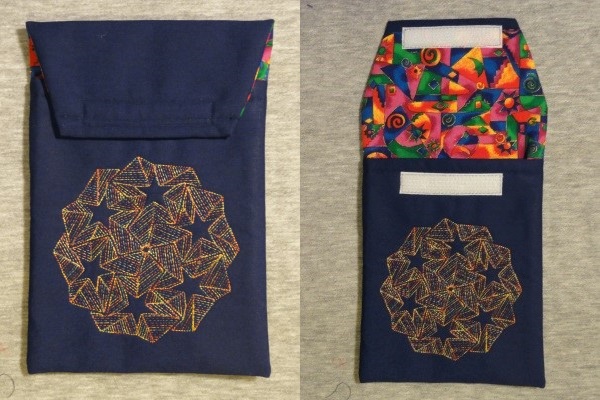
I decided to make a padded pouch for my Wacom graphics tablet. I stitched the paisley swirl with
Superior Rainbows #821. This picture shows my tablet in the pouch, but my laptop computer can
fit in the pouch instead. I'll talk more about the pouch a little later in this blog.
My original
Medallion Swirls use the multi-wave fill included in my embroidery software. The
paisley swirl gave me ideas for other swirls with recognizable subjects and fills. I created a swirl
with American flags and another with stars. In Superior Rainbows #823 red, white, and blue thread,
they look very patriotic. With the gingham motif fill I plan to use soon on a belt pack, I created a
heart swirl. I made a puppy swirl, and then a kitty. When a member of my internet embroidery group
saw the animal swirls, she asked for a horsey swirl. I was able to oblige. Here is a picture of all the
new Fancy Medallion Swirls on
Mug Rugs.
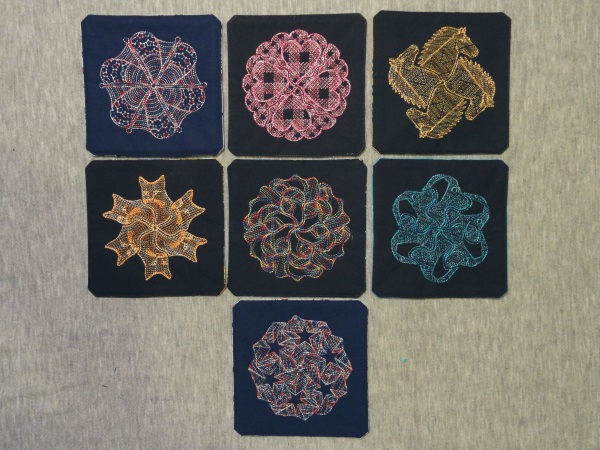
The swirls are available
individually, as a
complete set, and in sets that include either
all seven
swirls for a single hoop size or a
single swirl in all four hoop sizes. The swirls fit in the 100 x 100 mm,
120 x 120 mm, 150 x 150 mm, and 200 x 200 mm hoops. Click the link at the end of this blog to
download a list of all the swirls, along with their stitch counts and dimensions. Each design has a single
color. I highly recommend variegated threads for these swirls, especially Superior Rainbows threads.
Their 1" color change interval gives a lovely all-over color variation.
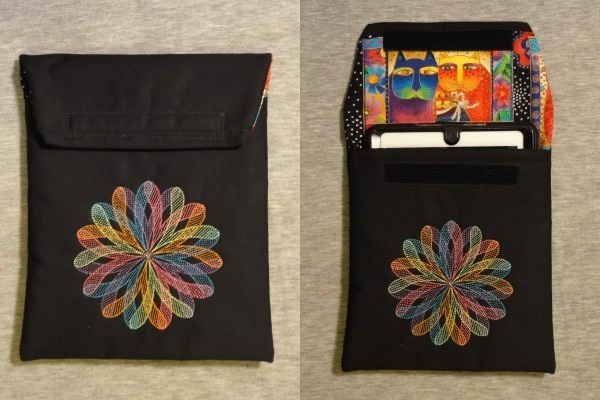
Now, back to the pouches. I created a variety of Envelope Pouch sizes.
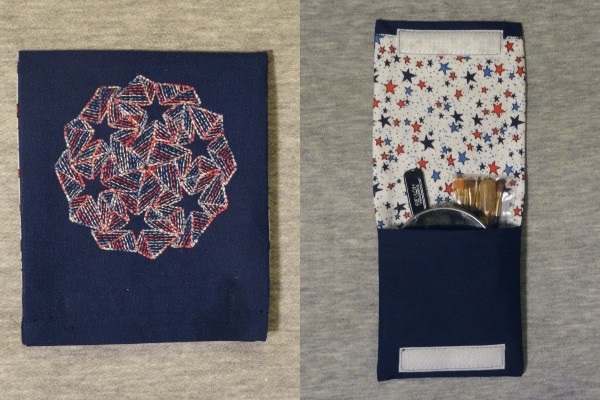
The large star swirl pouch is for my mother, and was made to fit her internet tablet. The small star
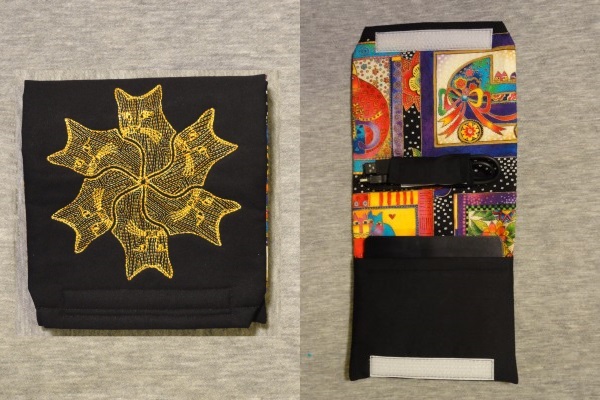
swirl pouch fits a mirror and make-up brushes. I keep my external CD drive in the kitty swirl pouch.
As you can see, I added a cord wrap to the inside of the flap so I don't lose my power cord. When the
flap is folded closed, the power cord sits in the extra space above the CD drive. The pouch with the
V Swirl design is for a very good friend's iPad.
This Envelope Pouch is very easy to make, requiring only six lines of stitching and two rectangles
for Velcro®. For large pouches, I stitch the embroidery design on the pouch front. For small pouches,
I make a larger flap and stitch the design on the flap instead. No hand sewing is required: turn the
pouch right side out through a gap in the seam at the top of the flap, top stitch the opening, and then
stitch Velcro® in place. The only difference in construction between the two variations is where to stitch
the Velcro® on the pouch front. The instructions explain how to draft patterns for both pouch variations.
A handy chart shows the dimensions of the pouches shown here. I include the dimensions of the
contents for these sizes, as well. (If you have a device in any of these sizes, then I have done the work
for you.) The optional cord wrap is also very easy to make and attach. Be sure to attach it to the lining
before constructing the pouch.
Guide_to_Fancy_Medallion_Swirls.pdf (472.9KB)Envelope_Pouches.pdf (5.3MB)