
As a Newbie (we
love YOU and we were all where you are), I can read your questions and remember
when I asked the same things. It does
not matter how much you sew; or how much you have spent on your equipment and
supplies; it does not matter what you know about embroidery; machine embroidery
is different from anything you have ever done.
The good news
is that science is telling us that when we learn something entirely new to us,
it is keeping our brains healthy by exercising it with new things. Sewing/gardening and other activities are
great, but our brains need new challenges.
You have found
a wonderful way to give yourself new ideas and issues.
One facet of
embroidery is the hooping. There is much discussion about the 'dos and don'ts'
of hooping, and I am here to give you some of my findings from my experiences
and what I have learned from others.
Let’s start
with some specifics about hooping with which we might all agree:
- Always use
the smallest hoop which will accommodate your project
- Movement
from the machine, needle and the hoop can cause some shifting of the
fabric creating alignment issues.
- A flat,
sturdy space larger than your hoop is required to complete hooping
- You are creating
a good basis for your work area.
- Make
sure your hoop is free of any glues or other debris
- Clean
with a cloth or cotton swab with rubbing alcohol or vinegar will remove many common
glues.
- Replace a
hoop which is damaged in any way
- A damaged
hoop will mar your project and your machine as well.
- Check and
mark the grain of your fabric before hooping
- You will
want to work with the manufacturer's lay of the fabric.
- Utilize
hooping aids such as double faced tapes made specifically for sewing
- Use all
the tools you need, Picasso had more than one brush and paints and other
items to create his work.
- Not all
projects can successfully be hooped
- Any
fabric with a nap or loops will need to be outside of the hoop. Items such as towels, foam, leather or plastics must
be handled attached and not in the hoop as well. Hoop burn is difficult to remove.
- Not all
projects need to be hooped
- Very
small items like baby projects can be done with a light spray of
adhesive and/or basted to the stabilizer.
Together with
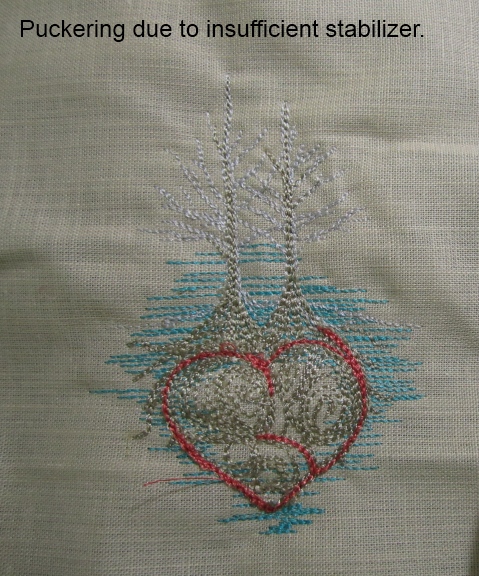
stabilizers, the hoop is equally important to prevent poor registration of a
design. I can remember my initial
attempts at doing FSL with similar results to my photo. My disappointment stemmed from the fact that
I was 95% done with my project before I could see that it failed. The reality is that it failed much earlier,
but it was not very visible. Of course
it is always possible that the digitizing has some variance, but that is very
rarely the case.
Frequently,
there is more than one way to accomplish any goal. Different methods are neither right nor
wrong, just different. I personally have
hand issues and hooping can be difficult for me. For fabrics which are heavy, slippery or in
other multiple ways, difficult to handle, I use a hoopless
method. Hoopless sewing is not for all projects. Once again, a ‘Discovery Sew’ (testing out
your project) will be your best guide.
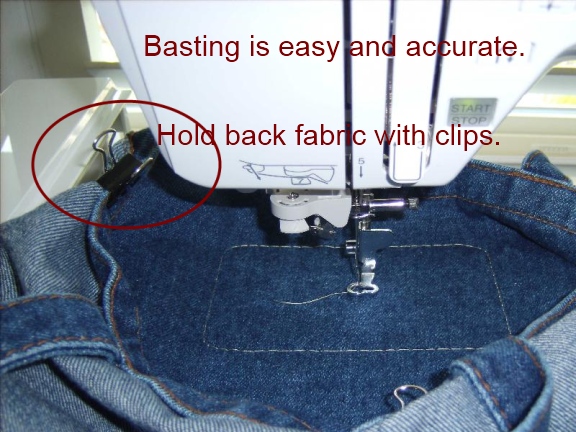
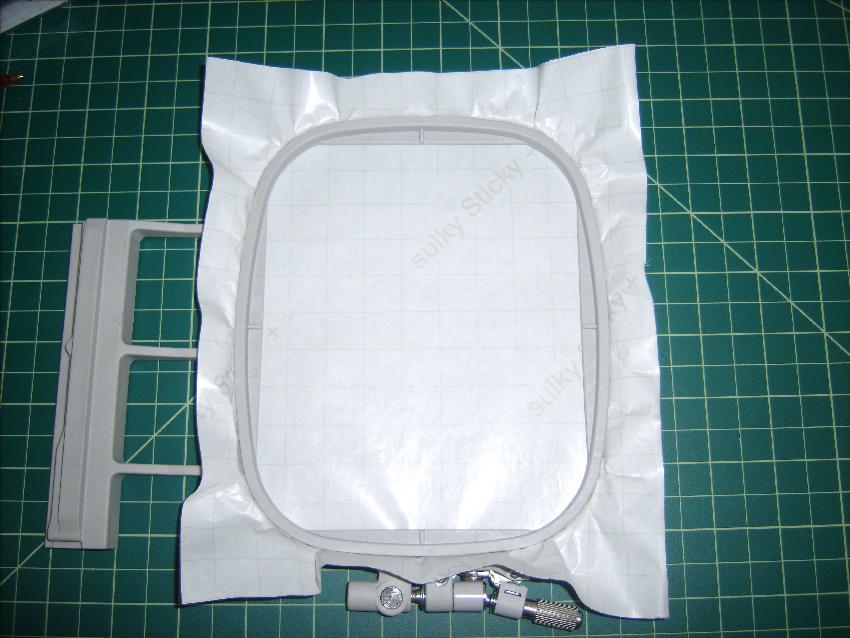
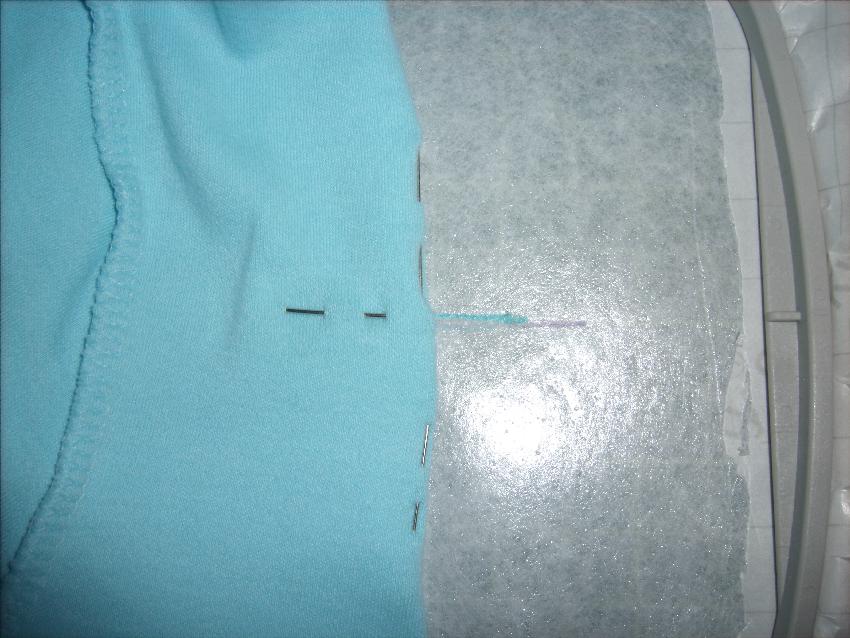
This
photo is a simple method of hoopless.
I was embroidering on a small tote that was difficult to hoop because of
the size and the seams involved.
In this case, I
simply hooped some tear away stabilizer and attached it to my machine. I placed my fabric on top of the stabilizer
which had 4 pieces of a product such as “Wonder Tape.” I then sewed a basting stitch around the area
where the design would reside. You may
also notice that I have clamped the sides to keep them from getting into the
design. This simple method would work
for stable fabrics such as denim and woven fabrics. It is a little less expensive because I am
not using my adhesive stabilizer.
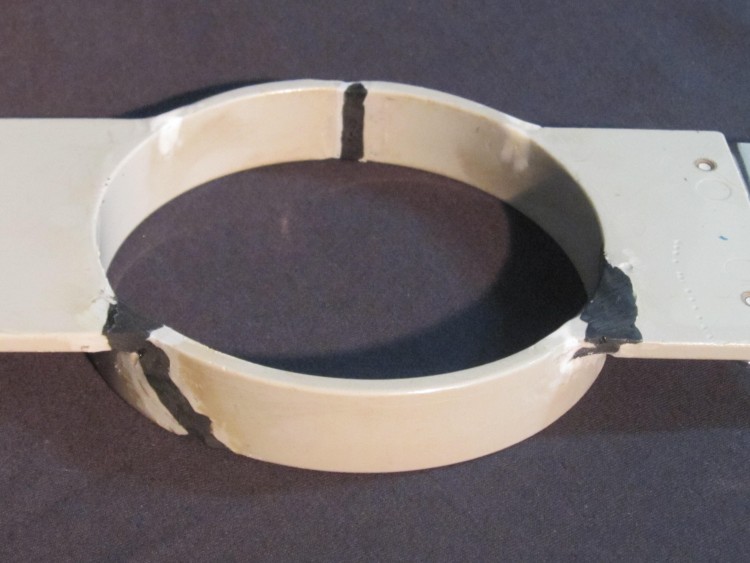
The next
hoopless option is for t-shirts, slippery and/or stretch fabrics. I won’t discuss the stabilizing because
we covered that on my last blog. I did,
however, start with hooping an adhesive stabilizer. While this stabilizer has grid lines on it,
the grid lines

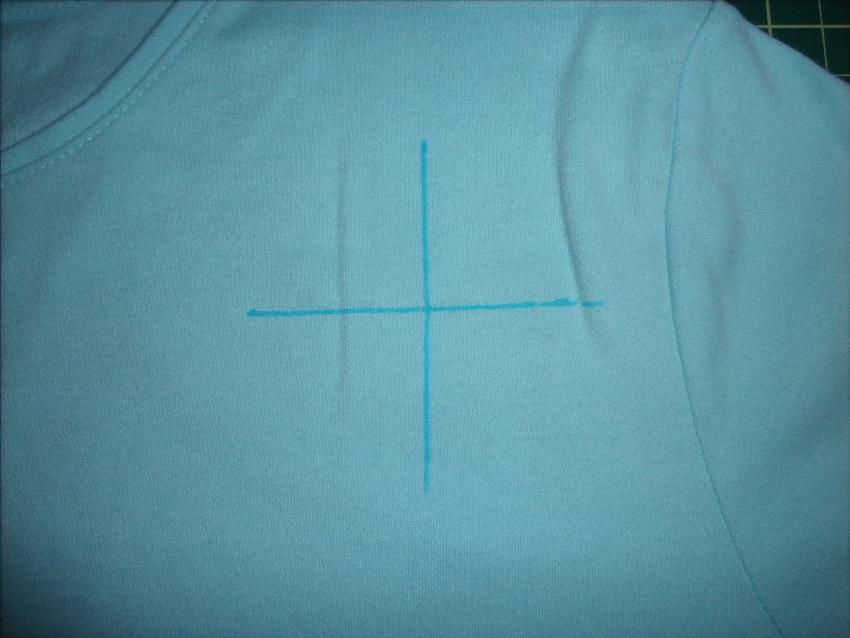
will be cut
away before I place my fabric. I will be
doing my own grid line for placement. The pins are only secured in the top
fabric. My objective is to have a stable
fabric where I will accurately place my design.
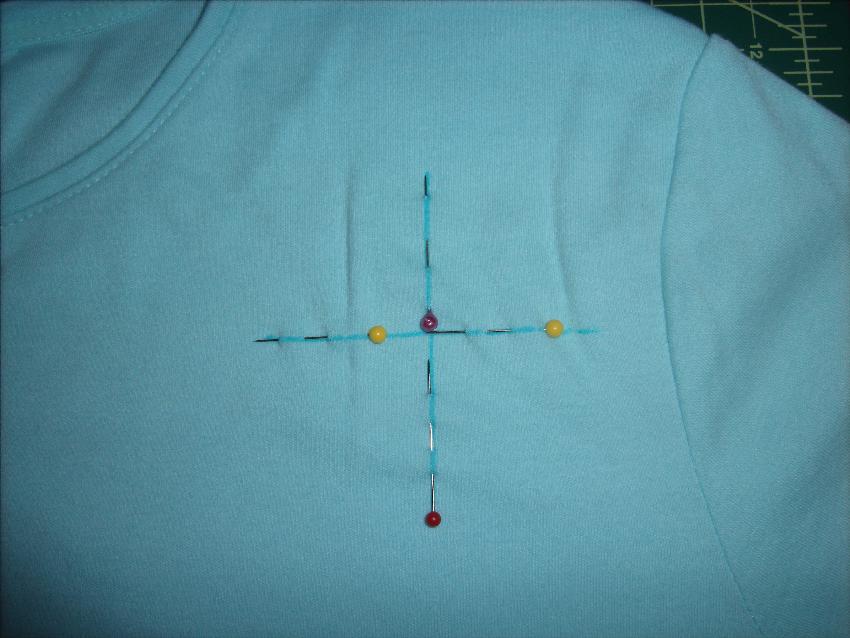
Next, I will be
combining my fabric and stabilizer. The
hoop is also given a grid line.
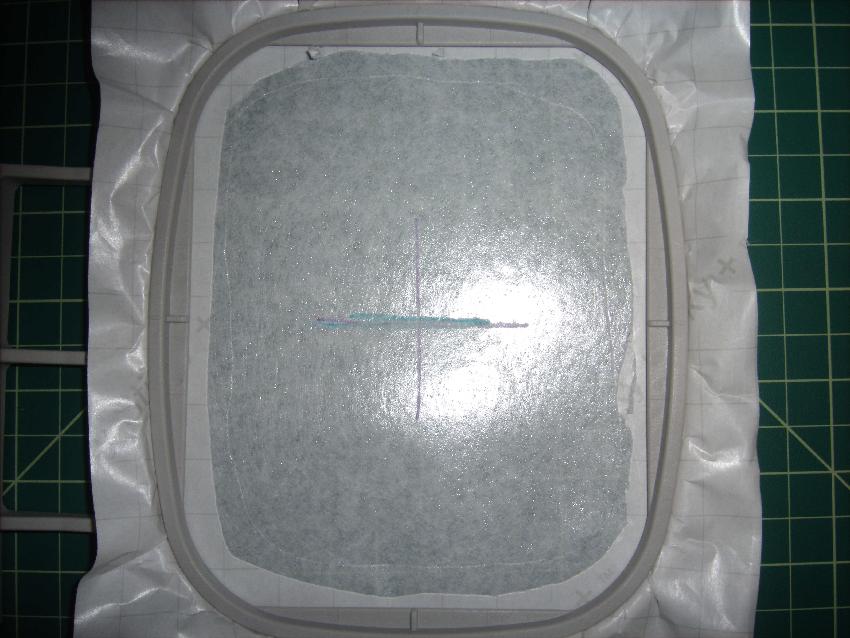
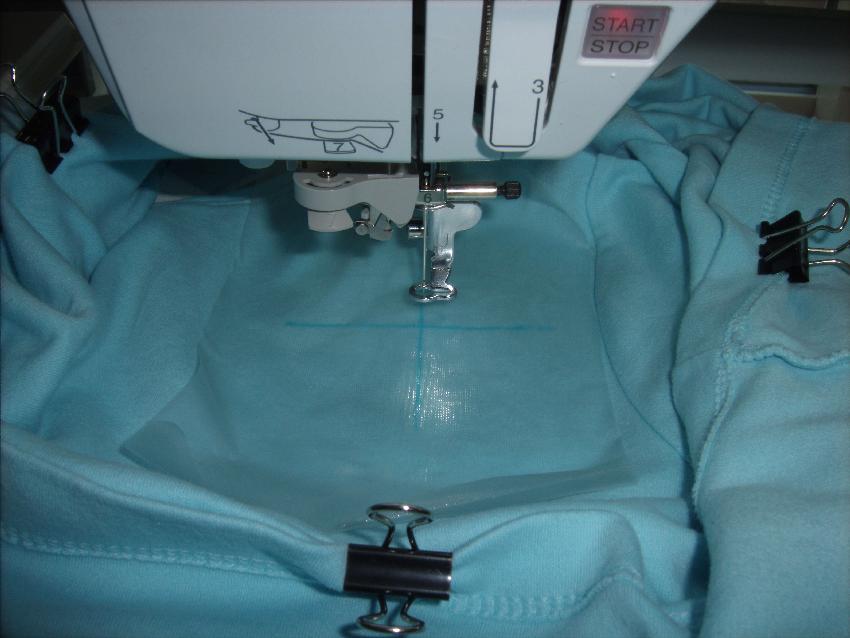
After lining up
my grid lines, I have finger pressed my fabric to the stabilizer. I then place a medium weight, water soluble
sheet on top. Basting is not required
here. I might add basting and/or
stabilizers if there is an opportunity to make the whole project stronger. In this case, I feel it has reached its
stability. I also have placed a ‘no-show
mesh’ under the hoop, just as I would have done if I had hooped the project.
Once you do a
hoopless project, you just may be hooked.
I know that I am. I only use
hooping when necessary and that is not too often. Fabrics like silk can get a ‘burn’ from the
hoop and towels and heavy fabrics can be damaged.
- Bonus:
 Before you do your next project, I recommend that you take your largest
hoop and place it on a flat surface.
Release the tension screw and notice that the gaps are not
perfectly even. Increase the
tension a few turns at a time and notice that your hoop is compressing,
but not necessarily evenly. All
hoops will have some variance and it will be helpful for you to know where
those gaps might occur in a regular project.
Before you do your next project, I recommend that you take your largest
hoop and place it on a flat surface.
Release the tension screw and notice that the gaps are not
perfectly even. Increase the
tension a few turns at a time and notice that your hoop is compressing,
but not necessarily evenly. All
hoops will have some variance and it will be helpful for you to know where
those gaps might occur in a regular project.
- If you have a lot of gaps when your
screw is reasonably tight, you could utilize a gripper like is used in
cupboards to keep dishes from slipping.
It is not expensive and sold in rolls.
If you need something like this, be sure to cut the gripping in strips
and use them on opposite sides for balance of tension.