There are times when attaching a patch or emblem is a lot easier than trying to apply embroidery directly to a difficult item. Other times, it’s helpful to be able to change or remove the embroidered identification easily. For these times, it’s nice to know how to make emblems or patches.
The most important part of making a patch is to put backing on it to keep it from wrinkling. You can apply a sturdy, fusible non-woven from the fabric store if the patch will not be washed on a regular basis. Non-woven fusibles have a tendency to separate from the face fabric which can give the emblem a wrinkled appearance.
If the emblem will be washed, a clear thermoplastic backing will make the emblem more serviceable. Some thermoplastic products also allow the patch to be heat-sealed to the host item. Some are compatible with a household iron.
The easiest – and least expensive way – to make emblems is to buy pre-made blanks with a serged border. Apply your desired embroidery to the blank emblem and you’re done! Unfortunately it isn’t always possible to get the color and style of emblem that you need. In this case, you can make an emblem from fabric and heavyweight water-soluble. Here’s how.
Purchase your desired color in a sturdy plain weave, like Trigger cloth, or twill weave fabric like Bandmaster twill. Get the plain version of Trigger – not the stretch version. Fuse a heavy-weight fusible non-woven to the reverse side.
1. Hoop a piece of heavy-weight water-soluble film, like Ultra Solvy. Stitch a running stitch outline of the emblem shape as a target line.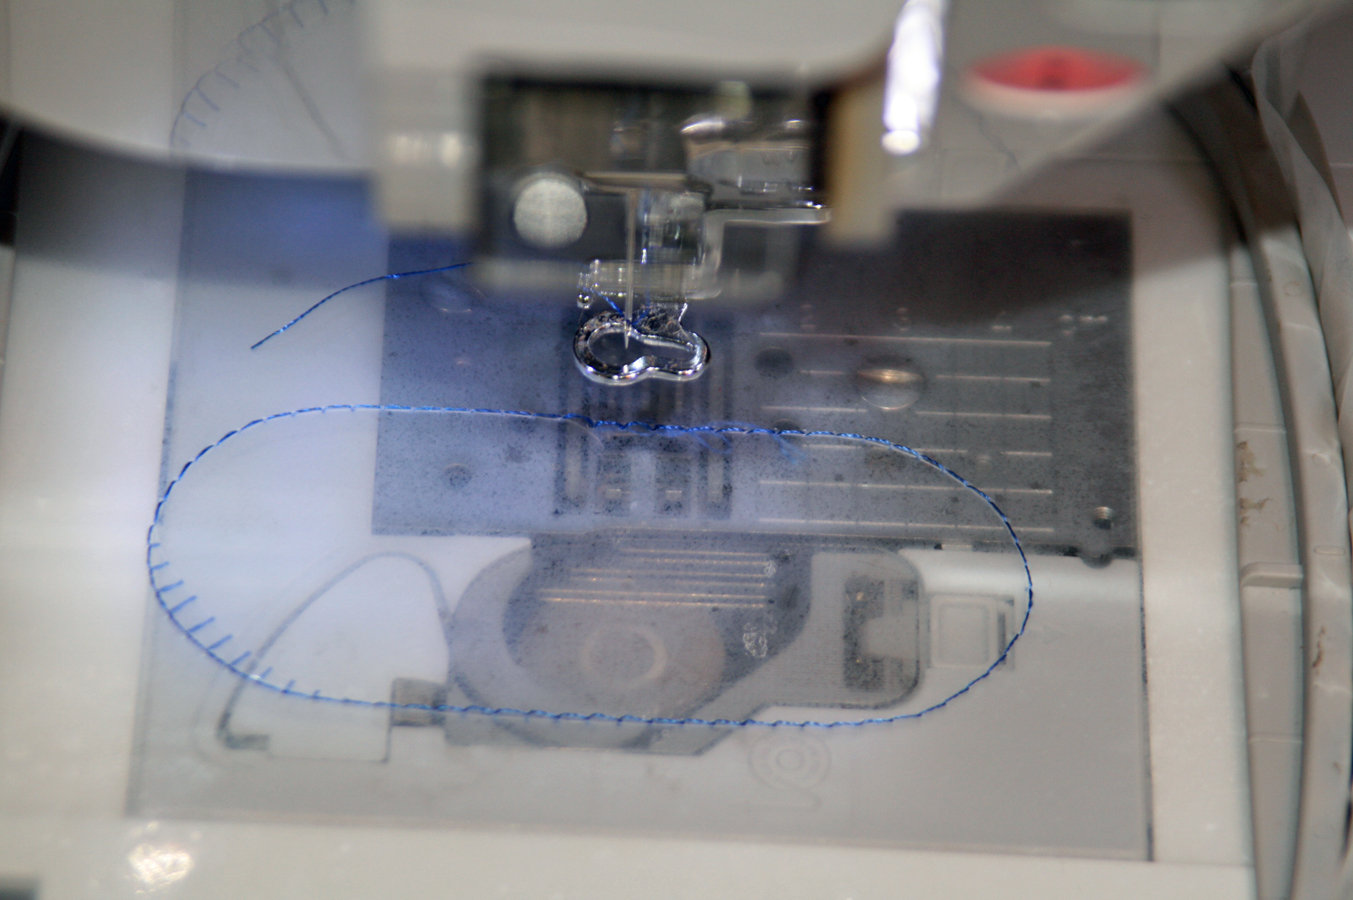
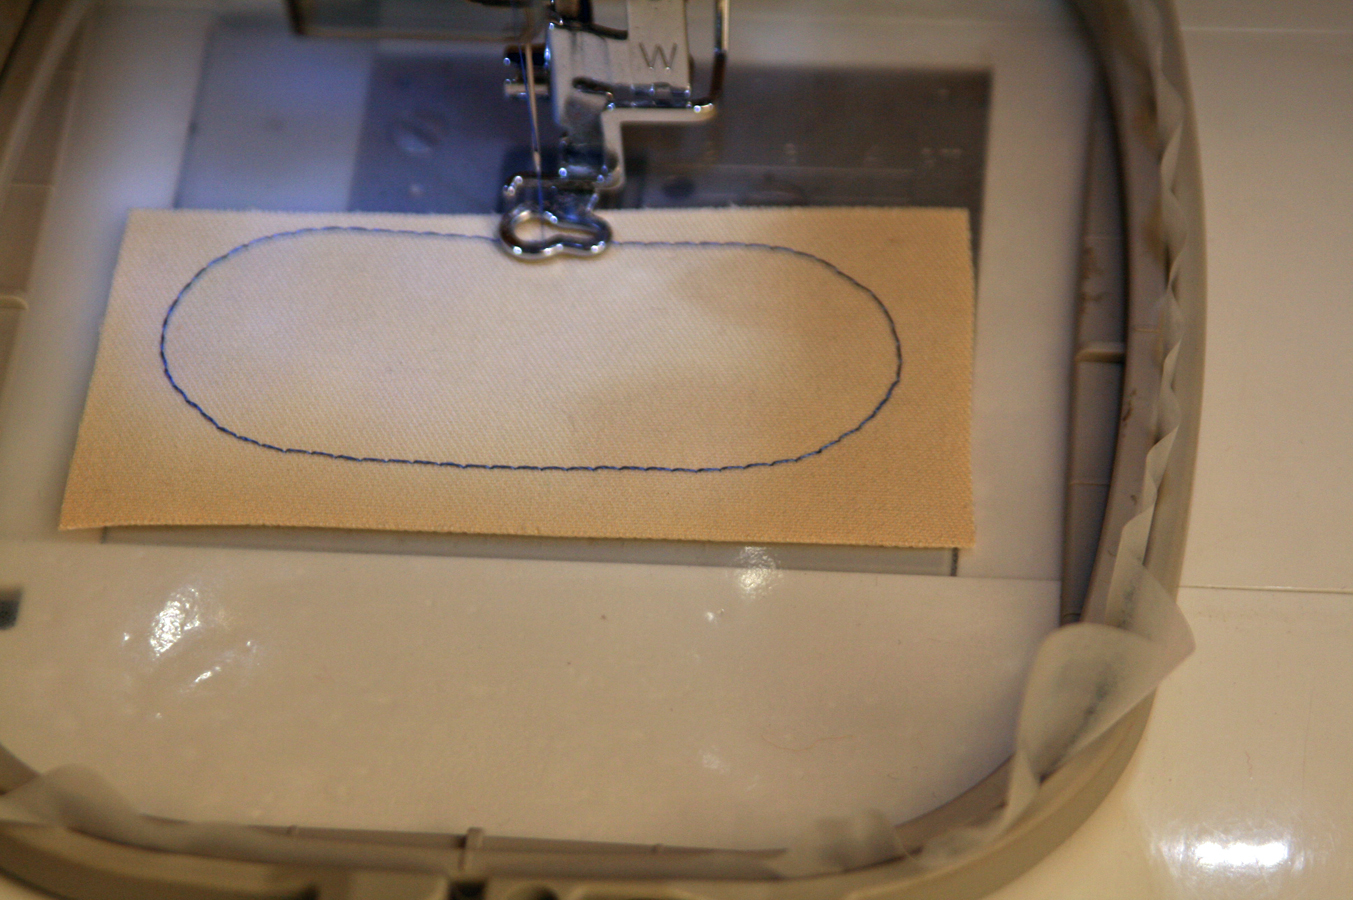
2. Cut a piece of prepared emblem fabric that is large enough to cover the target stitching line and place it on the line. Restart the machine to stitch the tack-down stitch to hold the fabric in place.
3.Remove the hoop and carefully trim the excess fabric from around the tack-down stitch. 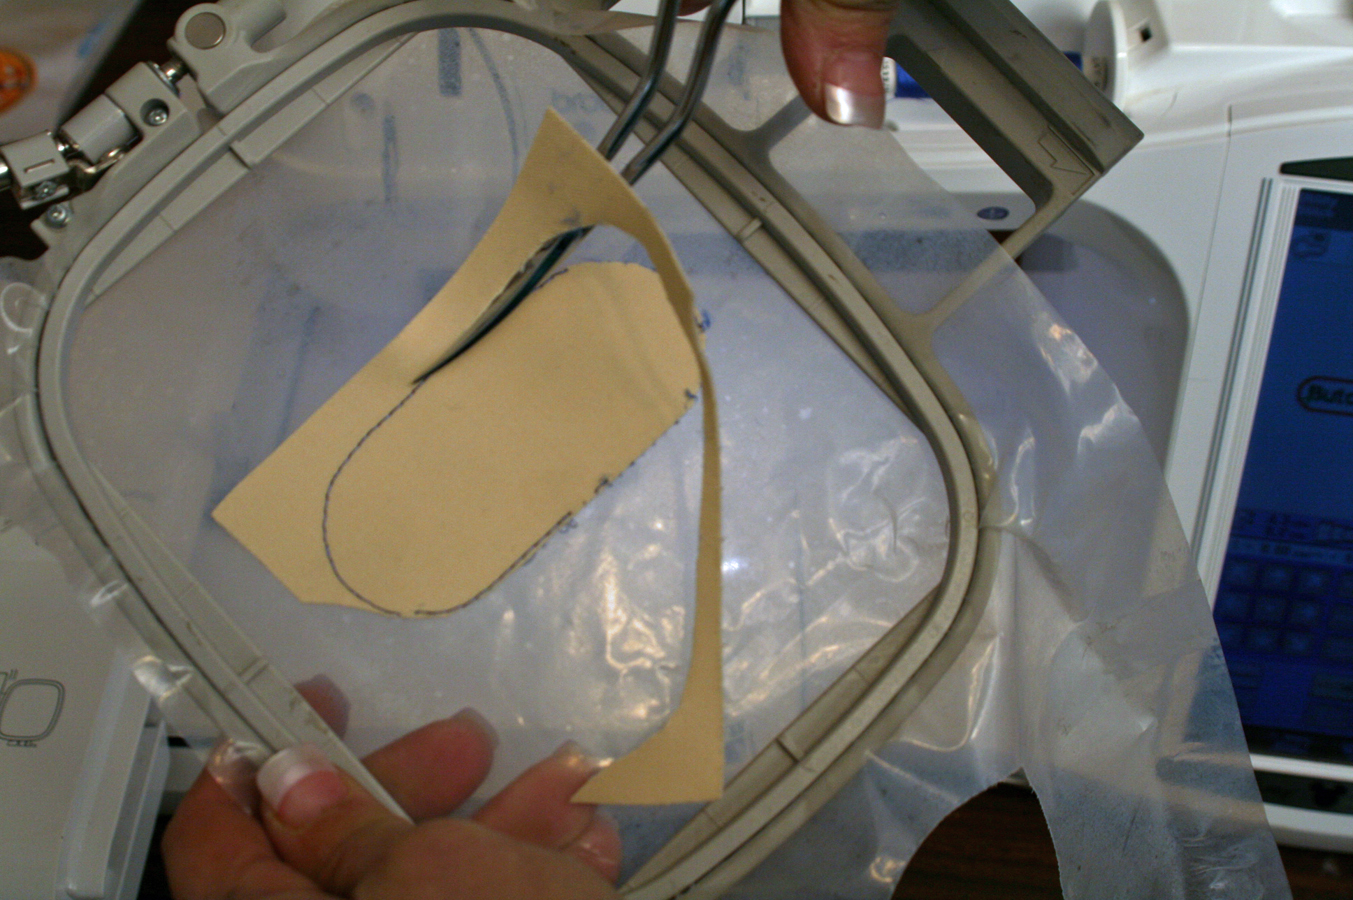
4. Replace the hoop in the machine and stitch the lettering for the patch. Finally, stitch the satin stitched border. When the border is complete, you can pull the completed patch off of the hooped water-soluble base and you have a completed emblem with an overcast border. 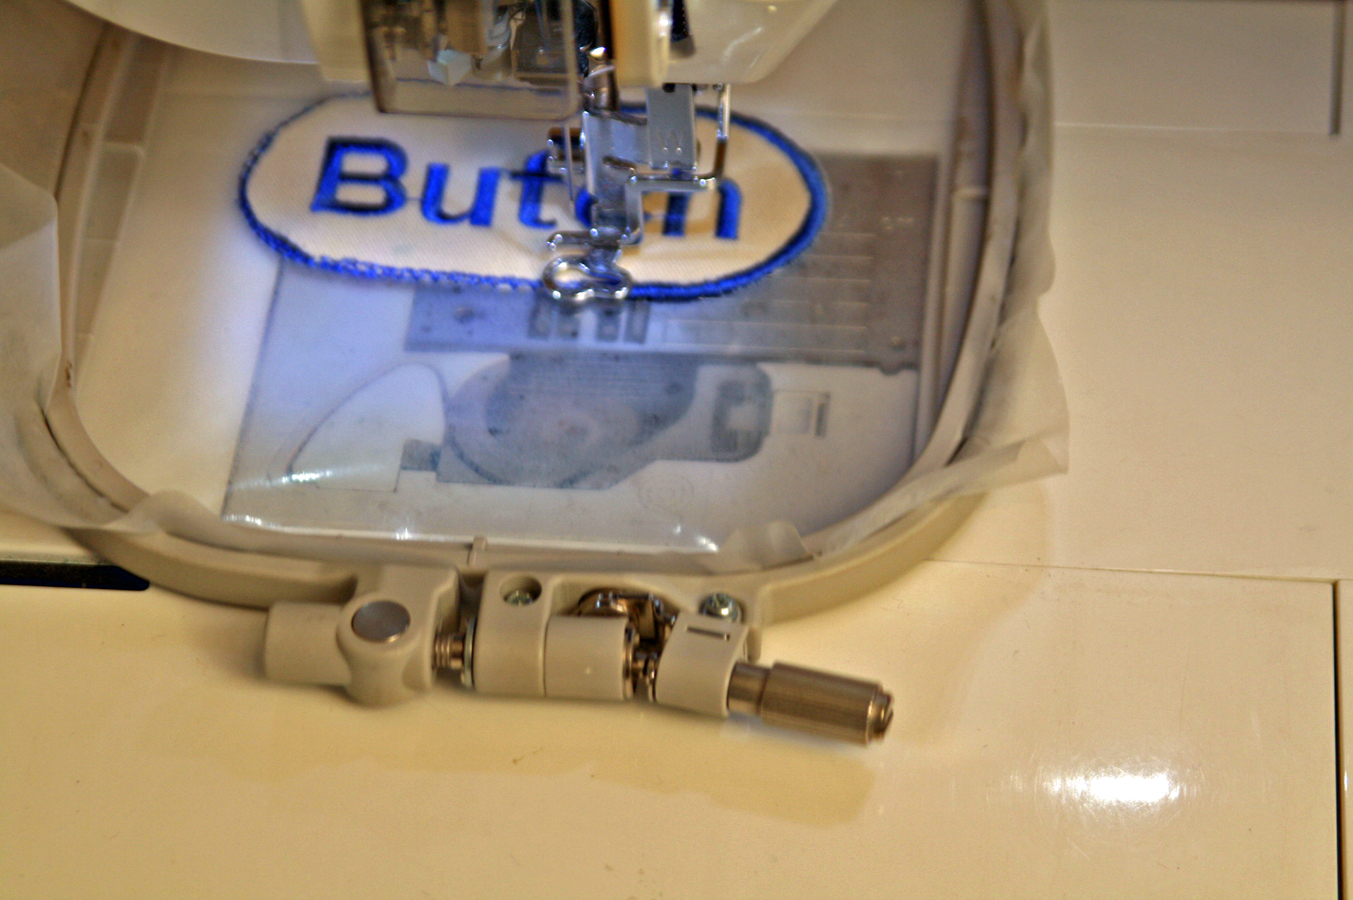
Go to www.myembroiderymentor.com to see my Patch Kit video offer, with more techniques and materials for making professional-looking patches on any machine.