It’s time again for LaRueSews to tell all of you a bit more about Quilting. For the past few months, we have been doing a Block of the Month. This time, it will be little more challenging. The block will be the Arrowhead block, but we’ll get to that in a bit.
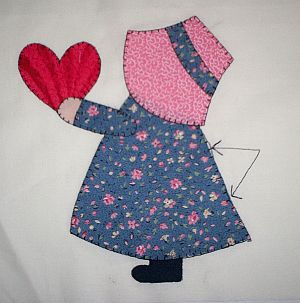
Right now, I want to get back to the applique project we started last time. I gave you a Sunbonnet Sue block pattern, and instructions for using Misty Fuse to make a fused applique block. How did it go? I hope that many of you have completed the block and are ready to do the machine stitching on it. Please let me know how it went for you and what you think of this Misty Fuse method of applique. I love this method and I have at least two projects in mind that I want to use it for.
The machine stitching on a fused applique block is the most fun. The stitching that you add to these applique pieces is just the thing they need to bring them to life and give them the personality that you will love. However, the stitching on these applique pieces can make or break a project. It’s a good idea to do some practicing with your machine stitches before you start the block itself. Learn the different stitches that you can make with YOUR machine. I have a Baby Lock machine that has many stitches for both utility and decorative stitches. However, I know that some of you may not have as many to choosefrom. I suggest that you sit down at your machine with stabilized fabric to keep the stitches from pulling out of shape. Try out the stitches on your machine and find those you like the best. Make a note of them and then practice using them as you would if you were doing applique. Draw a few varied shapes on the fabric and sew on the lines you have drawn. Make curves, inside and outside corners, and corners with sharp points and corners with not-so-sharp points. Learn how to stitch on all of those points and shapes.
For this kind of applique, there is no need to turn under a seam allowance. However, it’s a good idea to wash the items carefully and take note of any raveling. It’s a good idea to choose a thread that either matches or contrasts the applique in your project. I often use either black, navy blue, or dark brown to contrast. Those colors act as an outline for the figure. They also add detail and features, giving the figures more personality. You can vary colors, according to the type of figure and your taste.
I will show you a few stitches on this sample that I have made. I hope that it will help you decide what stitches you like. My favorite is the machine sewn blanket stitch. It has two or three straight stitches and then one straight stitch to the side. The side stitch catches the edge of the applique to hold it down and reinforce. I have also used a narrow satin stitch. It looks pretty, but it shows mistakes and errors in following the edge of the applique more easily than blanket stitch. Also, it is time consuming. At you stitch, keep a close eye on the edge of your applique piece.
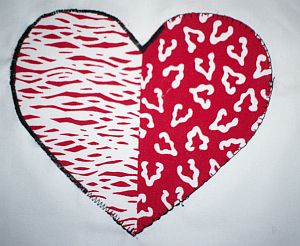
Be sure that the straight stitches follow the very edge of the applique, with the sideways stitches going on to the applique. A space between the applique and the straight stitching, it will show up, and not very nicely. I have included mistakes to show that it does indeed make a difference to be careful while you are stitching the applique stitches. The arrow on the finished block show where I went too far away from the applique fabric and when I over-stitched the applique.
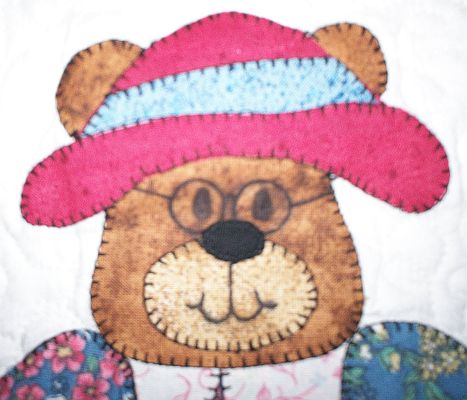
As you begin stitching, take a few stitches in place before beginning to lock your stitches in place. Do the same at the end. You may also choose to pull the bottom thread to the top to avoid the “bird’s nest syndrome.” This is some detail on my Bear quilt, again, you can see places where the stitching misses the applique a bit.
Inside and outside corners are very important when stitching applique. I suggest that you practice carefully to find the right technique for corners. If you get a good book on machine applique, it should give farther instruction about stitching around corners.
I know I have left a lot to your imagination. Please takethese suggestions and use them as a basic guide. Find a good book on applique and then GO FOR IT. It’s a fun skill to learn. You can make so many designs that are not available in machine embroidery sites. Let your ideas beyour guide.
Unfortunately, I was not able to get any good detail photos of sewing applique stitches. It was a disappointment, but after much surfing, I was able to find a video showing how to do blanket stitch on the machine. I have only one disagreement; I wouldn’t use straight stitch to repeat lines I have already sewn with blanket stitch. It leaves a darker line at the space that is over stitched. Take time to view this video. It’s worth it. It is from Sonya’s Snippets.
https://atbquilting.wordpress.com/2009/06/18/machine-blanket-stitch/
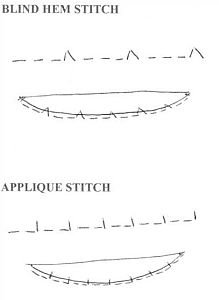
I also found a drawing of the blanket stitch that I like to use. The applique stitch shown here looks much better than the blind hem stitch, though the blind hem stitch is a good alternative.
>>
This is a link for a site that gives good tips for machine applique. https://www.thequiltercommunity.com/Wccd6833a6981.htm
For all types of quilting, I suggest books and products by Harriet Hargrave. I own several of her books and I value her advice on every kind of product. I suggest that you go to her web site and check out all the products and information there. https://www.harriethargrave.com/default.asp
The Block of the Month project is moving right along. These are the names of those who have said they are joining us:
Linda B, Sandra, Sewchicago, mgravey, 65708rjane, Sue, nurse76, mabsy, bonita, Elizabeth, BC, Bonnie, Lavonne, Tanalee, Jeanne, Karen Womack, Karen Womack, tmmatas, maggie milner, tuch2nmi, Annamarie, Debbiej, Shirley N., Sheila.
Please let meknow how it’s going.
Also, If anyone else wants to join us, you are welcome to do so. It begins in my August 28, 2009 Blog, titled YouWish is My Command. All of LaRueSews Blogs are listed
in the Archives box on the left side of this page.
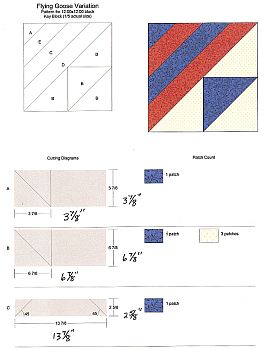
This is our next block, the Arrowhead block.

To download the full size block images click here.
Now I have a Quilter’s tip for you. It’s a tip anyone who sews can use. In this photo, you can see a little “wrapper” on the bobbin that keeps the tread from unraveling. That little wrapper is a Mini ponytail elastic. They are tiny, but they do the job. Also, if you like Mini M & M’s, keep the plastic cylinder containers. They are just the right size for bobbins.
That’s all for this time. Keep stitchin’ on those Block on the Month block and please tell me if you are still working on them and how it’s going.
Marge had the right answer last time about how many Blogs I have written since I began. She will get the promised Fat Quarters. Marge, please send me an email and tell me what your favorite color is.
Stitches to you,
LaRue