Is this the most magnificent swan you have ever seen?
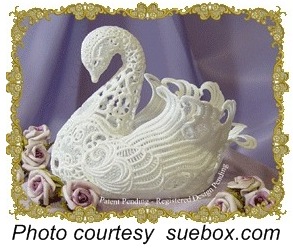
Free Standing Lace (FSL) is a technique unique to machine embroidery (ME) because, to my knowledge, there is no way to do this by hand. You could learn to ‘Tat’ which is similar, but FSL is obviously in a class of its own.
Previously relegated to Christmas ornaments and bookmarks, FSL is creating its way around to other holidays and designs of all kinds. When I personally saw my first FSL design, I was awed because I thought that it was ‘magical’ and I was going to have to learn a new way to ME from scratch again.
Well, it is magical, but not so much that the beginner cannot accomplish something really beautiful and eye catching for children of all ages. (Swan is possibly excluded from that statement.)
I do have to wonder who thought about creating something this unique; they were really thinking outside the box and inside the hoop. They must have begun with a simple square or rectangle that may have made the other digitizers roll their eyes. It was probably quite dense and may not have had much in the way of a design.
I did recently do a few less challenging designs and I am pleased to say, they were successful all the way down the line. I had been trying the 3D style of FSL for several years; but could not get the pieces exactly right. Or I got the edges crooked or they did not match because of the precise requirements of 3D FSL. When I succeeded with that, I tried sewing by hand and machine – well, let me just say that did not work out well at all. I tried fabric glues that never wanted to ‘grab’ together. They left me holding just the first edges of the project for 30 or 40 minutes and then sometimes they did not cure correctly.
When I finally found glue that worked, I could not wait to show you all the results!
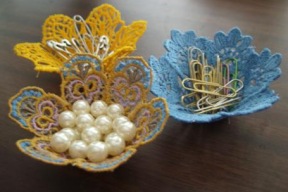
I first photo shows a simple ‘cup’ and the glue ‘grabbed’ on to the lace in about 15 seconds. It was well set in about 1 hour, cured by about 2 or 3 hours.

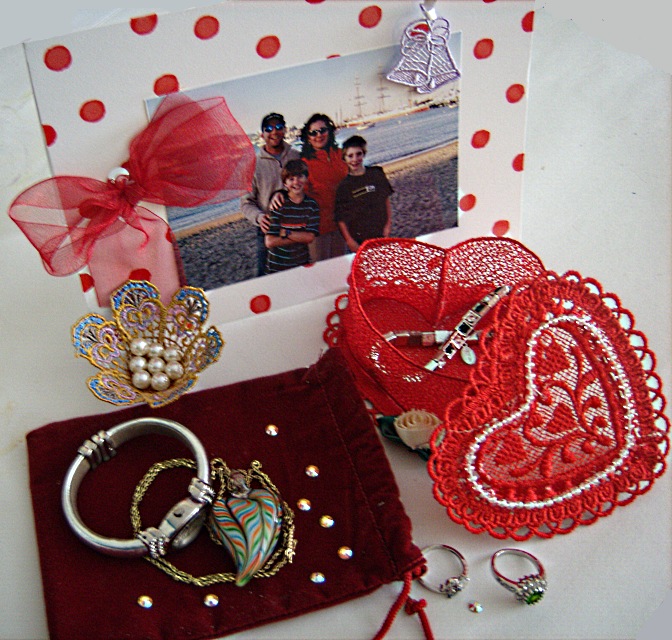
Next came the really tricky gluing project, the heart shaped jewelry holder. The base and the heart wall are sewn in 3 different pieces. Therefore, I had to first glue the wall in the shape of a heart, with some very specific angles. I did the top of the heart/wall separately from the bottom. Again, the glue did its job and I was delighted with the results. After the heart/wall dried, I had to position it on the base and I found that doing one side at a time ‘setting’ the wall on that base worked for me. The top had a small lip as well and I followed the same plan as I did for the bottom.
I also glued small strand of beads to the top, and slipped a little rose on the bottom lip of the box. Everything fit together very well.
I have done many FSL projects before, but they were just a flat design such as a snowflake or Christmas Tree Ornament. What did I learn from this project? A Lot!
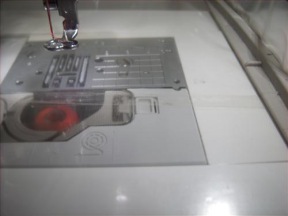
The first issue is that I really needed to use Badgemaster stabilizer. The instructions said to use two layers of an ‘ultra’ water soluble stabilizer. I know that two heavy weight sheets are not as effective as one sheet of professional strength Badgemaster. Any movement, even the very slightest, will cause the design to be off just a little and would have made this project difficult to say the least.
And, with Badgemaster you can take the sections of unused pieces and put them together to have a strong and unwrinkled sheet to use for another project. You can place a small amount of water on one side of the two sheets, press them with my hard rubber, heavy-duty metal brayer to make a solid bond. You can just see the bonded area running over the bobbin area.

Another excellent use for this well-built brayer is to place the wet FSL on a towel and press it enough to make it a flat material. I then cover the damp FSL with another towel and pressed it again with the brayer. The advantages here are that you have control of the layout of your design while still wet; and, it is partially dried in the process; and ironing is not necessary. Ironing a design after it is dry causes the stitches to be ‘flat’ in appearance.
The second thing I learned was that the right glue is an absolutely necessity. I must have 6 or more craft glues around here, but found one at Michael’s that was inexpensive ($4.00) and was perfect. It is called Beacon’s 3-IN-1 Advanced Craft Glue. I have no idea why it says 3-IN-1, but it is great glue.
It did dry crystal clear, just like the label said – there is a surprise, honesty in advertising! Then it did do an ‘instant grab’ – OK, not so much ‘instant’ as about 15 or so seconds. I can live with that. Then it says “Fast Dry Glue” and again, I agree with that. So, I can give it a 9.8 out of 10, because they should not have said ‘instant.’
I hope you try a 3D FSL soon and be sure to show us your results in the Forum. I can’t wait to see what you found to do!
LOOK OUT FLORIDA, here we come! – (I believe in fair warning)