Since I seem to spend a lot of time at the repair shop with my
machines, I thought I would talk about what the technician has to say to
me.
I seem to have the most issues with TENSION  But then again, I
have other issues as well. I am going to show some things on my Baby
Lock BLR2 and your machine will be different. However, many of the
features noted are going to be on every machine.
But then again, I
have other issues as well. I am going to show some things on my Baby
Lock BLR2 and your machine will be different. However, many of the
features noted are going to be on every machine.
This time I am looking at care of your machine. My demonstration is on my Baby Lock. Your machine will differ but much of the same issues will be similar.
I remember when I first started embroidering, I never would have considered taking my machine apart, but now, I feel comfortable if I respect a couple of rules:
- Never oil your machine - check with your manual for your machine, but I believe that is pretty much the correct rule for all machines.
- Never apply pressure to any part whether removing it or reinstalling it, the part should slip into place. If it won't slip back, keep retrying and watch for all places that 'meet' or 'by-pass' each other.
My machine does both sewing and embroidery. It is a very good machine and I really cannot complain about it. I have pointed out which areas are just for sewing. Some others, like the needle threader and the thread cutter work for both of the operations.
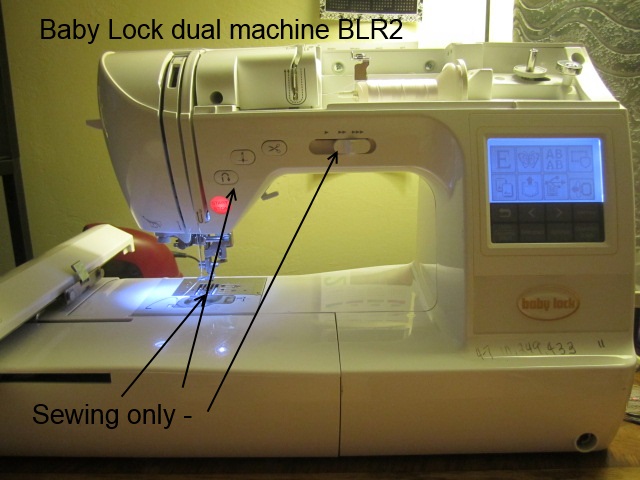
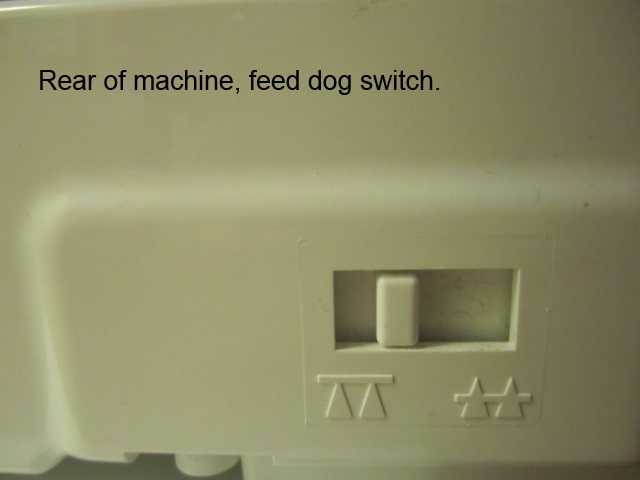
Sometimes I have forgotten which machine has sewing (I have several embroidery machines). The give-away is the feed dog! Duh!
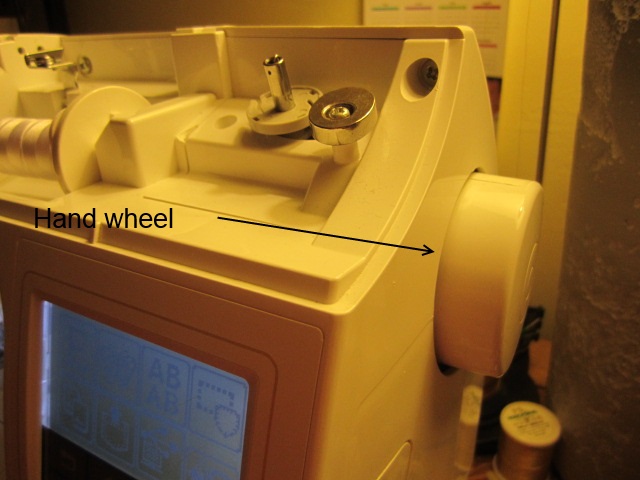
Next is the hand wheel on the right side of the machine. Never turn the wheel more than just a very small increment in a counter-clockwise direction. This wheel is precision set to go in the clockwise direction. Each piece of the machine is set to be 'firing' their part at the exact time so that a perfect stitch occurs. Just like a car, machines can have the 'timing' off and the sound and the stitch will show that it needs to be recalibrated - by a technician.
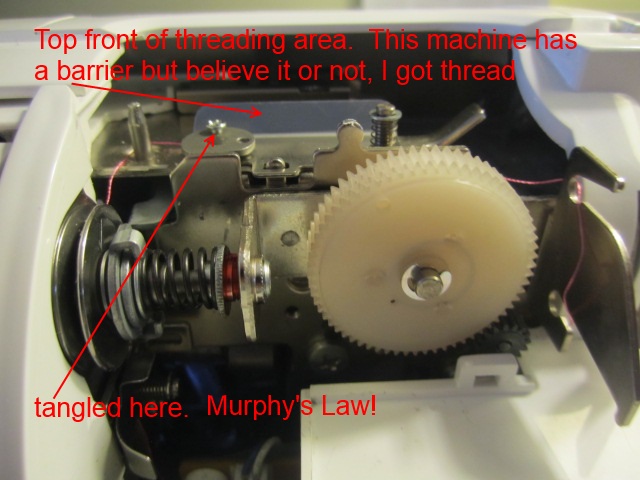
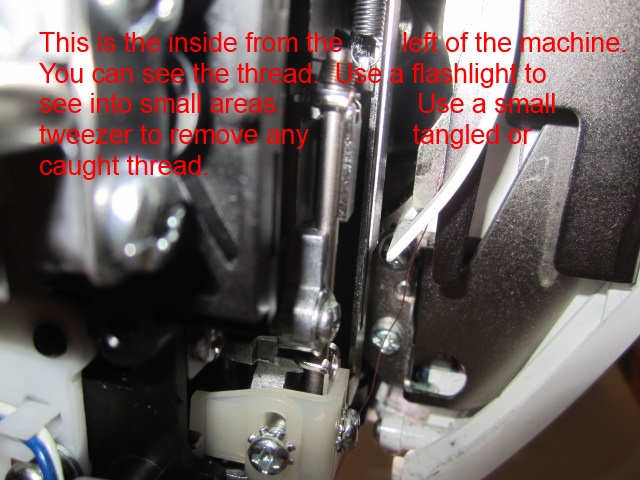
This is the front of the machine and the beginning of the threading area.
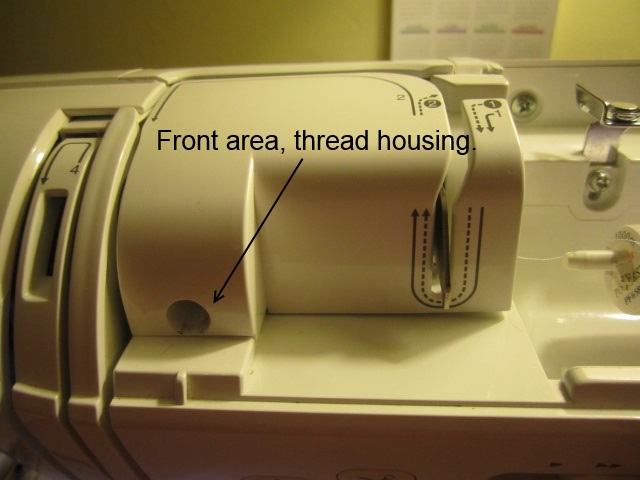
Removing the housing in front will allow you to view the path of the thread. Thread can and does get tangled in different areas. If you are having thread breaks, this is one place to check to see if something is interfering with the thread movement.
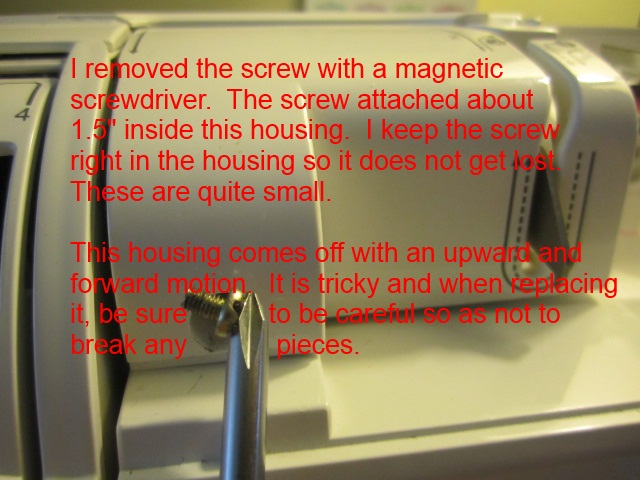
You may be able to see the pink thread going around the pathway. The barrier is a solid piece of metal, however, the thread managed to jump the barrier and get caught on the very small screw toward the left side.
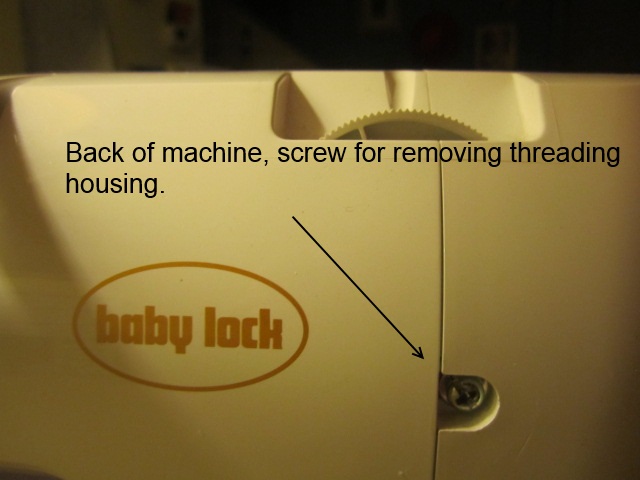
The back of the machine also has a small screw holding the housing to the machine. Leave the screw in place, there is no need to remove it and lose it. The housing, again, gently slides away from the machine. If you are experiencing any resistance, don't go further. Everything should come away easily. If you use pressure, you can break some of the plastic or damage something that will be an expensive surprise.
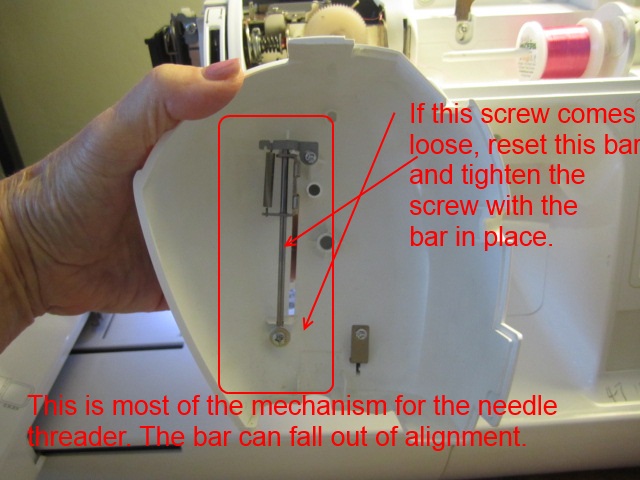
Inside of the back/side housing is the threader. I remember once when I had trouble with my threader, as I turned it over to a technician, I asked how much would the threader cost if it is broker. To my chagrin, it was quoted as $35. Then, when I picked it up, the tech was so proud to say he had saved me money by 'fixing' the threader. Knowledge is power, now I know that replacement is not often necessary. And, when it is not working, you may very well be able to fix it yourself.
As I noted before, my machine is a sewing and embroidery machine. I took it to the tech a different time with the feed dog up! He politely scolded me and I thought that I was just an idiot for having it in the up position as I embroider. That is a "no-no".
This photo allows you to see, the path of the thread in its later stage. Checking for stuck, tangled or ornery thread is best done with a flashlight. The parts are black making them difficult to see.
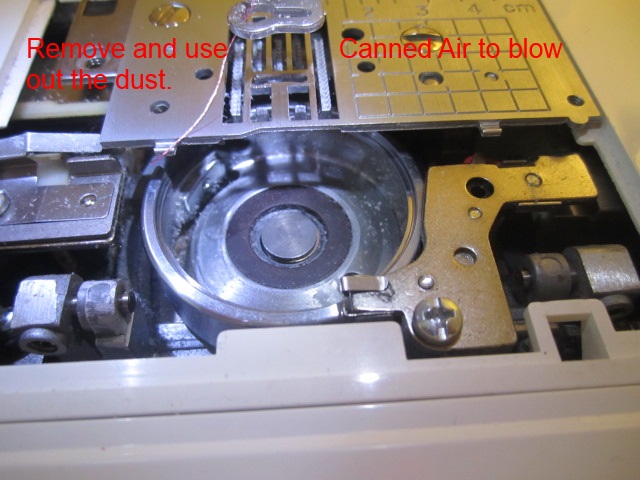
Use a can of Air to blow out your bobbin area. Most of the Air cans say DO NOT shake. If your can is putting out something liquid, that is not air and you need to aim the can better. Don't use that can of Air upside down. Blowing on it personally will probably not be in your best interest.
TIP TIME:
I am calling this one half of a tip because it does not have anything to do with embroidery. However, it does have a fun way to color Easter Eggs!
Start with a pan of water, straight from the tap. Place the eggs in as you begin. Heat on medium heat until boiling and cover. Turn off the heat and let the eggs set until the water has cooled. I have never had a broken egg from this method. I know you have other ways and please do share them here so we all have great eggs.
Prepare your dye. Next, using the bottom of a spoon, lightly crack the eggs about 5 or 6 times, making small cracks all around the egg. After the eggs are cracked but NOT peeled, place them back in the dye letting set for an hour or even two.
Remove the shell and you will have a very nicely marbled egg. It needs to be kept refrigerated and makes a lovely center piece for your table. Even better, make deviled eggs and the marbling will be somewhat deep and great as a visual item.