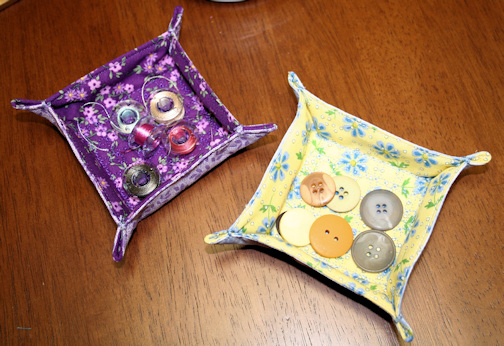
I’ll bet you can think of a million different uses for these
darling little baskets and, since they are so fast and simple, you could easily
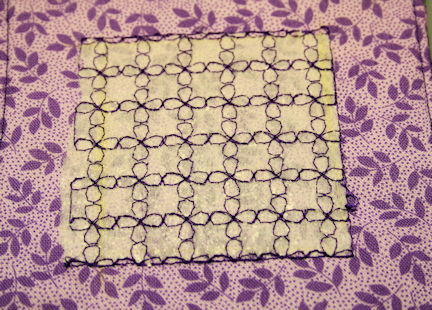
make a million of them! The tiny embroidered stippled bottoms add interest as
well as stability. A great way to use up
those leftover (or not) charm squares. I
made these fairly tiny (I was thinking buttons, bobbins, pins), but you could
certainly adjust them to any size desired.
Here is what you need:
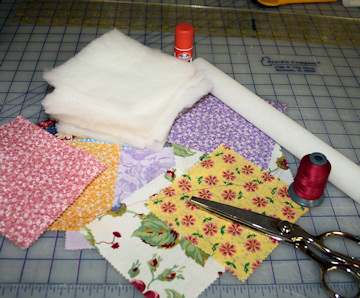
-5x5 squares of scrap fabrics or leftover charm squares (2
per basket)-just use larger squares if you’d like to make larger baskets
-5x5 squares of thin batting (1 per basket)-or cut to match
size of fabric squares if making larger baskets
-tear away stabilizer (you can use cut away or rinse away if
you choose)
-embroidery floss
-poly or rayon 40 wt embroidery thread to match or contrast
in both the top and the bobbin
-stippling design (you can download ours at the very bottom of the blog)
Here is what you do:
1.
Put batting on flat surface. Stack inner square face up on top of
batting. Stack outer fabric square face
down on top of stack.
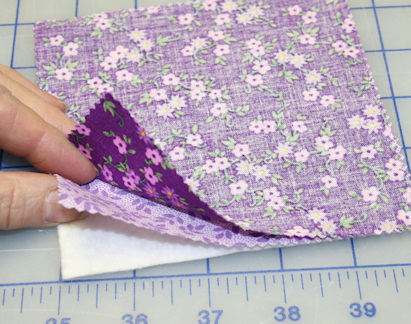
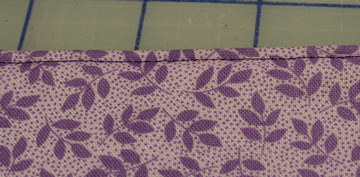
2. Sew ¼” seam all
the way around stack of squares, leaving a 2 ½” opening in center of one side.
Trim corners.
Reach in between 2 pieces of fabric and turn right side out (batting
should now be in the middle, between the 2 fabrics). Use a dull edge pencil or
tool to push out the corners.
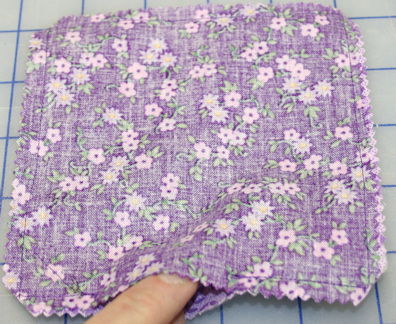
3.
Fold in the edges of the fabric at the opening
and press. Top sew 1/8” all the way around
the square to secure.
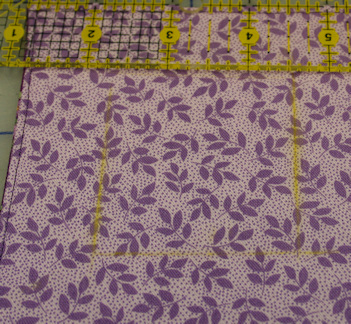
4.
Measure in 1” from each side and pin a template
of your design, or mark a square.
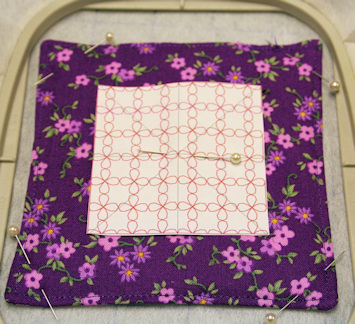
5.
Hoop the stabilizer. Center your square of fabric in the hoop and
pin at corners, making sure the pin heads will not be in the way of the sewing
foot of the machine.
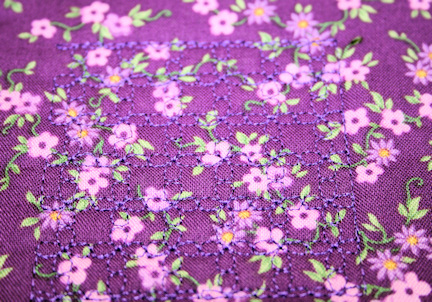
6.
Slide hoop in the machine, check the center, remove
template and embroider the design.
7.
Remove hoop from machine and detach stabilizer
from fabric (if you want the stabilizer completely removed from the bottom of
your basket, use rinse away stabilizer and allow fabric to dry completely and
press before moving to step 8).
8.
Fold corners of squares by pinching the upper
edges along each corner and pin about ½” from each corner.
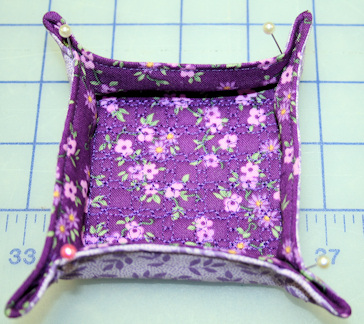
9.
Using 2 strands of embroidery floss, make a few
stitches at the pin in each corner.
10.
Remove the pins and enjoy your tiny fabric box.
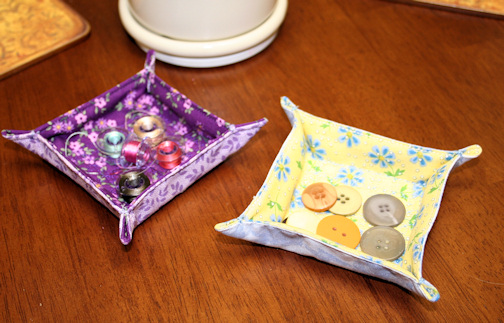
These are the perfect size for storing tiny treasures, and
containing the chaos around your sewing or craft area. They would make great favor gifts for a
sewing or ladies’ event too.
Take care,
DB
Charm Basket stipple bottom.zip (23.4KB)