These are great!
Especially if you have a bunch of little ones running around. They really do stay put until you take them
off. No Snaps! No, buttons! No ties! And they are one of those handy items that
when visitors see them they will ask where they can get them - every time. Our five-year-old made these towels for
Christmas gifts this year and they were a hit.
Now I should say she sat on my lap and helped guide the fabric while
sewing and pushed the buttons on the embroidery machine. She picked the fabrics though for each towel
we made.
Here is what you need:
One 17” square of linen or heavy cotton fabric
One 9” square of cotton fabric in color of choice (If you want more towel and less loop make the square smaller but not less than 5 1/2")
V shaped “button style” embroidery design (you can download
the one we made in the Floriani software at the bottom of this blog.
Tear away stabilizer
Sewing and embroidery threads
Optional embroidery design or monogram design of your choice
Here is what you do:
1.
Wrong
sides together, fold the edges of the 17” towel in 1/4” and press, then fold in
again and press. Sew close to open edge
to hem the towel on all sides.
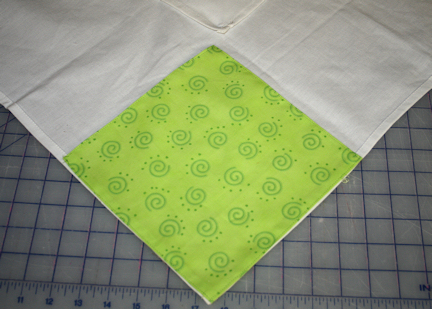
2.
Wrong sides together fold the edges of the 9”
fabric square in 1/4” and press. Place
the towel on a flat surface wrong side up.
Place the square right side up on top aligning to one corner. Sew along edge all the way around.
3.
Load the V embroidery design into your
machine.
4.
Thread the needle with thread that coordinates
with your fabric square. Wind a bobbin
with the same color embroider thread as you will use for the needle.
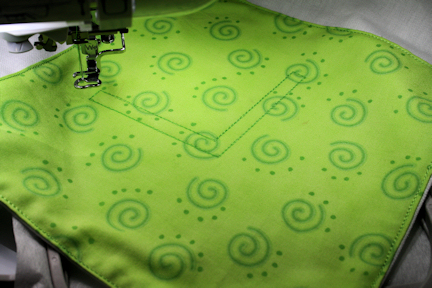
5.
Hoop the tear away stabilizer in a 5 X 7
hoop. Center the fabric square section
of the towel in the hoop and adhere with temporary adhesive if desired. Embroider the first two runs of the V design.
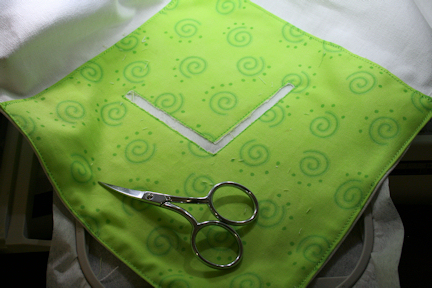
6. Remove the hoop from the machine and lay on a flat surface. Carefully cut out the center area inside of the
V of both fabrics being careful not to cut through the stabilizer. The curved
embroidery scissors work well for this.
7.
Embroider the final stitches of the design. Remove the hoop from the machine and the
excess stabilizer from the towel.
Carefully remove the stabilizer from inside the sewn V.
8.
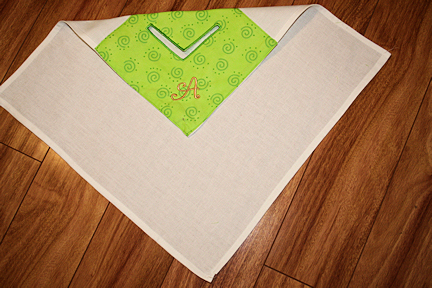
To determine where to place the optional design
if using lay the towel face up on a flat surface. Your sewn square should now be face down. The design should go on the opposite corner
as in the image above. If embroidering on the fabric square as we did here just hoop and embroider as always.
9.
Hoop stabilizer, adhere the towel using
temporary adhesive (Lapel stick works great) and embroider your design.
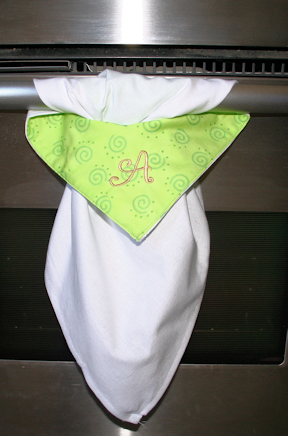
Now to hang your stay-put towel do
this:
Fold the towel sides in to create a point:
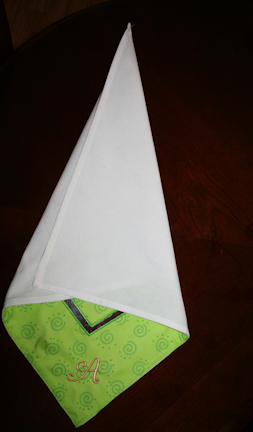
1. Place of the point of the square with the V
behind the handle facing forward with the point down like this:
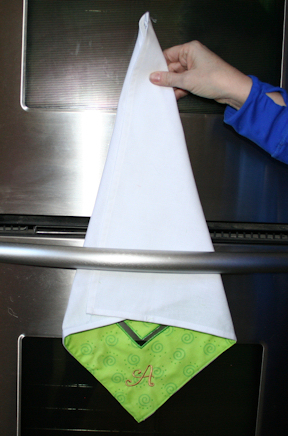
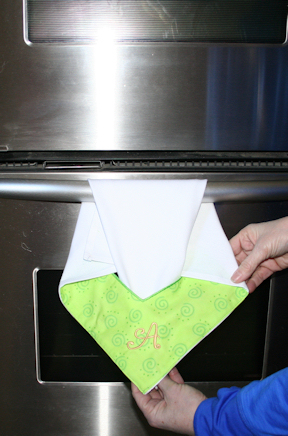
2. Tuck the towel over the handle and into the V
and pull down into place. It should look
like this:
These have been so popular we will
be making them the next time we need something for a charity auction. Have fun
making your own.
Take care,
DB
V applique design.zip (60.7KB)