In my previous blog I described how to remove the pictures from my jigsaw
puzzle designs and then add new embroideries to the remaining outlines. For
those of you who do not already have any of my puzzle designs, I introduced my
outline-only puzzle designs. You can read more about my puzzles
here and my
puzzle outlines
here.
I also promised to show you another way to use the outlines-only jigsaw
puzzle designs. I can now show you two ways. As detailed below, one of these
methods allows you to draw an image directly on the felt, while the other lets
you print an image on fabric and then fuse it to the felt.
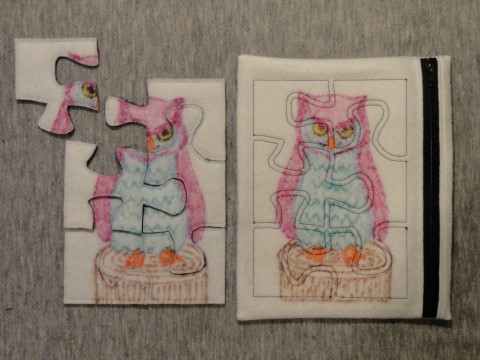
If you enjoy drawing or painting, you can draw your own puzzle pictures.
You can draw them freehand, but if you want the same image on puzzle and
pouch, I suggest you create a simple drawing as a guide and transfer it to the
felt for the puzzle and the pouch. You can then do your painting or drawing
freehand. There are plenty of permanent fabric markers and paints available.
Here is the owl I drew on a puzzle and pouch for my granddaughter.
I mentioned in my previous blog that I had tried to make a puzzle with
printer fabric but had problems with frequent thread breaks. The idea was too
good to abandon, so I tried again. This time I increased the stitch length for
the puzzle outlines and that helped greatly. My first try came out without a
single thread break. Unfortunately, I had forgotten to add the felt under the
stabilizer, so I had to try again. The next try had only a few thread breaks.
The embroidery for the pouch had no breaks at all.
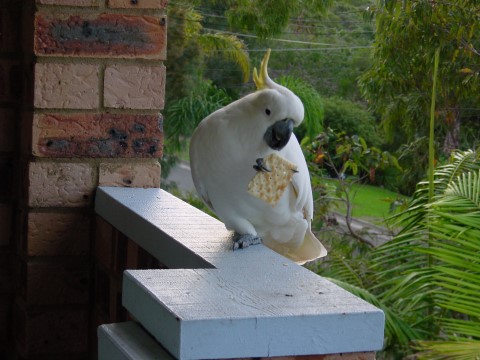
For my sample puzzle I used a photograph I took in Australia. The friend
I was visiting likes to feed the cockatoos that live in the trees outside her
house. The photograph started out looking like this.
I cropped the picture and sized it so that it would print at the
size I needed for my puzzle. I used two graphics programs to accomplish
this task. I started out with a free PC program called Paint.net, available
at
www.getpaint.org. This program has a lot of wonderful tools, but
unfortunately doesn't allow printing at a specified size. The help forum for
the software suggested printing via Microsoft Paint, so that is what I did.
Microsoft Paint can be found in the Windows Accessories folder in Windows
operating systems. I used the version available in Windows 8. Click the link
below to download instructions for sizing your images to fit the hoops.
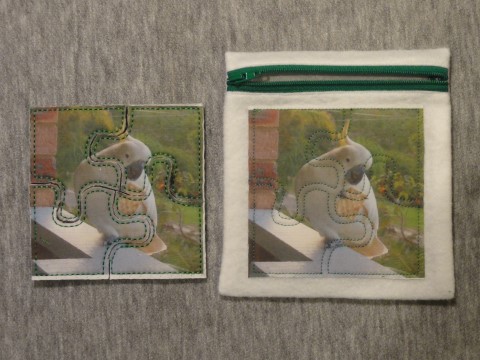
Printing a Photo at a Specific Size.pdf (1.4MB) I used paper-backed fusible web for the puzzle and fusible interfacing for
the pouch. Since I had no thread breaks with the interfacing, I would try it
next time for the puzzle, too. Temporary basting spray will hold the picture
in place until I use the fix-baste function on my machine. Either product will
give the picture body and minimize fraying. Here is a picture of my finished
puzzle and pouch.
You can also use regular printed fabric for a puzzle. The document linked
above includes a chart with dimensions needed for all the hoop sizes. Refer
to the chart for determining fabric dimensions, too. Add in the margins that
are meant to surround the printed picture. See the instructions for details.
Cut one piece at the size needed for your hoop and then use that piece to
locate and cut the same portion of the print from elsewhere on the fabric. Use
interfacing and/or fusible web as you would for printer fabric.
My new set of puzzle outlines includes three designs for each size.
The
Cutlines_A designs are the same as the outline portions of the puzzle
designs from my original puzzle set. They are also the same as the
Cutlines designs from my outlines-only set. These outlines include 1.6 mm triple stitch
outlines of puzzle pieces and stitches for cutwork needles. The
Outlines designs are the same as in my puzzles and outline only sets, too. The remaining
designs, designated
Cutlines_B, have 3.0 mm triple stitches and are meant for
stitching on puzzles with printed fabric. You can use either
Cutlines design
for stitching on drawn or painted puzzles.
The designs are available by
puzzle size and also as a
complete set.
For those of you who already have the original puzzles or the outline only
designs, I also offer the
Cutlines_B designs
individually and as a
set.
Every purchase of the new outlines designs includes instructions expanded to
include the information you need to create your own puzzles. We also include
the following list of stitch counts of all puzzle outline designs.
Puzzle_Outline_Stitch_Counts_II.pdf (27KB)