When I hear kids say
"just 2 more months of school" or "just one more year of
school" I laugh to myself because I know a lot better. You all know
what I mean, learning is not 9 months a year (antiquated as that is) or just a
few years, learning is a lifelong journey of discovery and - if you are open to
it - an awesome journey. When I taught Microsoft Software, I often told
my adult students that if they were not in this class, or one like it, they
were not just standing still, they would be losing ground.
That is enough about
structured education. My point today is that not only is learning a
lifelong journey, it is also everywhere around us. Most people understand
learning from a well educated and knowledgeable people. BUT, have you considered
the opposite of that coin, learning from a less educated or less successful
people/projects/ideas around us?
How do we know who
is the knowledgeable versus the one who you believe to be all knowing?
How do we discern the difference between a real leader and a "I believe I
am a" leader?
My point here is
knowledgeable people can be wrong from time to time. Conversely, someone
who is lacking in formal education or knowledge can have a totally brilliant
moment, day or life.
I have wanted to
learn to digitize for a long time. I see
digitizing as a creative form of art that has many facets to it. Once a
site puts a vendor's design on their sales page, that site owner is saying that
they believe in the vendor's ability to create a perfect design every
time. While that may be a little naive, it is a must for doing
business. That is one of the reasons
that sellers must have some sort of return policy.
In the case of the
design I am highlighting today, the vendor is a very well known site for
designs. They have quality, interesting
designs and a very good client base. So,
this issue that I am discussing will remain anonymous because, they normally
have much deserved reputation and they are allowed to be wrong once in a while.
I really love this
design and on my sales site, it is VERY popular. Therefore, I have done it probably 20 or more
times. When you have done a design that many times, you really get to know each stitch.
Furthermore, this has over 50,000 stitches, it is not a quick one to
complete. It has 12 color changes as
well. It is also 'cast iron' to
sew.
My Embird software
allows the viewing of the stitches in a density format. This is a little section showing 'normal'
density. In this case, I say normal
loosely. In some cases, you will want
the density to be light. An example
would be if you want some of the background to show through. A more dense example might be if you are
trying for a more three dimensional look.

The focus is
naturally blurry to show the areas as they blend together. Incidentally, the dots of orange are the very
dense areas.
Here is the photo of
the density map of the design.

There is one point
of red, extremely dense and the lines are all orange, very dense. The
remaining stitches have a small smattering of green, normal, in them.
I have already reduced the
density and removed any small stitches that were less than .7 mm. This is the after picture. I always hear my machine pounding in the
stitches.
Part of the problem
is that few openings are left for the next layer of detail.
Believe me, the
design is beautiful and very detailed.
But I use a fresh needle at the beginning and around the midpoint (26K
stitches), I put in a new one. Breaking needles is dangerous.
Another issue is the
jump stitches. I have asked digitizers
about this issue and they all say that short jumps tend to pucker the design,
so they may opt to make a jump go in a different direction to prevent the
squeeze from creating a divot or poof.
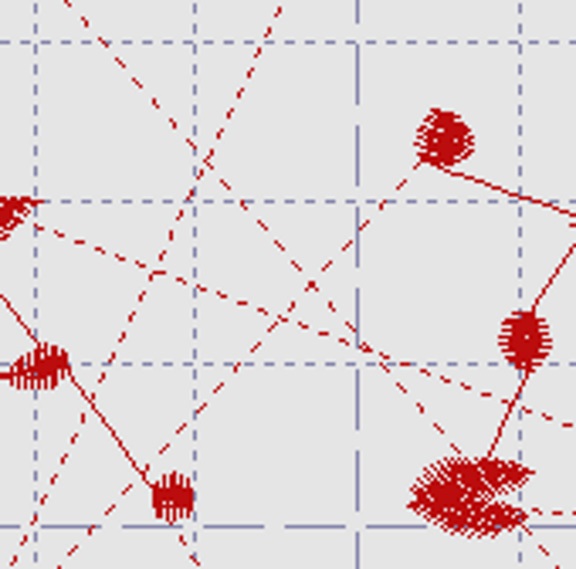
The grid in the
background is 1" square. The jumps
crisscross and this particular thread is the last one of the design. So these jumps are not under all the design,
they are on top.
I can vouch for
small jumps being tight. In my hankies,
between words there are jump stitches.
Each time I cut those jumps, I can actually feel the release of the
pull.
Lastly, I have been
using 4 layers of heavy duty cut-away AnnTheGran Stabilizer and still get the puckering on
the sides of the design. BTW, I only use 60 weight thread on this design.

While you cannot see
these sorts of issues before you buy a design, it is always a good idea to
check out their 'freebies' so that you can check their work. Don't forget to test that design and take a
good look at it.
Learning to spot a
bit of trouble before you purchase it can help save your sanity. It is part of the learning curve of
embroidery.
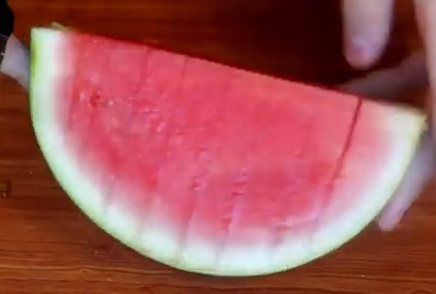
Nothing says Summer more than watermelon (unless it is corn on the cob and barbecued chicken). Here is a fun trick to make watermelon cubes!
First, quarter your melon. Then, make slices straight down the melon.
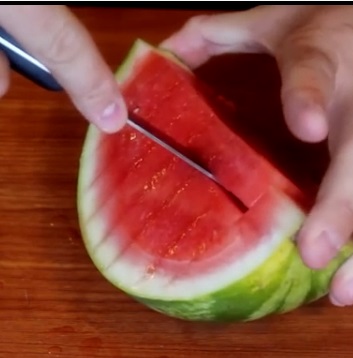
Next, slice at desired spacing from right to left.
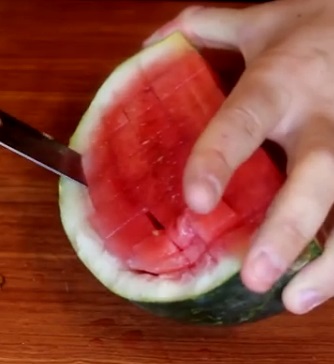
Turn your watermelon to the opposite side and do the same cut as above. Your cubes will start to fall out of the melon.
Cut the cubes away from the rind and enjoy. This will work for cantaloupe, zucchini, tomatoes and other soft fruits or vegetables. Toss them all into a great salad and you have a HIT!
I always love Audrey Hepburn - Katherine as well.