Has the first two months been as busy for you as it
has for me? Time has flown and it will
soon be Easter. With a baby due any day
we have been busy sewing diapers, wipes, onsies and burp cloths. And I have had the older girls more often
than usual. This week we were trying to
decide what we could make for Easter to give as little gifts. Our oldest had made bookmarks before when she
was learning to sew a straight line. She
thought that would be a good idea. I did
not have any Easter themed fabric in my stash and the younger two haven't
really done any sewing yet. They want to
"sew" too but really still just like to push the buttons and watch
the embroidery machine go. So, we made
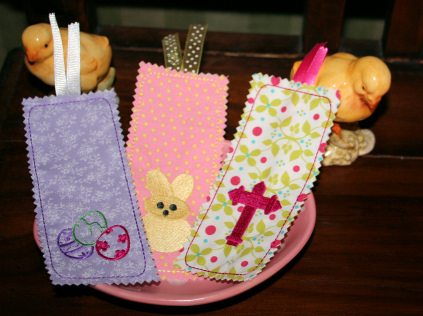
these in-the-hoop bookmarks. Here are
the three styles we are embroidering:
Here is what you need:
Scraps of fabric - Two matching rectangles 3 1/2" wide
by 7" tall for each bookmark
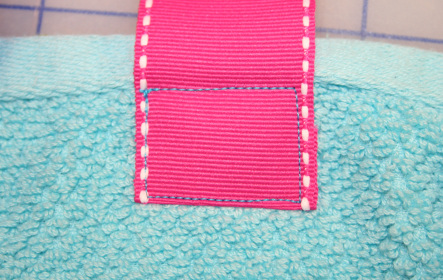
Scraps of ribbon to coordinate - two ribbons for each cut around
3" in length
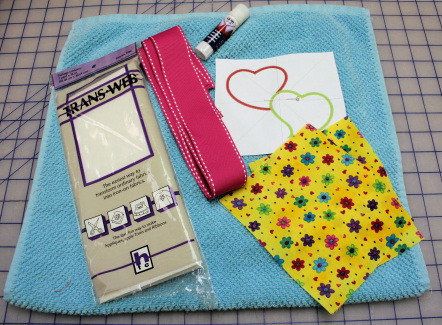
Light or medium weight, cut away stabilizer
Lapel stick or other temporary adhesive
Embroidery thread
Pinking sheers
In-the-hoop Easter bookmarks (download the ones we used
here)
Here is what you do:
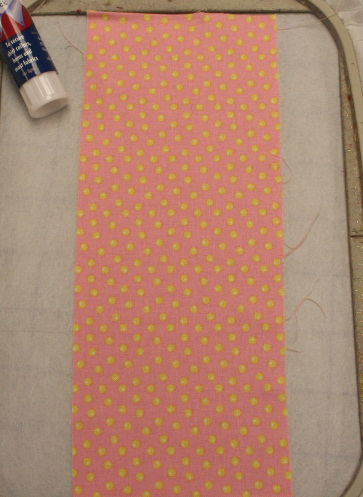
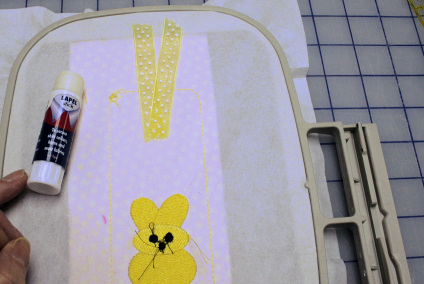
1. Hoop the
stabilizer in your 5'X7" hoop.
Adhere one fabric strip, face up, down the middle of the hoop. (You only need a little adhesive around the
edges of the fabric)
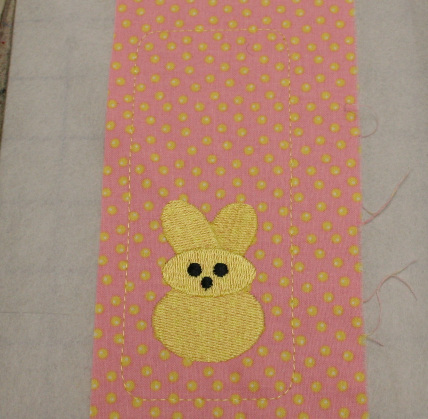
2. Using the same
color thread in both the bobbin and needle embroider the first color. Embroider all the rest of the colors except
for the last one.
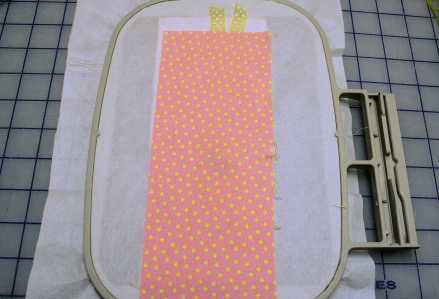
3. Remove the hoop
and place face down on a flat surface.
Adhere the ribbons so that they stick out at the top (face down if
applicable). Put a little temporary
adhesive around the edges of the wrong side of the second fabric strip. Place, face up, over the stitching and
ribbon.
4. Carefully place
the hoop back on the machine and check that the ribbon and back fabric is in
place. Embroider the last thread color. Remove the hoop from the machine.
5. Remove the design from
the hoop. Pink around the outside of the
bookmark border stitching being careful not to cut the ribbons.
Your quick and easy Easter bookmark is finished.
You could roll these up and put in eggs (instead of candy)
for an egg hunt. Add them to an Easter
basket or send them in a card. And just
watch the pile of small scraps go down!
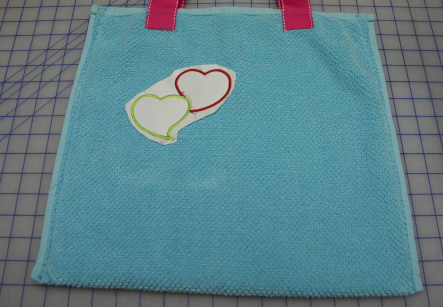
Here are a few other blogs that might inspire an idea or
two:
Easter Goodies for infants
Sewing for Sunday bags
Lollipop covers in-the-hoop
Enjoy the season and take care,
DB