A young woman, who uses a service dog to help cope with certain
health issues, asked me recently to make a pouch to contain the dog's
official ID card, a bag for waste, and a few dog treats. I was happy
to oblige and created this simple pouch. I had time to create a plain
pouch before our trip out of town. Strips of Velcro wrap around the
leash, holding it in place, so I call it a Dog Leash Pouch.
When I showed this picture of the pouch to my machine embroidering
friends, they were shocked that I hadn't embroidered anything on
the pouch. "You should at least embroider a dog bone," someone
suggested. I took that as a challenge, so did create a dog bone
design. I drew the motif in my digitizing program and then used
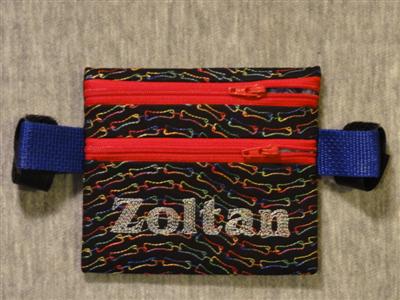
it for a multi-wave fill. I made this next pouch for another friend
who has a dog. (Isn't Zoltan a great name for a pooch? He is a
terrier mix of some flavor.) I arranged his name with
Contour Print 30.
I decided that Cocoa, the service dog, needed a fancier pouch, too.
I knew her leash was red so kept with the color scheme from the first
pouch.
Contour Script 60 fit on this pouch. Cocoa is all ready for a walk.
A pouch like this can be handy for many other uses,
so I decided to create a larger pouch, too. I also created a variety of
fill patterns, a few of which match the fills for the
Fancy Water Bottle
Caddy. You will recognize the bicycles, the cathedral windows, and the
shell motifs. The two bone designs are new, and the hexagons and squares
appear on my
Crazy Patch Pouches. Here is a picture of all the fill
patterns. See
DLP_Stitch_Counts for information about design dimensions,
finished pouch sizes, and design names. The stitch counts are included,
too, of course. The design packs are available
here and individual designs
here.
The embroidered panel for the small pouch fits in a 150 x 240 mm
or larger hoop. The large pouch requires at least a 200 x 260 mm hoop.
Designs in both sizes include (a) guide lines for cutting off the median strip
that connects the two zippers and (b) centering lines for adding text to the
design.
Notice that there are two horizontal centering lines. If you would
like to omit the lower zipper, as in the pouches shown below, then you
would omit the guide lines for cutting off the median strip (since you
don't need them) and position your design at the higher horizontal line.
Use the lower horizontal line for a two-zipper pouch. The instructions
included with the designs have this information, too. I used
Contour
Script 60 and 75 for the small and large pouches, respectively.
For the dog leash pouches, I added a loop of webbing to each side
seam. I slip the Velcro strips into the loops and then wrap the strips
around the leash. Most leashes aren't as fat as the kind service dogs
wear. The following picture shows that one Velcro strip can be fastened
to the handle of a leash and the other to the leash itself. This will
prevent the pouch from sliding down the leash and touching the dog.
If you prefer, you can use only one loop and attach a D-ring or swivel
clip to it. You can also omit the hardware entirely, as I did for the one-
zipper pouches. If you have any other hardware you would like to attach,
you can certainly find a way to do so. Just make sure you move the slider
into the area of the pouch before attaching anything to the side seams. (Ask
me how I know.)