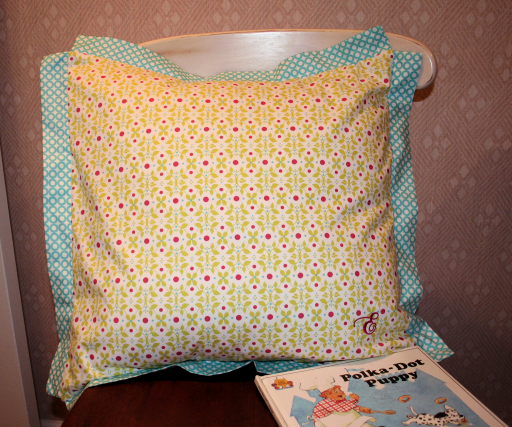
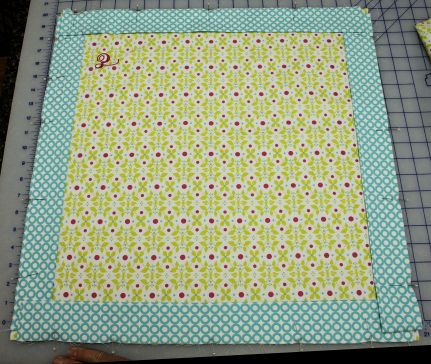
Our girls love to read. So much that our daughter is making a special reading nook out of a closet in her schoolroom area. The seven year old, who always wants to add her thoughts to a project brought me a picture. The pillow had these different, flapped edges and she asked if hers could have them on hers. "I guess so," I said, tentatively. I had never made these before but they didn't look too hard. Here is the first pillow with the flapped edges:
What you need:
20"X20" pillow form
21"X21" fabric square for front
two fabric rectangles 21"X14" each for back
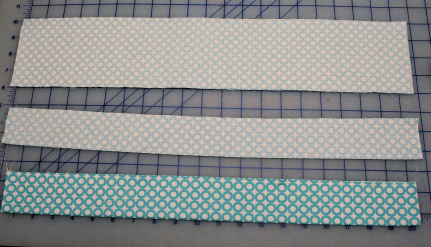
four coordinating fabric strips 21" X 4" each for flapped edges
Embroidery design as Desired
Sewing and embroidery thread
tear away stabilizer
Lapel Stick or other temporary adhesive (optional)
What you do:
1. Embroider the front as desired. She just wanted her initial in the corner and since they will be thrown around on the floor and washed really often I thought that just might be a good idea. (Alphabet Xpress has a variety of fonts available and there are lots of Alphabets to choose from here if you prefer those.)
2. Make the flap edges. With right sides together, fold the long strips lengthwise. Sew the short ends using a 1/2" seam. Turn so right sides are out. Press. Repeat for all four strips. Set aside.
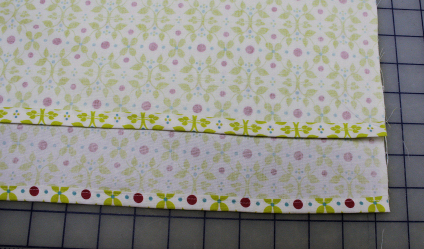
3. Hem the opening edges. On the long edge of the fabric rectangle, fold in 1/2" and press. Fold over again 1/2" and press. Hem along the open edge. Repeat for the second rectangle. Set aside.
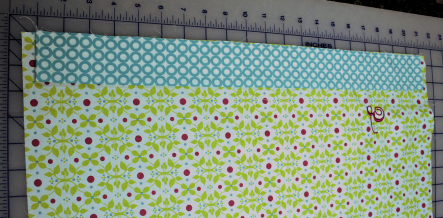
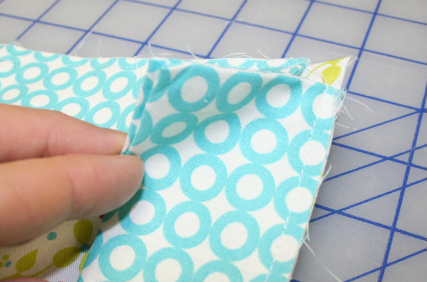
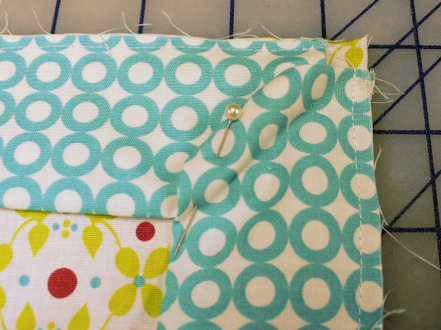
4. Lay the 21"X21" rectangle face up on the table. Center and align the raw edges of a flap strip on each side. Pin in place. There should be a 1/2" square of the front showing at each corner. Sew using a 1/4" seam folding the short edges of the flaps out of the way at the corners as you go.
5. Lay the square back on the table face up. Pull the corners of the flap edges up. Roll and pin so they stay out of the way. Lay a rectangle face down on top aligning the raw edges of the long side with one side of the square. Pin in place. Sew a 1/2" seam. Repeat for the other side using the second rectangle.
6. Lay the square back on the table. Smooth the two rectangles so that they are flat and the hemmed edges overlap in the middle. Pin along the top and bottom. Sew through all layers of the raw edges, top and bottom using 1/2" seam. Now you have sewn all the way around and have an overlapped opening in the back of the pillow. Turn right side out carefully since there are still pins in the corners. Remove the pins.
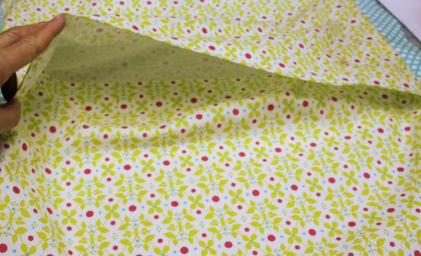
7. Insert the pillow form through the center opening in the back.
This one is ready for a reading session. Two more to go. These are really fast and easy.
If you have any small scraps left over make some bookmarks. The kids will love them. Here are the book slings the also go in their reading nook. These fabric boxes are great for storing books or other kid related stuff in the area.
Take care,
DB