Snowman Sweatshirt Jacket
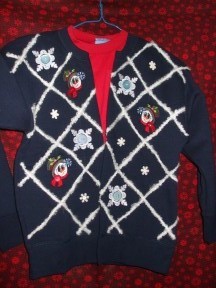
Being a cold natured person, I love making jackets out of sweatshirts. They are warm and comfortable. This is one that would be perfect for the child in your life. (Adults would love it also.)
To make the jacket, you will need:
Sweatshirt
Snowman and snowflake embroidery designs - I used two resized designs from Dakota Collectible's Button Up collection 970458
Fuzzy white yarn, other yarn or narrow ribbon of your choice
Snowflake buttons and other buttons for decorations (You might find some of them in your "stash".)
Lightweight cut away stabilizer such as a no show mesh
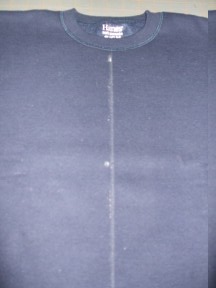
To begin the project, find the center front of the sweatshirt by folding in half matching the shoulder and underarm seams. Mark a line down the center front. On a dark shirt, I use an almost gone piece of soap from the shower. It makes an easily seen line and can be removed with a mist of water.
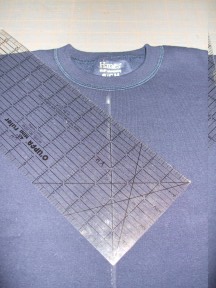
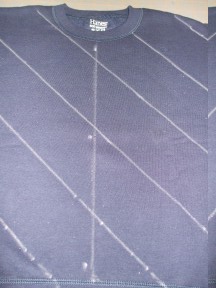
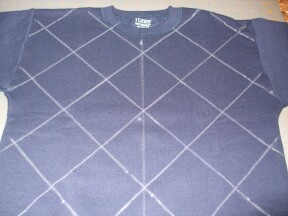 For this child's shirt, you will make a grid with the lines 3 ¼ inches apart. Use a ruler with a 45 degree line. Place the ruler so that the 45 degree marking lines up with the center front line. Mark the lines in one direction and then in the other to form the grid as shown.
You are now ready to cut the shirt down the center front and embroider. The designs I used from the ButtonUp Collection are too large for this child's shirt. I used resizing software to reduce the size to no larger than 2" X 2 ½". Dakota Collectibles' AlphaSizer Max software does a great job of resizing any design.

A lightweight cut away stabilizer such as a no show mesh is perfect to use for this shirt. You do not have to hoop the shirt with the stabilizer. You can hoop the stabilizer only then spray the stabilizer after hooping with a temporary adhesive spray, and stick the shirt down to the stabilizer. For added security pin the shirt to the stabilizer being careful not to get the pins in the embroidery area. I also drew a plus mark in the center of the square to help align the shirt with the notches on my hoop to be sure the design was correctly placed.
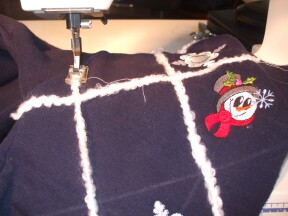
After embroidering the designs in the squares you selected, you are ready to sew down the decorative yarn.
I chose to use a straight stitch sewn down the middle of the yarn which followed the grid lines I had drawn before embroidering. If your yarn is thinner, you can couch it on with a zig zag stitch.
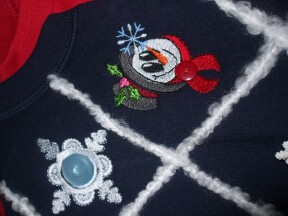 I sewed a large button in the center of the snowflakes and a small one on the knot of the snowman's scarf. You could use some hot fix crystals around the designs to further embellish them if you wanted. In the squares I chose not to embroider, I sewed a snowflake button. These can be found in almost all fabric stores and Hobby Lobby.
To finish the center front edges, turn about ½ inch to the inside and hand whip stitch the edges down with thread that matches the shirt. You could straight stitch the edges to the inside with your machine if you choose.
Thanks for considering this project for the child in your life.
Virginia