Seasons Greetings Everyone!
If you happened to catch my blog around Halloween, you may remember that I used the cutest designs from Amazing Designs---little candy corn characters dressed up for Halloween. It was the “Sweet Halloween I” collection. Well I had so much feedback from that project, that I wanted to do something using the Christmas version of those cute designs.

(inside that pretty package is a small loaf of Chocolate Chip Bread)
Our kitchen towels make a wonderful “gift wrap” for baked goods—and when all the goodies are long gone, the kitchen towel can be used for years to come! So I decided to stitch up a “gift wrap” and give you a few helpful hints for getting it to look just the way you want.
What you’ll need:
Vintage Gingham Trim Tea Towel (Available in red, green, or black trim)
Sweet Christmas 1 designs by Amazing Designs (I used the Green Peppermint Hat design from this collection)
1 yard or so of coordinating ribbon
Tear away stabilizer
Temporary Adhesive Spray
Very Easy Instructions:
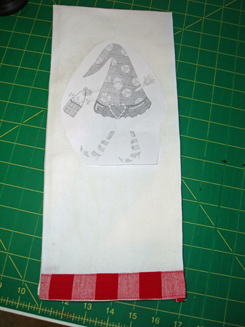
1.) Print a paper template of the design. This make placement on the towel so much easier! Cut it out of the paper sort of like you’re cutting out paper doll clothes.
2.) Wrap the towel around the baked item (I’m giving little loaves of chocolate chip bread!). Spray the back of the paper template with a temporary adhesive spray (just a small spritz will do). With the towel wrapped around the loaf of bread, determine where the design will look best. Stick the paper template onto the towel at this point. Unwrap the bread and set that aside.

3) Now lay the towel flat on a table, and take a look at where you placed the paper template. It SHOULD be pretty close to the center front of the towel. You can straighten it up a bit and get it “looking right”, being careful not to move it too far from it’s original position. You need to keep it fairly close to where you initially set the template down, so it will look right when you wrap up your bread at the end.
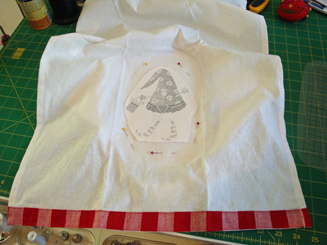
4) Hoop your stabilizer, spray it with a temporary adhesive spray, and stick your towel down onto the hooped stabilizer. I like to pin a little around the edges, as you can see. I feel like it will stay in place a little better during the stitching process.
5) Stitch away! How cute is that!?! Remove from the hoop, trim any threads and tear away the remaining stabilizer. You may want to give it a little press with a hot steamy iron from the back side of the towel.
6) Wrap the towel around the loaf of bread so that it forms a gathered edge around one end. Tie it with a big pretty ribbon and you’re done!
You know I have extremely limited sewing time---everything I do really has to be completed in an hour or two—no more than that because I get interrupted with life and might not get back to the project (can you relate?!?) So this is a nice, easy project that adds so much to a gift with very little investment of time or money, but just LOADED with thoughtfulness. And maybe a few calories….
Happy Stitching Everyone!
Susan