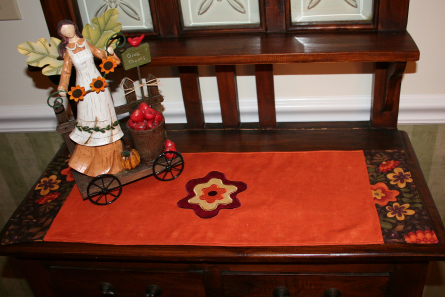
A while back, our oldest daughter painted her dining area walls orange. We all thought she was a little crazy but with her black furniture it actually looks very nice. She has a small table on one side and has been looking for a runner for quite some time now. She really didn't want it to be seasonal but the fall colors matched her color scheme best. When a friend and I stopped at a fabric store a few weeks back I saw this orange fabric and coordinating print and had to buy it (You know I just cannot enter a fabric store and come out empty handed! Anyone else have this problem?) This week is her birthday. She is in Nashville (and I have her dog, of course) but I hope she is happy with this little runner when she gets back. With her away it was easy to measure her table to make it the right size. Here is the finished runner on my entry cabinet since I do not have time to go back to her house to photograph it:
Here is all you need to make it this size 10" X 26":
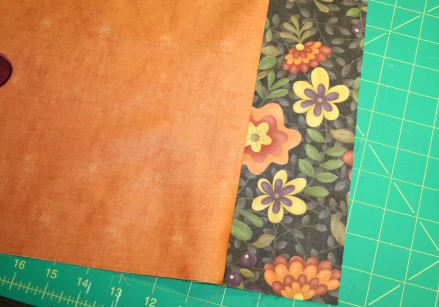
1 rectangle fabric for the top center 10 1/2" X 20 1/2"
1 rectangle fabric for the bottom center 10 1/2" X 20 1/2"
4 rectangles of coordinating fabric for the accent ends each 10 1/2" X 3 1/2"
1 rectangle soft fusible interfacing 10 1/2 X 26 1/2 (I usually wait to cut this until the top is complete.)
Embroidery Design for the center (optional) You can download my layered funky flower appliqué below.
Scraps of fabric for the appliqué flower if using.
Two sided appliqué iron-on interfacing such as HeatNBond (optional)
Thread
What you do:
Embroider the design if desired
1. If desired, iron the fusible to the wrong side of the scraps for the funky flower. Cool and remove the paper side. Set aside.
2. Fold the top center rectangle in half both vertically and horizontally to find the center. Hoop with cut-away or tear-away stabilizer .
3. Embroidery the first run of the bottom appliqué layer.
4. Place the bottom layer of the appliqué fabric on the hoop so it completely covers the placement stitches. (You can use a little spray adhesive on the corners if you like.) Stitch the second color to tack it down.
5. Remove the hoop from the machine and cut closely around the outside of the appliqué. These little EAsy Cut squeeze scissors are great for this. Put the hoop back on the machine and embroider the third color appliqué run.
6. Repeat for the next two layers and then embroider the last color for the center of the flower. Remove from hoop and cut away or tear away the stabilizer. Press.
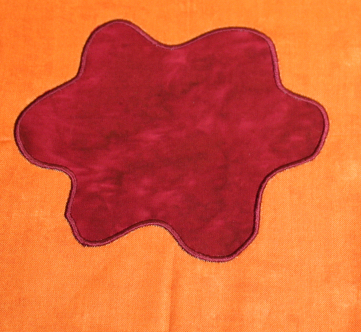 This is what the first layer looks like completed.
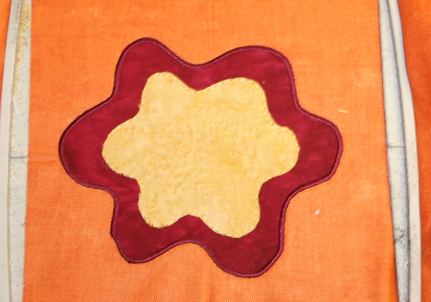 This is the second layer trimmed before the applique run.
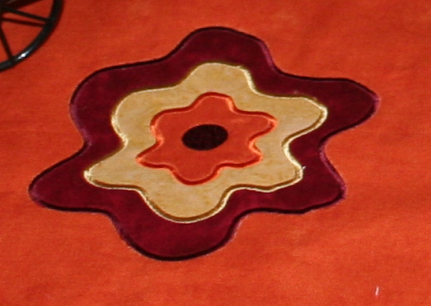 This is the finished funky flower.
Make the Runner
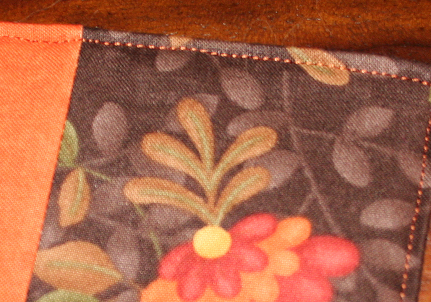
1. With right sides together pin the end strips to the ends of the front and back. Using 1/4" seam sew. Press the seams open.
2. Press the rectangle of soft fusible interfacing to the wrong side of the front of the runner.
3. Place the front of the runner face up on a table. Place the back of the runner face down on top. Pin and sew using 1/4" seam leaving and opening on one side for turning.
4. Trim the corners. Turn right side out and press well folding the opening in so the edge is even. Topstitch 1/8" from edge all the way around.
Click here to download the funky flower appliqué.
You could easily make this simple runner any size you need. It sews up in no time at all. Make the center sections shorter and you could make matching placemats for a great gift.
Take care,
DB