It is time for perfect brides to be walking down a perfect isle, in a perfect gown, with a perfect man. Well, many of us need to come up with a perfect gift in any event.
LaRue, the Quilter Extraordinaire, and I like to exchange ideas of what we will be blogging about here at AnnTheGran. She had the best idea for me. I told her I had seen those double cuffed pillowcases and she said she had the easiest pattern available. Enter the quickest, easiest project I have done in years.
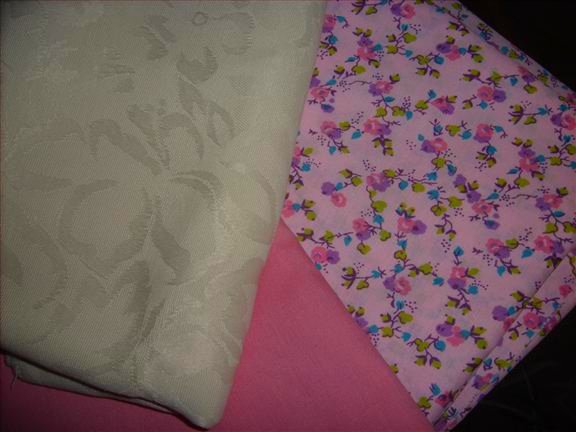
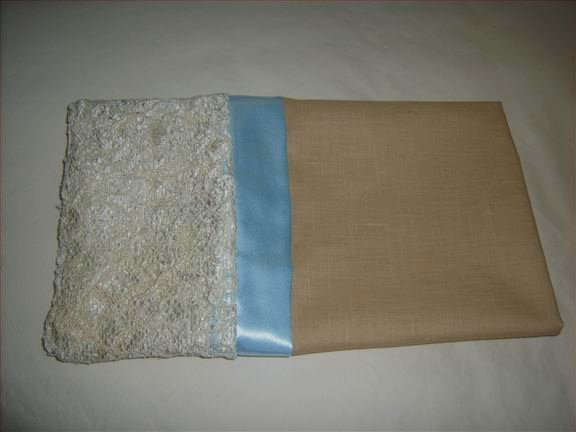
I had some material that was lying around for a long time. You know that material that we have to find a place to put because we cannot bear to part with it? Here is the sample set I chose:
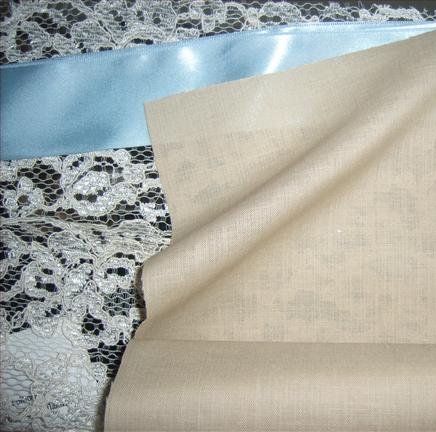
The beige fabric is linen look, but a lot softer. The strip of ribbon was just purchases from Wal-mart - you do know they are liquidating their fabrics permanently, don't you? And the bottom fabric was a scrap piece of lace that is not very large, so this project is perfect.
After using lace, I don't recommend using it for the cuff for various reasons, but in this case, it was a little too 'open' in the weave and caused some sewing issues. But I decided that is what I wanted, so here goes the steps.
1-1/3 Yards 45" pillowcase fabric (cut to two 24" lengths, one for each case)
4" to 6" by width of fabric for accent (ribbon is an easy choice)
10" by width of fabric for cuff
Standard pillowcases are 22" wide, so the 45" fabric makes it very easy to plan your project.
Iron your accent and cuff fabric by folding in half lengthwise. You will have a long piece of accent (about 3" by about 42") and the cuff is done the same (about 5" by about 42"). You want a sharp edge on these pieces of fabric so that your finished project will be crisp and clean.
Lay down all three materials. The bottom layer is the cuff, unfolded and wrong side up; the second layer is the accent piece, folded with selvage edge in the pinning area; and the top is the case material, open and wrong side down. Pin them together making sure that edges are well aligned.
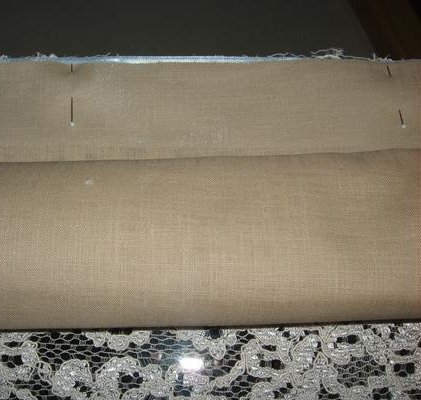
Roll the case material up to that top, pinned area. You now have pieces that are the length (42") of the fabric, but only about 4" or 5" wide.
Pull the edge of the cuff material up around the rolled case material and pin to the top edge.
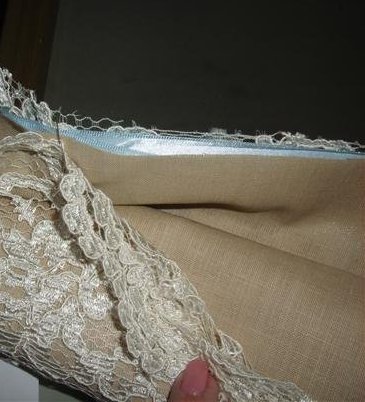
Sew the seam which includes the bottom layer wrong side of cuff, the edge of the accent fabric, the wrong side of the case material, and finally, the other side of the cuff material. Because my upper and bottom layers were both lace, I used scraps from Badgemaster stabilizer. It will wash right out, and the lace did not get tangled as it was sewn. Read more about Badgemaster at my blog specifically for it. It is one great wss!
Turn open the cuff material, and turn the inside fabrics out. The end result is an almost finished pillowcase.
.jpg)
Close the top and side seams and press. Your pillowcase is a joy and it takes only about an hour to do the whole process.
I am gong to work with Alphabet Xpress to add the names of my bride and groom, nothing is easier to work with for names, phrases, dates and so much more.
The best part of this project (beside the fact that it is quick and easy) is that you can combine lots of fabrics. Here are a few of my next projects, and I am not sure which will be the case fabric, the accent fabric, or the cuff. How fun is that?