November 6, 2009
db1921
Not rated yet
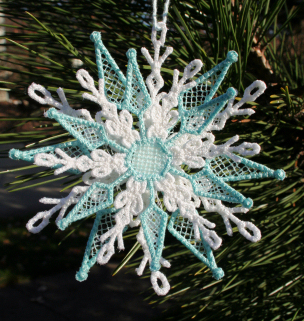
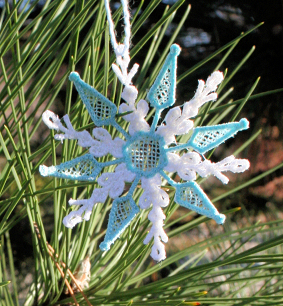
Each time she visits my granddaughter asks if we can get the manger set out early this year. It is very old and worn but she loves to play with it, taking the figures on the trip to Bethlehem. We make a tradition of getting the house ready for the Christmas holidays the weekend after Thanksgiving. So she must wait until then. Another thing she requested this year was to have embroidered snowflakes for her tree like we have on ours. Now I have had mine for a long time and they were all hand crocheted, then starched to make stiff. Since my crochet skills are pretty basic and she loves to watch the embroidery machine go we decided to make hers the easy way. Not being a traditionalist (at least not yet) she wanted her snowflakes to be blue. We finally decided on blue and white with a shimmer finish. We have finished a dozen or so and have a few more to go to have enough for her tree but we are having a good time making them. I think we will make a few extras to use as bag tag decorations.


We'll be glad to share our snowflakes with you. Click here to download them. Please feel free to make yours all white if you like.
Basic instructions for the layered snowflake follow.
You will need:
- Snowflake designs.
- Two layers of wash away mesh stabilizer.
- Embroidery thread in colors of your choice.
- Bobbin thread (we just used white).
- Two adhesive pop dots (like they use in scrapbooking).
- Glitter or shimmer spray if desired.
- Piece of embroidery floss or string.
To make the snowflakes:
- Hoop two layers of wash away mesh stabilizer (you could probably use soluble but I like the mesh.) Load the design and embroider the first color directly on the stabilizer.
- Embroider the second color. If you want it all white just use white for both colors.
- Cut around the design fairly closely leaving about 1/8th to 1/4th outside the snowflake.
- Using your fingers and warm water dissolve the stabilizer. (You want as much as possible to stay in the threads of the snowflake to keep it stiff so do not rinse it under running water or soak it.) Let Dry.
- Repeat with the second snowflake size.
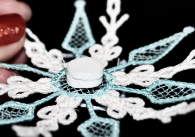
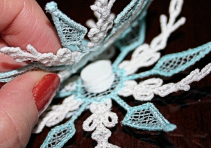
- Lay the large snowflake face up. Stack the pop dots on top of each other and place on the front center of the large snowflake. Place the center of the backside of the smaller snowflake on top of the pop dots.


Add glimmer or glitter if desired and string a piece of embroidery floss to create a hanger.
Making ornaments can be lot of fun. These snowflakes were made using Designer's Gallery Christmas Traditions software. Who doesn't love an ornament tag on their gift. These little creative pieces of art can use up scraps, thread, glitter, buttons and whatever else you have on hand. They become something useful as well as well as give that handmade touch. They can be used as tree and wreath decorations, on scrapbook pages, cards, gifts and anything else your imagination can come up with. Get creative and let me see what you do with these little snowflakes or other ornament and tag projects you do. Snowflake Tag ... you're it!
Take care,
DB
PS: I love snowflakes and here are a couple of my favorite snowflake design packs: Musical Snowflakes and Snazzy Snowflakes. Both are perfect for adding hot fix crystals and the possibilities are endless.