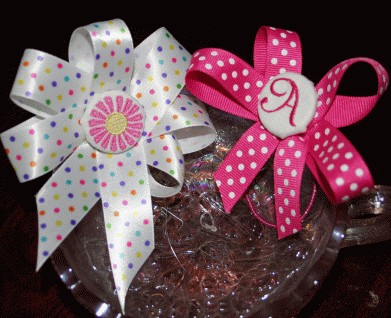
Being the "Meesy" to two beautiful granddaughters I am always on the lookout for cute things that I can make for them or with them. They are very girly girls and love fancy ribbons, barrettes and bows. Last weekend I went on a getaway with a friend and we browsed through shops in every little town we went through. In one I saw the cutest monogrammed things from key chains to hair bows to pacifier holders. I knew I had to come home and try a few of these. And although they are quick it doesn't have to be a monogram. Any tiny design like the one you can download below would work as well.
First here are my first two button bows:
You will need:
- 24 inches of ¾" - 1" wide Ribbon depending on how many loops you want in your bow. In my opinion Grosgrain works best and if you have never done one before you might want to consider starting with the four loop bow.
- 1 alligator clip or snap clip.
- 1 cover button 7/8"- 1" in diameter ( I used the "not tools required" kind where the back snaps on.).
- Paper and pencil.
- 1 small design or monogram that fits in the diameter of the button front.
- Scrap fabric about 3" square (or if you want to hoop it large enough to do so).
- Embroidery thread.
- Tear-away stabilizer.
- Sewing thread and a hand needle.
- Temporary spray adhesive (optional).
- Stapler (optional but nice).
Embroidering the Button Front
1. Hoop the stabilize.
2. Spray a little adhesive on each corner of the scrap and center in hoop.
3. Load and embroider the design or monogram letter.
4. Remove from hoop but do not tear off the stabilizer yet.
Making the Button (you can follow the directions on the package)
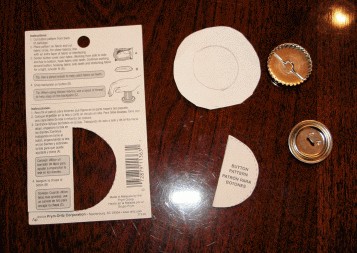
1. Cut the half circle pattern from the back of the button package.
2. Fold a small piece of paper in half and trace to make a circle. Cut the circle out.
3. Place button in center of paper and trace around it.
3. Place the paper on top the backside of the design centering the design in the inner circle and trace the outside of the circle pattern. Cut out the design along the trace line. Tear off the stabilizer carefully.
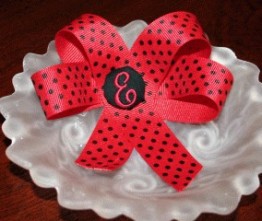
4. Place the button on top of the backside of the design centering it under the button. Pull the fabric around and press onto the little spikes stretching as necessary but holding the design in the center.
5. Lay the button face down. Place the back on and use a spool to press until it clicks to lock in.
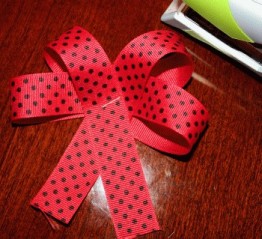
Making the Bow
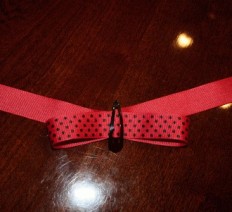
1. Fold your length of ribbon like this:

2. Place the clip at center and pull up to the crossover point. Hold or clip like this:
3. Fold the ends down to making the second set of loops in approximately the same size at the first ones.
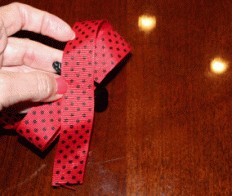
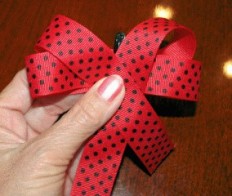
4. Now I cheat here and staple it to hold it. Then hand sew the layers together through the center.
5. Place the button in the center front and sew on. If your little one is younger you can add a couple of dabs of hot glue as extra insurance that it won't come off. Sew bow to a clip, headband or ponytail band.
Click here to Download the Mini Flower design
Alphabet Xpress has some great fonts that could be used for these fun little bows too.
I think I will look for some mini-Christmas designs to use for my next button bow making afternoon.
If you make some of these be sure to post them so we all can see and get inspired. If you know some other good bow making tips or uses for embroidered covered buttons share those with us all as well.
Take care,
DB