The sun shone on us all in Orlando and we had a great time at the second annual Annthegran Community Circle gathering. We met up with old friends and made some new ones too. For two days we learned lots, laughed lots and ate lots.
Mary Mulari and Rita Farro kept everyone in stitches as they showed clever ways to make quick gifts. We learned about Egyptian cotton, red sweatshirt evening dresses, glitter and glitz. And Zippers – Wow! What will that Mary Mulari come up with next?
Although most of the CC attendees came from the east coastal area we had ladies from Canada, Oregon and Texas. One lady met another from her home town and found out she lived in the house right behind her. It really is a small world after all.
Attendees went home renewed, with a whole host of new ideas to inspire their next project and the next and the next and the next.
Several attendees asked for my coffee cup wrap instructions. So here they are.
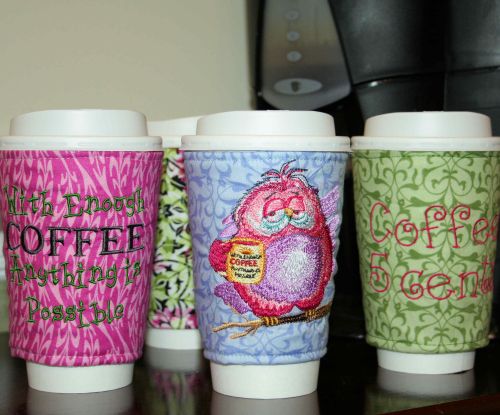
1. You’ll need:
- A 6”X12” rectangle of fashion fabric for the front.
- A 6”X12” rectangle of fashion fabric for the lining.
- A 6”X12” rectangle of leftover batting (Hobbs warm and natural type works best)
- An alphabet, font software or embroidery design of your choice.
- Matching embroidery thread.
- Tear away stabilizer.
- One paper coffee jacket.
- Velcro strip.
2. Carefully open the coffee jacket down along the glued seam. Place this as a pattern on your fabric.
3. Trace adding 1/4” on all sides. Cut one wrap piece from each - front fabric, lining fabric and batting.
4. Using whatever method you like center your design or text on the front wrap piece. Hoop fabric with the stabilizer or just hoop the stabilizer and stick the fabric on. Embroider the design. Remove the stabilizer. (Remember to check and do it right side up. I did it upside down twice before I got it right.)
5. Place the front and lining right sides together. Lay the batting on top. Pin. Using ¼” seam stitch along all sides leaving an opening to turn. Clip the corners and put a couple of snips at the curves.
6. Turn right side out and press folding the raw edges in.
7. Top stitch around the whole wrap.
8. Cut a strip of Velcro and sew to inside of one short edge and outside of the other.
9. Wrap a cup and give it away to get a guaranteed smile for the day.
Note: Add some trim to the top or bottom if you like for even more giggles from your friends. This is great for monograms too. Fun projects like this are easy to make, providing smiles and a sense of friendship without a lot of time spent.
After the event all us girls and I took off for the beach and then to see the princesses at Magic Kingdom. We had a blast – I can only wish that I had the energy of those two little girls!
Take care
DB
PS: My camera had some severe problems at the show so I got absolutely zero pictures this year. I was able to get it fixed after but if anyone else got some fun snapshots please post them in the gallery. Thanks so much.