Everyone is interested in ‘being green’ these days. Preparing for the Holidays, I plan to go green and have a great time doing ornaments and decor for my home.
I want to have a really old fashioned Holiday with my family and you may want to as well. What does that mean to me? To you? To our families? I suppose it is different things to different people, but one thing is clear, saving money is paramount for nearly all of us. This one qualifies for money saving, going green and keepsakes for generations to come, I like that!
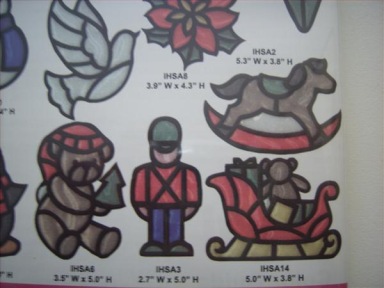
The design I selected for this blog is one that creates a “Stained Glass Ornament” and is really good for decorating trees, center pieces and certainly, windows. The following photo is what the designer had in mind:
These designs are created with clear vinyl, organza and black thread acting as the beading on the glass. They really look like 'stained glass' and when placed in a window, are outstanding.
But, I did not have the same thing in mind! I am thinking 'use what you have,' 'Green' and 'Heirloom.' I made a list of the sorts of scraps you might have available. Keep in mind that some of the ‘stain’ areas are as small as 2” by 2” so you should be able to find lots of great pieces to use on this project.
Fabric Variety:
· Quilt scraps
· Sewing project scraps
· Organza for stained glass look (the original design by the artist)
· Denim in various stages of wear
· Themes for your Décor – all blue or purple, etc
· Lace, net, voile, tulle (first made in Tulle, France, c.1818), nylon, rayon, silk, etc
· Support your favorite charity by showing their colors.
· your imagination is the only limitation
You will also need some clear vinyl for the base of your ornament.
This design is quick and easy. Start by placing a piece of the vinyl in your hoop and stitch out the outline for the first appliqué piece. Place your initial fabric so that the outline will be covered and stitch it with the second round of stitches. Trim as you normally would and repeat the process until all areas are covered with fabric.
The final step is to create the satin stitch which is the “beading” for the stained glass. You may want to use either black or silver thread since stained glass is usually one or the other. I used several different types of threads, whites, metallics and some twist types.
Here are some of my completed items.
This one has two different scraps, one is the bell and the second is the bow.
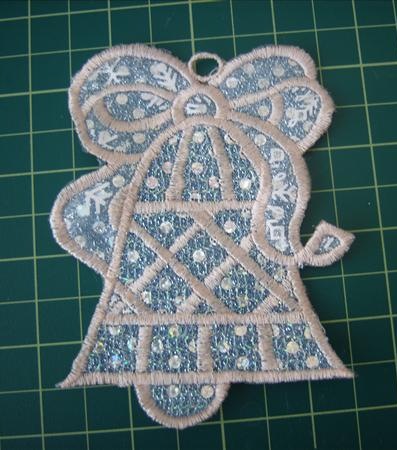
The designs themselves do not have the rings on the top because they are 'window' ornaments. I placed an "o" from the monogram lettering available on my machine. However, since there is no underlay for this letter, it is going to collapse if it gets wet. So, I tucked it low into the design for support. The design itself is not Free Standing Lace (FSL), but due to the vinyl, can be used alone or in an arrangement, just like FSL.
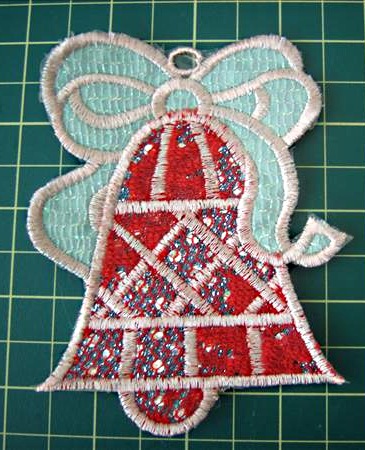
The next design is using three different scraps. The bell has a blue background with a red overlay. The light green bow makes a good contrast to the bell.
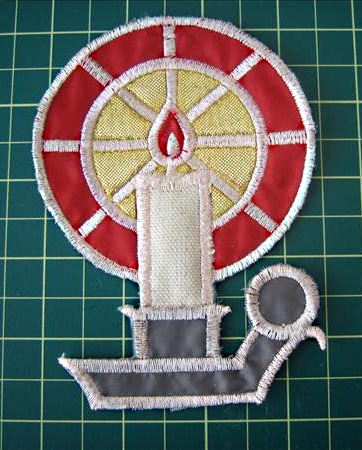
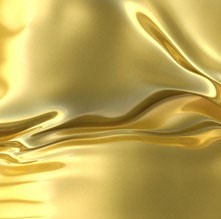
I was really having fun making up things as I went along. The candle is done with heavier fabrics, including gold lame fabric (shown in second photo).
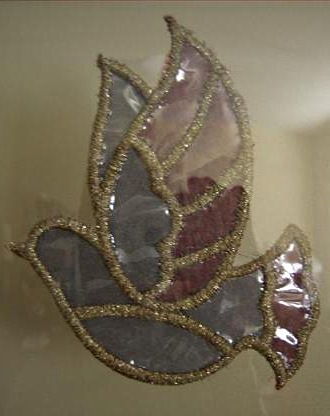
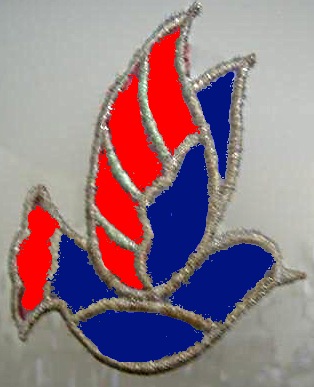
In the next photo, you can see my dove which I did do with the organza, and in the stain glass method. The second photo has been colored by me so you can see the color more accurately. Photographing the vinyl distorts the colors, making them appear dull. The ornaments are absolutely beautiful and colors are alive!
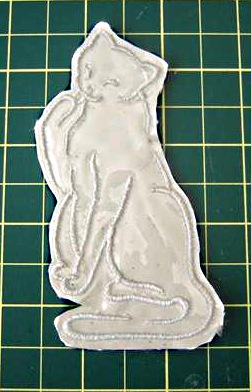
And, last but not least, I found a design which was just an outline of a cat with clean paws. I used white fabric sandwiched between two pieces of vinyl. When complete, I did not trim close to him because he did not have the same heavy stitching as the stain glass. Mr. Snowman was fun to do as well.
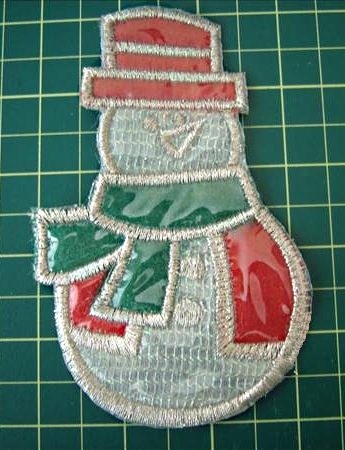
These are "Christmas in the Heartland" and using the same instructions as the cat, I think these would make great "stainglass Ornaments!"
I am off to do some more of these, they will look nice on gifts, at table place settings, hmm. . . and so many more places.