You know that WWW stands for World Wide Web. Typing in WWW tells your browser that you are connecting to a Web server.
However, as the Internet and related-technology evolved, prefixes became mostly unnecessary. But we are creatures of habit and many Websites use both WWW and non-WWW addresses.
Today, advances in search sites have made this no further problem. Search sites are now smart enough to know that both addresses have the same content and some sites have forwarding to the preferred spot..
These days, it's a bit redundant to use WWW with a URL. Your browser can figure out what it's connecting to on its own. It's pretty rare, but some sites may still require it. If you have trouble loading a site, try putting the WWW back in. Occasionally, this will fix the issue and route you to the correct site.
Here is a nice Freebie - Virtual Magnifying Glass Portable. It makes your cursor works just like a real magnifying glass. Just point and see. You can also put it on a thumb drive. Then, use it on any Windows or Mac machine. You won't have to strain your eyes again. It is free - find it here: portableapps.com
Creating a keepsake is always an honor IMHO because it will be something admired and appreciated for a long time to come.
I do create and sell hankies for brides and am always surprised by what they will be asking of me each time.
Recently I had worked on a hankie that had some of the remaining beads from the bride's wedding dress. What a challenge that was!
For ease of working on such projects, give me my Alpha Xpress any time! This time I am going to go over some of the adjustments I make to end up with a WOW factor for my bride.
When my bride first approaches me with their order, I do have a set of questions for them. These include:
- When is the Wedding Date (do I have a little time?? - not always!)
- Who is the hankie for (I have a nice mother-in-law hankie that is a big hit, but there are others who want a keepsake too)
- We discuss which thought the bride wants for the hankie (you would be surprised at how lengthy some of the thoughts can be. . . )
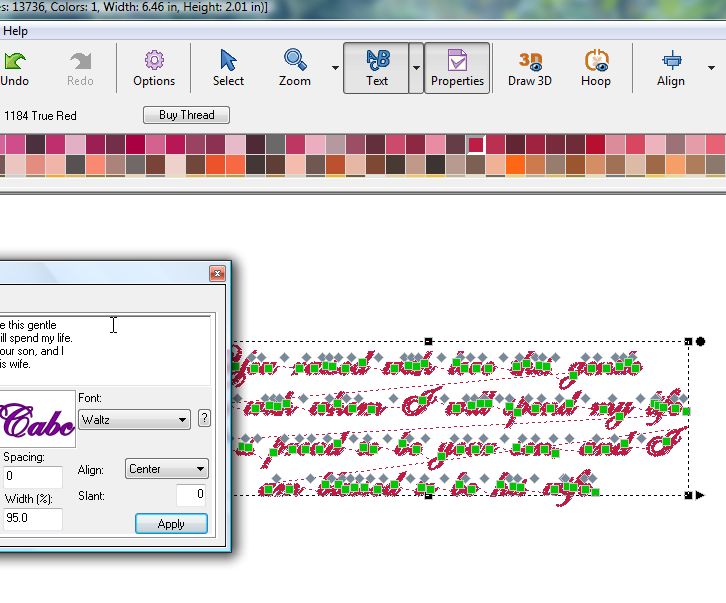
- We discuss which font is the brides choice (I only give 4 options, there is no need to give her dozens of choices. I use the Annie, Bonance, Darling and Waltz. Those are from very simple to very ornate and work perfectly!) Incidently Darling is the hands down ultra favorite!!!
- We chose what color the bride wants for the thread.
I guide the bride to the destination and prepare to create my project. I keep it as simple as possible for my own sanity.
I begin with selecting the Text feature and filling in my wording.
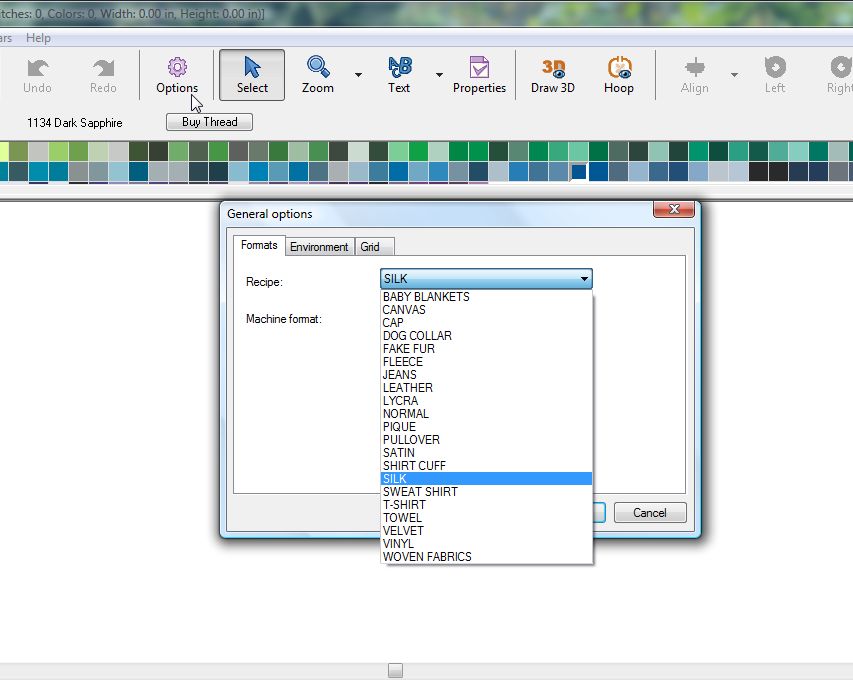
I selected Precious this time just for fun and it is a more formal and classic look.

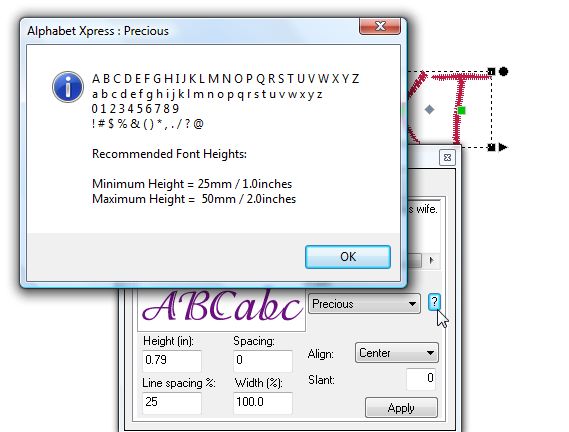
If you have never checked the "?" next to the name of the Font, now is a good time to do so. There are the 'pieces' available and suggestions for Heights.
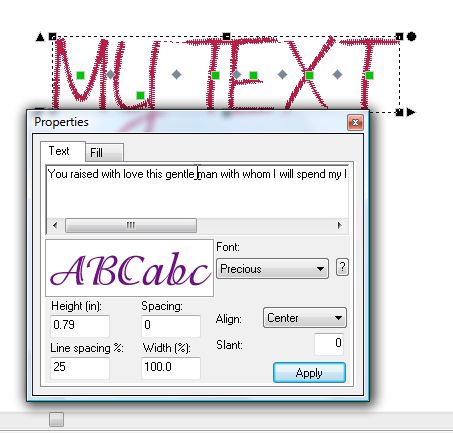
I needed to adjust the line of text so that it did not become 5 miles long. I have done this so often that I know about how many letters will look good on a hankie and I selected the end of the word "gentle" to be the end of the first line. I continue until I have several lines for my project.
Next, I know that .79 inches (19 mm) will be too large for a hankie. That size would be better for something like a blanket. The Help information indicated it works best at 1" but I am going to use .4" because I will be making further adjustments.
The .4" has reduced the stitches, but experience tells me that I need to adjust more. Additionally, this is 8.75" wide, still too wide for my hankie.
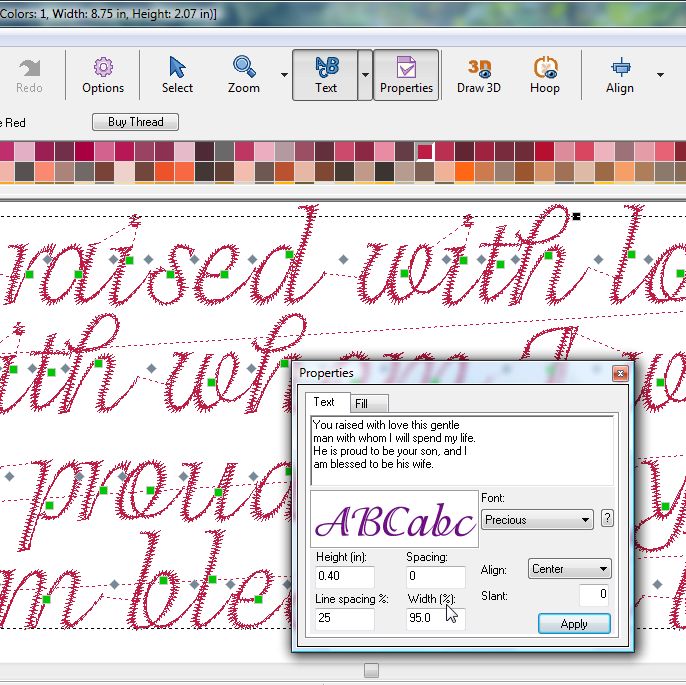
I returned to Properties and adjusted the width from 100% to 95%. I am careful not to make a large adjustment here because this is a 'squeeze' and I don't want my letters to be too close. I still have another place to adjust. Just stay with me here.
In Properties, I select the "Fill" tab and have some options to use there. I will stick with the satin stitch since this is for a formal event. However, I could use something more playful if I am making something like a jacket where I might be using something interesting like 'Snake Skin.' I do play with these so I know what to expect if I decide on a project on the 'wild side.'
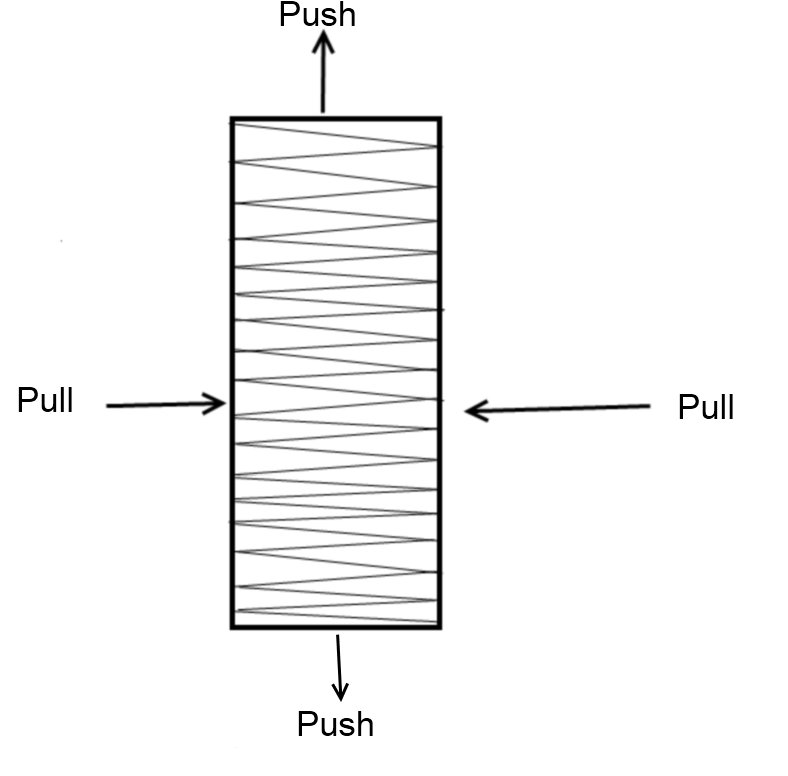
Notice that the 'Density' is set at .4. That is an average density and found frequently in embroidery. Look at the pattern, it shows the difference between points.
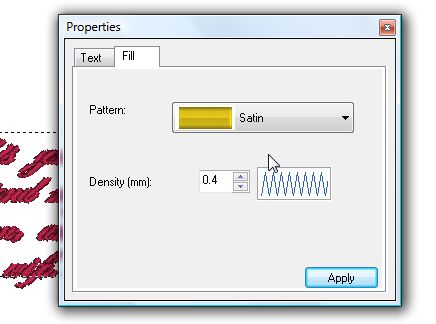
I adjust my Density to .5 and you see that the points are further apart. That means that there will be fewer stitches. So, that is why a larger number in the density means fewer stitches.
I adjusted the Density and saved the file.
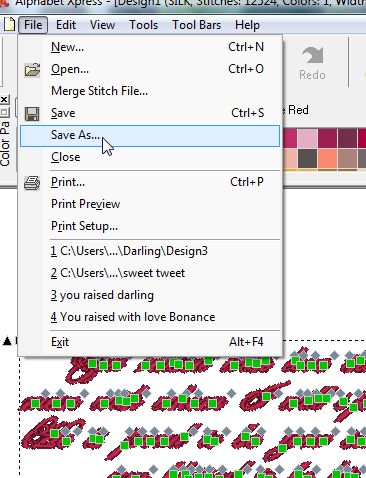
As usual, I do a 'Discovery' sew to see exactly what my outcome will be. A 'discovery sew' (aka sew out) is done on a similar scrap of fabric is something necessary to be sure you will not ruin your project which may be on a very expensive fabric or garment.
Alpha Xpress is the best for a lot of writing!!