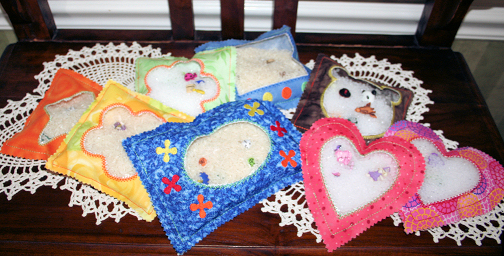
We are preparing for VBS this week. My daughter volunteered to co-ordinate the craft room and it has been a big job. The same basic craft, with minor changes, has to work for all ages from three years to fifth grade and go with the lesson for each day. She has come up with some creative ideas and we are pretty much ready to set up now. Since the children may finish in stages we wanted some "extras" activities that could be done for short but varying time frames. One activity suggestion was to have I Spy Bags available. I decided that we could make those on the embroidery machine fairly quickly. So, off to the sewing room we went and here are a few of the ones we have ready to go:
Here is what you need to make one:
Two fabric rectangles approximately 8" X11" (these may vary depending on which bag you make and what you have available)
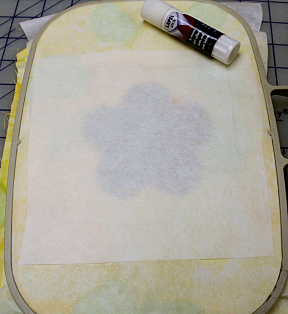
One rectangle of light tear away stabilizer
One 6" X 6" square of light tear away stabilizer
5" X 5" square of clear, sewable plastic
Lapel stick temporary adhesive
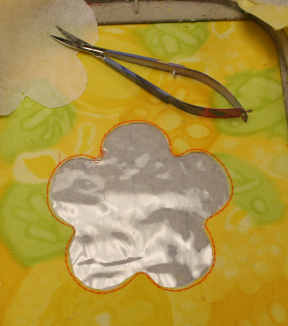
Appliqué embroidery snips
Funnel
Rice or plastic pellet filler
buttons or other small trinkets
sewing and embroidery machine
Embroidery thread and bobbin thread
Here is what you do:
1. Load the design into your machine (You can download some of the ones I made here)
2. Hoop one rectangle of tear away stabilizer and one rectangle fabric just as you would for any embroidery. Embroider the first color.
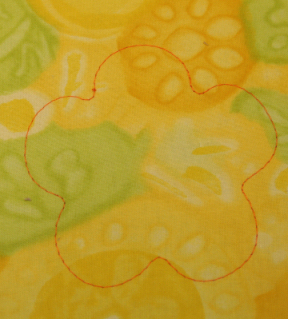
3. Remove hoop from the machine and lay on a flat surface. Trim out the fabric only just inside of the stitched lines.
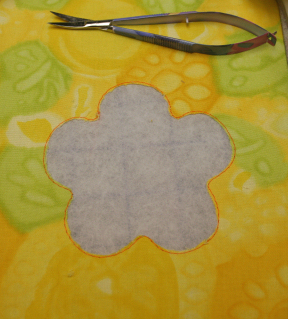
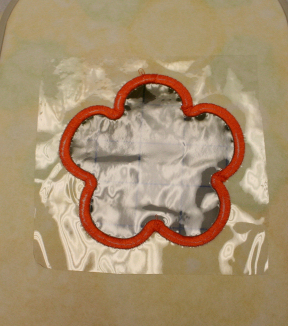
4. Flip the hoop over and use the lapel stick to adhere the edges of the clear plastic to the backside covering the stitches. Adhere the edges of the 6" X 6" square of tear away and place over top of the plastic. (This allows the plastic to easily slide over the machine bed.)
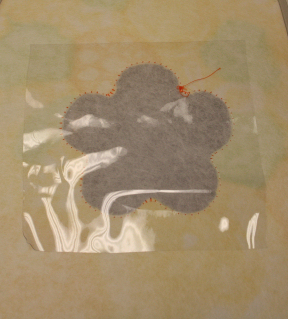
5. Carefully flip and slide the hoop back onto the machine. Check to be sure all is in place as desired. Embroider the second color. Remove hoop from the machine and lay on a flat surface. Carefully trim out the stabilizer from in front of the plastic.
6. Carefully slide back onto the machine and embroider the third color. Remove hoop from the machine, flip over and lay on a flat surface. Slowly and carefully remove the stabilizer from the backside. Trim away any thread tails.
7. Now, put a little of the lapel stick adhesive in along the inner edges on the back side of the hoop. Place second fabric rectangle face up and press in place gently. Carefully slide the hoop back on the machine and check to make sure the fabric is in place underneath. Embroider the last color.
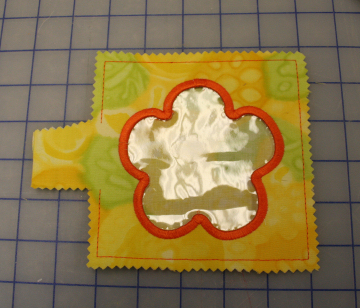
8. Remove the fabric layers from the hoop. Pink around leaving a neck at the opening. Insert the funnel into the neck. Add a little filler, then the buttons or trinkets, then fill approximately 3/4 full with filler. Sew the opening closed using your sewing machine. Pink the neck off evenly with the rest of the pinked edge.
9. Make a list of what is inside to go with the bag and you have and I spy bag the will keep a child busy, at least for a little while.
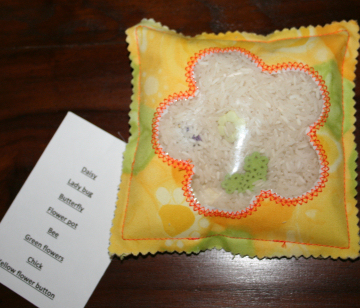
We made a ton of these little I spy bags some with varying themes and number of items so that there would be a few for any age group. My granddaughters tried them out and loved them so we think these will be a hit at VBS.
Hope you have as much fun with these as we did.
If you like embroidering quick and easy things for children here are a few more projects that you might like:
Button Snakes
Polka dot aprons
Fishing in the hoop
Take care,
DB