April 11, 2014
carol
Not rated yet
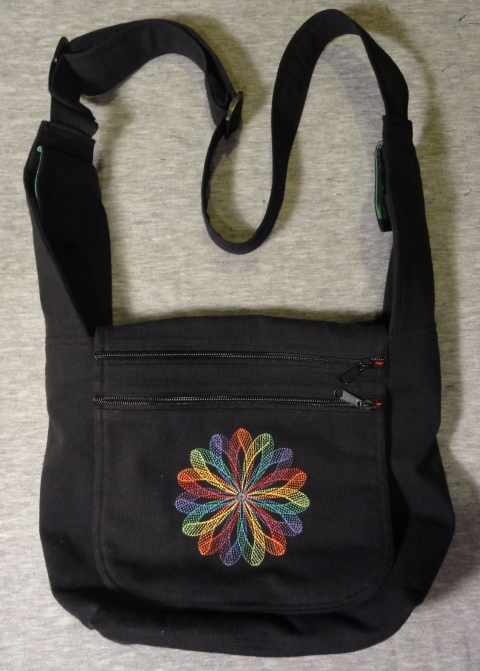
A few years ago I made for myself a messenger bag style purse, with one of my
swirl designs embroidered on the front and back. (I used the swirl with 18
repeats in 6 colors, shown here.) You can see the finished purse in my March
11, 2011, blog.
As soon as I'd finished that first handbag, I thought of ways to vary it, but
it took me three years to start the new bag. I was waiting to find solid black
denim rather than the kind with grayish threads running in one direction. Also,
I had other projects that needed attention sooner, such as the Baby Activity
Books for our grandchildren.
I finally decided that the perfect time to make this new purse would be the
week my husband was to be out of town for a conference. I ended up spending over
25 hours making the purse. I added a lot of top stitching to the purse and also
stopped to take photographs of construction in case I decide to write up
instructions in the future. I think the time was well spent because I am very
pleased with the results.
I did make some changes from the original version. Can you spot them? For
this new purse I used my favorite swirl variation, shown here. The swirl on the
front of the purse fit in the 120x120 mm hoop and the one on the back fit in the
200 x 200 mm hoop. The solid black fabric really makes the designs pop, doesn't
it?
Even though denim is a woven fabric, it has some stretch to it. The denim
had shifted a bit when I embroidered the swirls for the first purse and I wasn't
happy about that. After some research, I bought some Sulky Totally Stable
stabilizer. (It is available at Ann the Gran in a kit for embroidering on
towels; it is also available in other sizes elsewhere.) I did a test sew on
smaller fabric and was very happy with the results; I definitely recommend this
stabilizer for fabrics that are at all shifty. I pressed two layers of the
stabilizer to the back of the fabric before marking my centering lines, and then
used basting spray to position the fabric on my hooped cutaway stabilizer. This
is my preferred way of embroidering, but you can hoop the stabilized fabric
directly in the hoop if you wish.
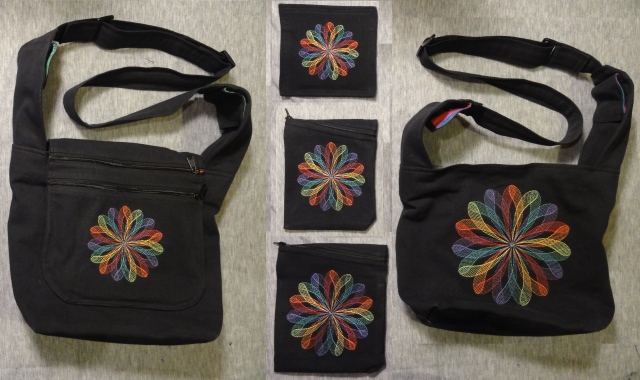
I made a Zip-Around Pouch with the sample 120 x 120 mm swirl. I had had
quite a few swirl pouches to coordinate with my first purse, so I decided that my
new purse needed the same. I made another Zip-Around pouch, this time using my
150 x 150 hoop. One more swirl to try. I made a new pouch to hold my business
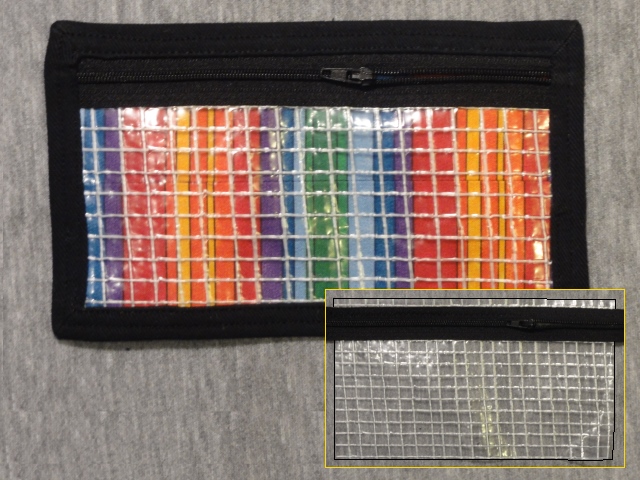
cards. For this pouch I used my 100 x 100 swirl size. The front of the pouch
has a zipper on a piece of reinforced plastic, with a piece of lining fabric
behind. The embroidery is on the back of the pouch, with the edges formed into
a frame to finish the front of the pouch. I call it a Window Pouch because the
front of the pouch is a window. Here is a picture of the complete set,
consisting of purse and pouches.
And here is the front of the window pouch.
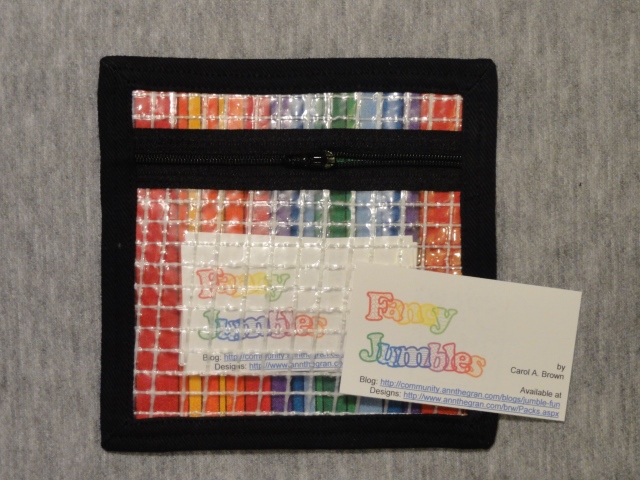
Click here to download the instructions to make this pouch. The pouch can
be made in any size, and you can even use more than one zipper on the pouch front.
See the Variations section of the instructions for details. The instructions
also show my use of the Totally Stable stabilizer.
For the pouch shown below, I placed the edge of the zipper 1/4" from the edge
of the plastic. A small amount of the zipper is hidden by the fabric frame, yet
the zipper teeth were far enough away to allow easy top stitching of the fabric
frame. I don't recommend putting a zipper any closer to the edge than this.