So are you hanging in there with me? Together we can get these gifts done early! Last time I finished a quick and simple project and promised to razzle and dazzle you this week. Well--I may not razzle you, but I will certainly dazzle you. This week I used some beautiful crystals to complete the project and it turned out beautifully! I couldn't get the photos to do the project any justice. You will just have to come see it in person the next time Ann hosts a Community Circle event.
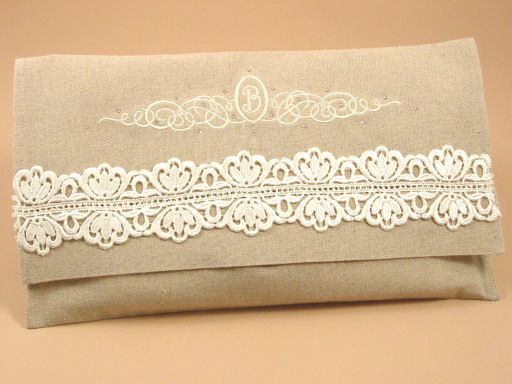
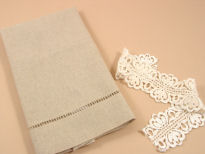
This week's gift-giving project is for my sister, who is restoring a 100-year-old home in Gainesville, Florida. It has a ton of history and she loves antique things. She's going to love this Victorian-inspired lingerie bag! Can you believe this started out as a guest towel and a small piece of lace? Guest Towels don't have to be just for hanging around the guest bath. They can be turned into something completely different with a few unique folds, a few stitches, and some trims! Here's just one of a variety of projects you can create using a very basic blank.
Victorian Inspired Lingerie Bag
Supplies:
-Oatmeal Linen Guest Towel (the white and ecru guest towels are great colors for this project too)
-Decorative lace or ribbon equal to the actual width of the guest towel
-Monogram or design of your choice
We used: AnnTheGran's "Ruffles and Flourishes" (Embellishment02)
AnnTheGran's "Dynasty" Alphabet Collection
-Thread to match the color of your guest towel
-Thread to match the color of your trims
-Tear Away Stabilizer
-Optional Hot-Fix Crystals
1) If you are using the Oatmeal Linen Guest towel, we highly recommend pre-washing it. The oatmeal linen is very raw and unprocessed, so it tends to shrink. The white and ecru do not need to be pre-washed. Machine wash on delicate, put into dryer with a load of towels and run until the guest towel is still damp. Take it to the ironing board and press with a hot steamy iron and some starch. It will look beautiful again!
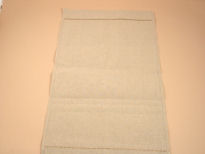 2) Place the guest towel right side down onto your work surface as shown in the photo.You will turn up the bottom of the guest towel approximately 7" to create a pocket. Use your best judgment to create a pocket that works for the size/style of lingerie bag you want. Top-stitch along each side of the towel to finish creating your pocket. With me so far? This is going to be easy!
 3) Before we get to the embroidery part of the project, we need to add the lace trim to the lingerie bag. Why do this now? Because the lace is going to affect where we want to place the embroidery design on our finished project. Visually we want the lace and the monogram to complement each other, so we need to add the lace first. If you're using ribbons or other sort of trimming, this rule stays in effect. Add the trims first, then the embroidery designs.
4) Don't make adding the trim a science project. You're the only person on the planet that will notice the stitching. The person receiving the gift is going to be in love with the monogramming..not with the edges of your trims! See the next step for details on attaching your lace trim.
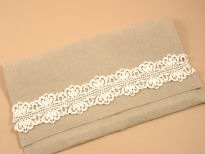
5) With thread that matches the trim, use the hemstitching on the guest towel as a guide and straight stitch the lace onto the guest towel across the width of the towel. I like to use a straight stitch across the width of the towel first, then tack down the edges using a small zig-zag stitch. See how easy that is with the hemstitching as a guide?!? No need to worry about straight lines-it's built into the guest towel!
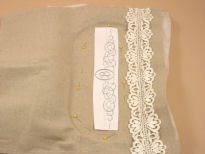 6) Here comes the embroidery! Using your embroidery software, combine the Embellishment02 design from "Ruffles and Flourishes" and the monogram of your choice. I had to resize the lettering a bit to fit within the oval on my embellishment design. Then I enlarged the entire design to get the desired width and height. PRINT A PAPER TEMPLATE! If you've been following my blog, you've learned how much I love paper templates! Cut out your paper template and determine design placement on your lingerie bag.
7) I chose to use a tear-away stabilizer. Some might prefer a water soluble tear away for the backing, but I don't like to have to get my project wet after completing it. I find the tearaway works just fine on its own. I hoop the stabilizer and spray it with a temporary adhesive spray (or you can use a sticky stabilizer). Place the towel down onto the hooped stabilizer and pin around the edges. No need to hoop the entire towel! Stitch the embroidery design.
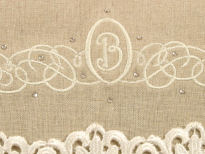 8) Finally, I added some decorative crystals as an extra special something. Just a few to highlight the design-not overpower it! I wish the photography would show the beauty of this finished bag. It's truly gorgeous!
Fill with something special and you have a beautiful Victorian-inspired lingerie bag made so simply with a guest towel! And gift number 3 is complete! Think of all the different guest towels and kitchen towels there are in the world---all of them can be used in this manner. The possibilities are truly endless.
Until next time,
Susan