When you first start to work with embroidery, you are going to find so many great items that it will be hard to decide on which one to try first. Right after Free Standing Lace (fsl) my next project was cutwork. To my knowledge, neither of these techniques can be done with hand embroidery. So, naturally I was anxious to do the cutwork as well.
For newbies, cutwork is a lovely way to make your embroidery a significant cut above as an outstanding gift or treasure for yourself.
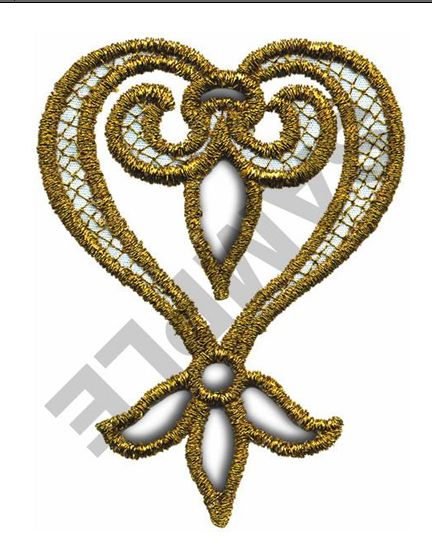
This wonderful design is from Great Notions is just $8.49 for Ann's Club Members or $9.99 for non-members. I have turned it up side down for a lovely heart design!
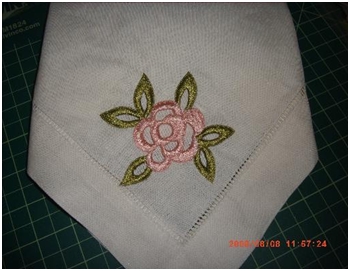
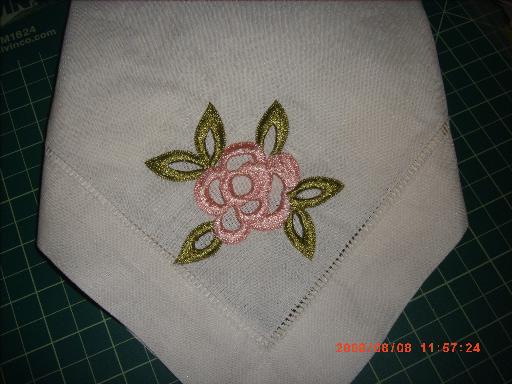
Cutwork is a second cousin to an applique. The stitching will be created in a similar manner. I actually did this project a while ago, but the principles are interesting. This is my hemstitched napkin it is identical to the second photo.
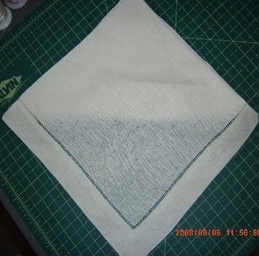

The second photo is a napkin courtesy of Neiman Marcus at $120 per dozen.
When I was seeking the perfect design, there were so many here at ATG that just made me feel like I will be creating something really special the next time with that heart design. I know you understand that feeling; it is what this embroidery is all about. I wanted to show you how easy it is to do a ‘cutwork' style of design and take your breath away at the same time.
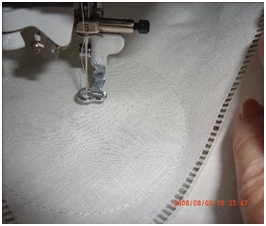
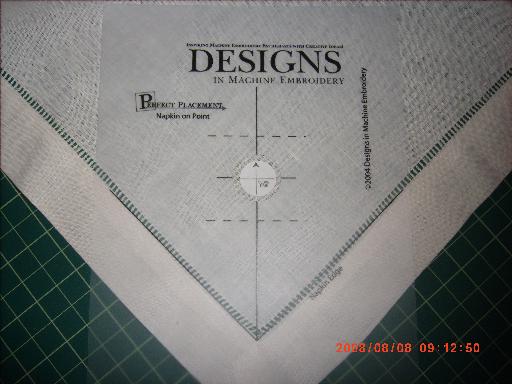
My test sewouts exceeded my expectations! And my first napkin was ready to be sewn. This is really where "Perfect Placement Kit" does come in quite handy. I worked with the placement and felt confident of my workmanship. In the photo below, there is a ‘v' shaped mark which is barely visible, and that is the key for placement.
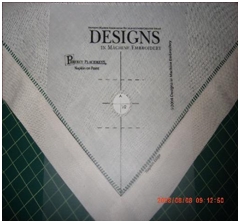
The floral design I selected has two rows of cut area placement. I chose to do the first outline twice and the second outline once. That is a personal preference because it makes the cutting line stronger. The eventual design will make all the area sturdy. I was very impressed with the digitizing on the design. I have several other brands which did not have the ‘edging' stitches that this digitizer had placed in their work.
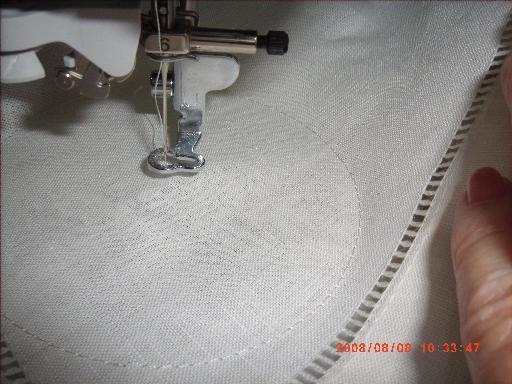
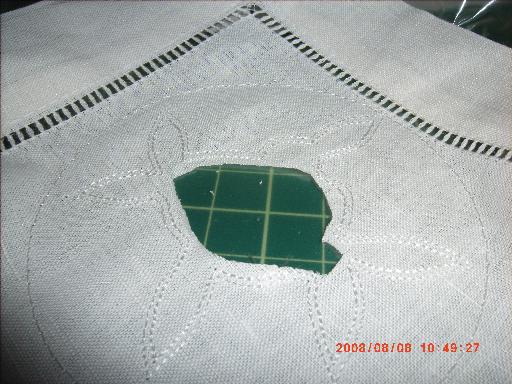
I did not hoop my fabric because I wanted to be sure there was no movement in the linen. Linen is loosely woven and can have some variation in the thread lines. So, I started with my basting circle. Barely visible in the second photo is the outline. I am ready to begin cutting.
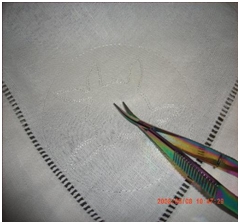
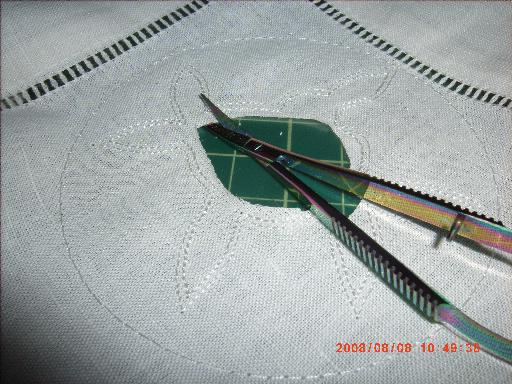
I did my ‘rough' cut to start out with my over all cut. Do NOT remove your fabric from your hoop. Make sure that you do NOT cut your stabilizer! I am using Badgemaster. It holds up to a lot of wear and tear and as you all know, I love it. If you are using the 'Ultra' water soluble brand, make sure you use it doubled in your hoop.
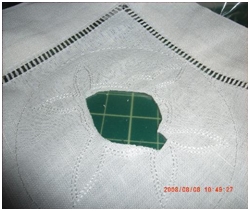
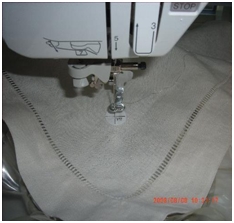
Once I completed the cutting (and snipping off any loose threads), I placed my hoop back into the machine. I did use an identical color in the bobbin threads since this is a napkin that is going to be used from either side. I was careful to cut the threads between change of colors so that those threads could not be a problem.
After finishing the cut, I replaced the hoop in the machine and embroidered away.
The embroidery machine does all the rest of the work for me! Remove as much of the stabilizer as you can. As stated, Badgemaster can take it! I carefully tear it away by hand, no scissors needed.
This project did not take long at all. There are about 8,000 stitches, so it was a 12+ minute sewout. Doing 4 or 6 can be done in less than 2 hours. How is that for FANTASTIC and quick!
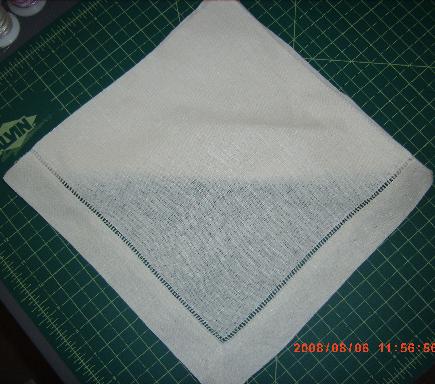
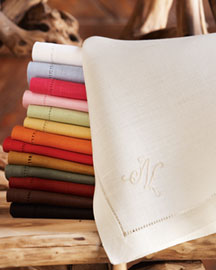
Photo courtesy of Neiman Marcus $120 per dozen
When I was seeking the perfect design, there were so many here at ATG that just made me feel like I was creating something really special. I know you understand that feeling; it is what this embroidery is all about. I wanted to show you how easy it is to do a ‘cutwork' style of design and take your breath away at the same time. I hope I succeeded.
My test sewouts exceeded my expectations! And my first napkin was ready to be sewn. This is really where "Perfect Placement Kit" does come in quite handy. I worked with the placement and felt confident of my workmanship. In the photo below, there is a ‘v' shaped mark which is barely visible, and that is the key for placement.
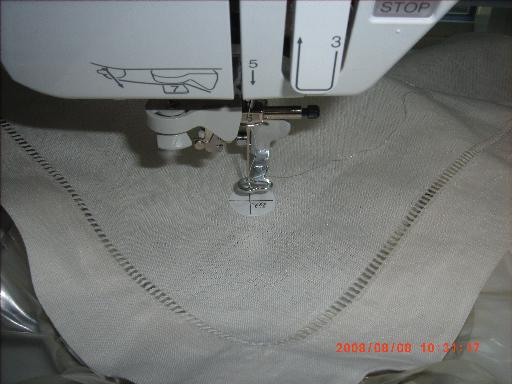
The floral design I selected has two rows of cut area placement. I chose to do the first outline twice and the second outline once. That is a personal preference because it makes the cutting line stronger. The eventual design will make all the area sturdy. I was very impressed with the digitizing on the design. I have several other brands which did not have the ‘edging' stitches that this digitizer had placed in their work.
I did not hoop my fabric because I wanted to be sure there was no movement in the linen. Linen is loosely woven and can have some variation in the thread lines. So, I started with my basting circle. Barely visible in the second photo is the outline. I am ready to begin cutting.
I did my ‘rough' cut to start out with my over all cut. Make sure that you do NOT cut your stabilizer! The cutwork style is a ‘cousin' to free standing lace; therefore, that water soluble stabilizer (wss) is important to your project. You can use a cut away stabilizer if you prefer but I felt my wss was working just fine for me.
Once I completed the cutting (and snipping off any loose threads), I placed my hoop back into the machine. I did use an identical color in the bobbin threads since this is a napkin that is going to be used from either side. I was careful to cut the threads between change of colors so that those threads could not be a problem.
After finishing the cut, I replaced the hoop in the machine and embroidered away.
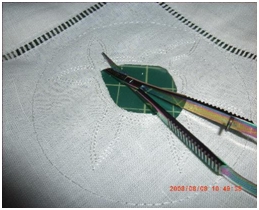
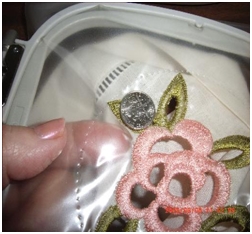
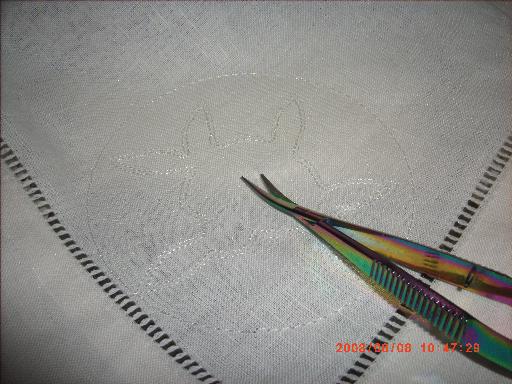
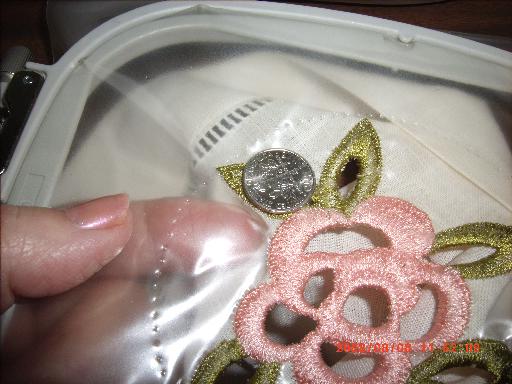
My completed design is ready for the final removal of the stabilizer. The small openings inside the leaves were cut away using my smallest scissors. That part is tricky and if a little amount of stabilizer remains, I could use a little water to complete the removal. I am using a coin (sometimes I use a spoon) to hold and preserve the stitches and cut or tear away the stabilizer as appropriate. This helps me take the pressure off of my fingers and hands.
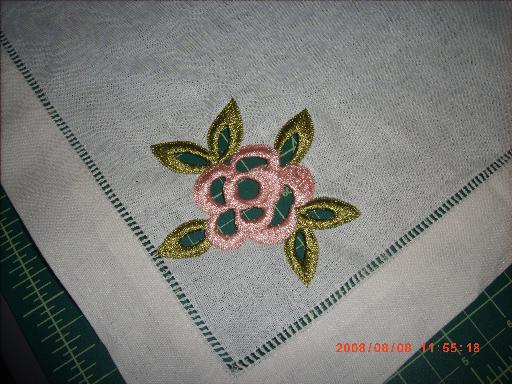
If for any reason you think you might have cut the threads make sure you use something like "Fray Check" so that washing will not damage the embroidery. It is so easy to nip a thread. If you feel the need to press the napkin, place a dense towel on your ironing board and place the design face down on that towel. Use a steam setting and your embroidery will not loose its 3D appearance. I personally think that linen is meant to have a casual quality to it, so for me, ironing is counterproductive to the fabric's properties.
I hope you will find time for this eye-catching project. I know I had fun doing it and cannot wait to finish the set for a special Christmas gift, maybe for me!
Print Blog
- See more at: https://community.annthegran.com/blogs/avid-embroiderer/archive/2008/08/09/the-avid-embroiderer-presents-cutwork-august-8-2008.aspx#sthash.iMHgICqh.dpuf
Photo courtesy of Neiman Marcus $120 per dozen
When I was seeking the perfect design, there were so many here at ATG that just made me feel like I was creating something really special. I know you understand that feeling; it is what this embroidery is all about. I wanted to show you how easy it is to do a ‘cutwork' style of design and take your breath away at the same time. I hope I succeeded.
My test sewouts exceeded my expectations! And my first napkin was ready to be sewn. This is really where "Perfect Placement Kit" does come in quite handy. I worked with the placement and felt confident of my workmanship. In the photo below, there is a ‘v' shaped mark which is barely visible, and that is the key for placement.
The floral design I selected has two rows of cut area placement. I chose to do the first outline twice and the second outline once. That is a personal preference because it makes the cutting line stronger. The eventual design will make all the area sturdy. I was very impressed with the digitizing on the design. I have several other brands which did not have the ‘edging' stitches that this digitizer had placed in their work.
I did not hoop my fabric because I wanted to be sure there was no movement in the linen. Linen is loosely woven and can have some variation in the thread lines. So, I started with my basting circle. Barely visible in the second photo is the outline. I am ready to begin cutting.
I did my ‘rough' cut to start out with my over all cut. Make sure that you do NOT cut your stabilizer! The cutwork style is a ‘cousin' to free standing lace; therefore, that water soluble stabilizer (wss) is important to your project. You can use a cut away stabilizer if you prefer but I felt my wss was working just fine for me.
Once I completed the cutting (and snipping off any loose threads), I placed my hoop back into the machine. I did use an identical color in the bobbin threads since this is a napkin that is going to be used from either side. I was careful to cut the threads between change of colors so that those threads could not be a problem.
After finishing the cut, I replaced the hoop in the machine and embroidered away.
My completed design is ready for the final removal of the stabilizer. The small openings inside the leaves were cut away using my smallest scissors. That part is tricky and if a little amount of stabilizer remains, I could use a little water to complete the removal. I am using a coin (sometimes I use a spoon) to hold and preserve the stitches and cut or tear away the stabilizer as appropriate. This helps me take the pressure off of my fingers and hands.
If for any reason you think you might have cut the threads make sure you use something like "Fray Check" so that washing will not damage the embroidery. It is so easy to nip a thread. If you feel the need to press the napkin, place a dense towel on your ironing board and place the design face down on that towel. Use a steam setting and your embroidery will not loose its 3D appearance. I personally think that linen is meant to have a casual quality to it, so for me, ironing is counterproductive to the fabric's properties.
I hope you will find time for this eye-catching project. I know I had fun doing it and cannot wait to finish the set for a special Christmas gift, maybe for me!
Print Blog
- See more at: https://community.annthegran.com/blogs/avid-embroiderer/archive/2008/08/09/the-avid-embroiderer-presents-cutwork-august-8-2008.aspx#sthash.iMHgICqh.dpuf